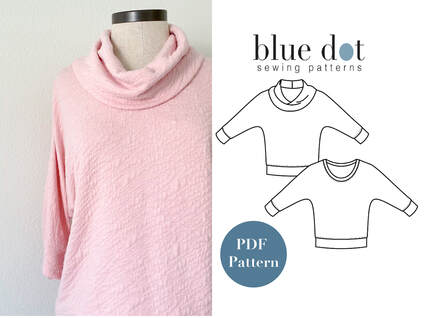
 The Georgia Top now has a Cowl Neck Expansion Pack available FREE! If you've already purchased the Georgia Top, you can download the expansion free here. If you haven't purchased the Georgia Top, the listings now include the expansion pack and the full pattern package is available here.
Enjoy some new warm sweaters this year! Diane
0 Comments
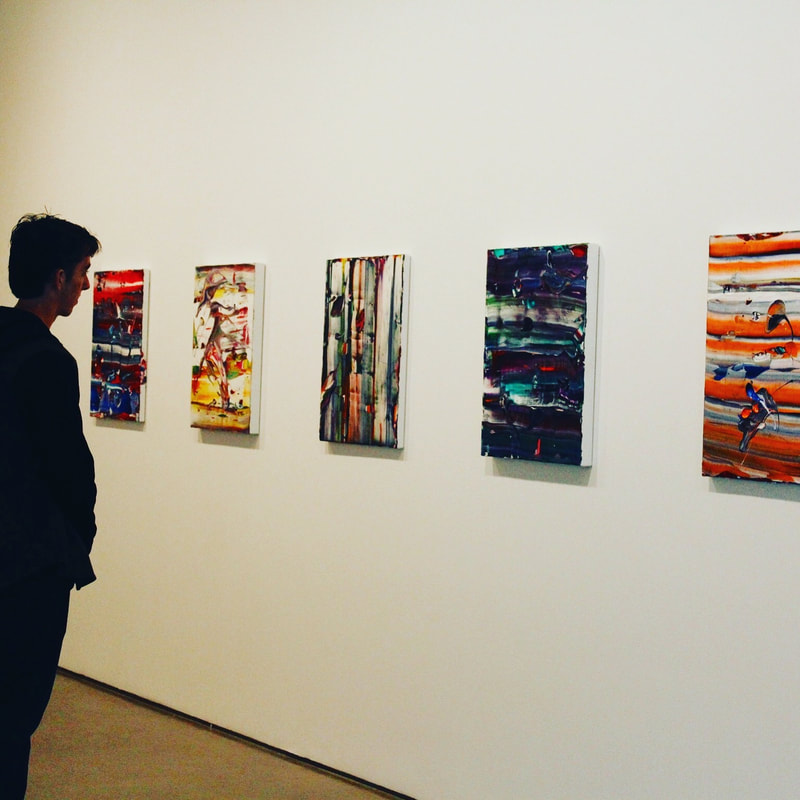
 There's nothing better than when you sew and gift and you know they like it and it fits! But when it's for your teenage son it's even better. That's what we have here...Mom got it right on this one. Our son is very easy to please but he also doesn't like to have a lot of "things". This is a wonderful trait (I wish I was more like this) but it does make giving him a gift a little bit tricky. Our family went to NYC for my husband's show a couple of weeks ago and I was so excited we were going to have everyone in the family together I decided to make something new for everyone in the crew.  My original plan was to make my son a flannel shirt so I cut out McCall's 6044 (my go to men's shirt pattern) but as I started constructing it, I realized he has a flannel hoodie in his closet that gets tons of wear and honestly could use a little break. So I made the body of the shirt using 6044 and I made the sleeves and hood from McCall's 7447 out of sweatshirting. The patterns were perfectly interchangeable (the sleeve popped right in and the hood was the exact length of the neckline). The only changes I made were lining the hood and adding twill tape to the neckline. This was a fast shirt. It's amazing how much faster a hood is from a collar and a knit sleeve is from a cuffed sleeve with a placket. Win, win here! This post isn't picture heavy but I'm not complaining since he was okay with me at least taking a photo and posting it. It was a dream trip with the family in NYC and the best part was seeing my husband's paintings up and on the wall in a beautiful space. Love!
 There has been so much going on over here, getting back to school, a new pattern in the works and lots of sewing. I've made loads of samples for the new pattern (I can't wait to share it!), new fall samples for my current patterns and some new transitional and fall pieces for my wardrobe. I'm still busy putting the finishing touches on the new pattern but I thought I'd take a moment to share a quick dress I made to take me from summer to fall. 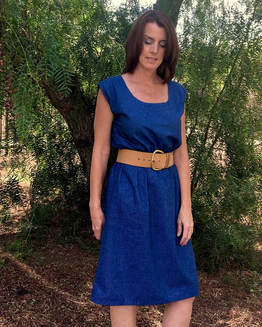 This is the Olivia Dress from StyleArc patterns. Although this is my first time using a StyleArc pattern, I have a student that's been using them and has had great success. This dress couldn't be easier, 5 pieces in total including the facings which is perfect for me when I want a quick dress that's as easy to pull on as shorts but looks cute enough for dinner. I've been saving some patterns ideas for a dress like this on my Pattern Box Pinterest board and now I finally added it to my closet. The fabric is a medium weight brushed chambray with a white pinstripe from The Fabric Store in LA. This dress is cute with sandals right now but it'll also be great with a darker belt and boots as it gets cooler. For sure I'll be using this pattern again and next time I'm going to add pockets to the sides. 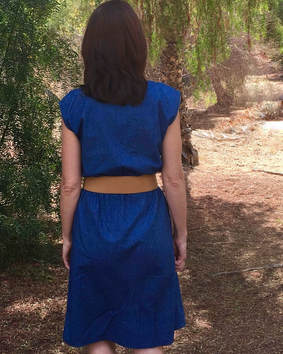 The Olivia dress is easy enough for a beginning sewist but keep in mind StyleArc patterns have minimal instructions with few drawings so some garment construction experience would be helpful.
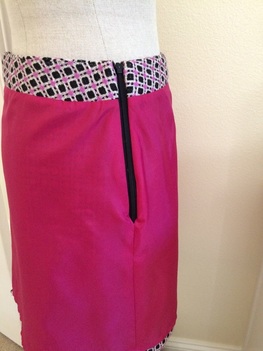
I'll be sharing more makes and a new pattern soon! Be sure to follow me on Instagram as I share more about what's going on in the studio there. Keep sewing my friends! Diane 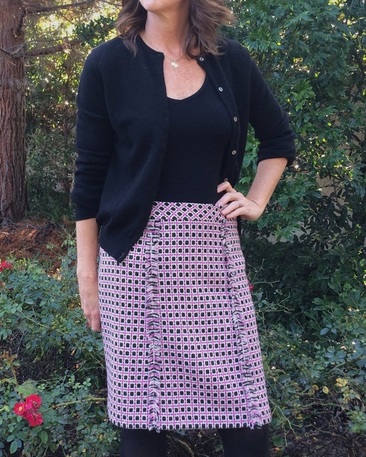 It’s week #2 of the “Bottoms-Up” skirt series. Last week I made a gray and black Ally Skirt but this week I have a wintery but colorful plaid skirt that’ll spice up my closet. 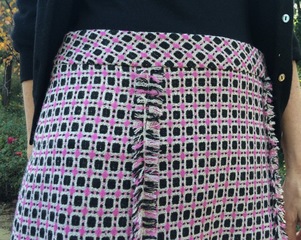 This beautiful wool boucle from Fabricland was one I couldn’t pass up. Clearly, it would make a stunning jacket but I would wear a skirt so much more. Chanel boucle jackets often have fringe trim so why not add some trim to my skirt as well? 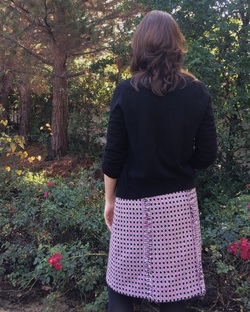 I used McCall’s pattern 7096. It’s fairly new pattern and has front and back seams that would lend themselves to fringe. I made view A in a size 12 because I found it ran a little big and it still sits too low on the hip for me. I figure by the time Thanksgiving is over it’ll be just perfect. 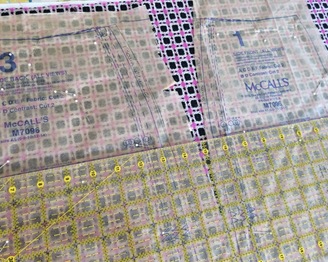 I took my time cutting the plaid (for obvious reasons) and cut all pieces in a single layer to make sure I got the match right on. The best way I found to ensure everything lined up was by using my 24” quilting ruler across all of the pieces. And after all of that painstaking work lining it up, I used the Accufeed on my machine (essentially a built-in walking foot) to keep those plaids in place. 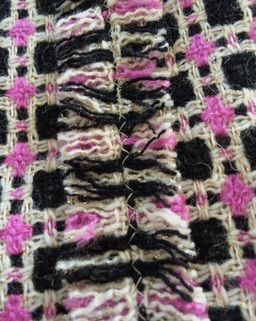 The fringe may look difficult and time consuming and it may make you think I’m clever, but it’s so simple you won’t think I’m such a genius. I sewed the front and back seams wrong sides together, pressed them open from the front, and did a long zig-zag stitch down the center seam to stabilize the seam for fringing. I simply pulled threads (while I was on the phone with my sweet mom) and it was done! It really is that easy.
This is an unlined skirt pattern and for sure a wool skirt needs to be lined. I wrote a “How to Line an Unlined Skirt” post to show how to make a pattern for a skirt lining. The lining was made without the front and back seams to eliminate bulk. I then attached it to the yoke. Check it out! 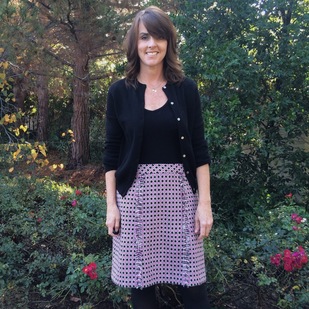 I have a purple skirt in the works for week #3. Doesn’t every girl need a purple skirt?
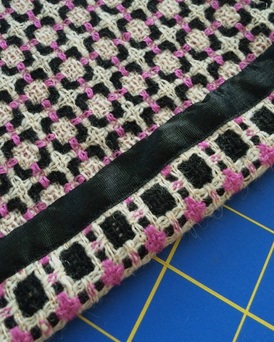
Happy Sewing! Diane  It’s week #1 of the “Bottoms-Up” Series - 3 Skirts in 3 Weeks. Skirts are a staple in my wardrobe and some new choices for work and play will be greatly appreciated in my fall wardrobe. 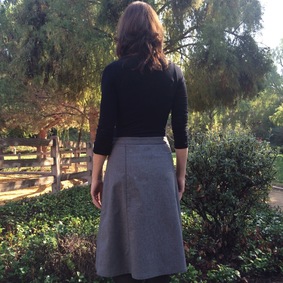 Recently, I taught the Ally Skirt class and it was interesting to see the fabrics and buttons my students brought. One student used a hot pink corduroy with black snaps (very retro) and another used a suiting to add to her work wardrobe. It inspired me to dress up the Ally skirt pattern with a suiting fabric. 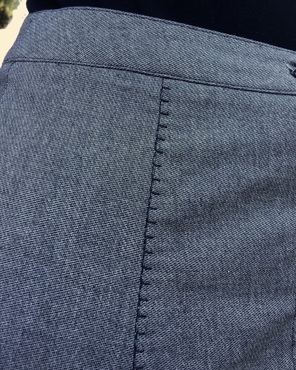 I like this cotton suiting because it looks great for fall and winter without being too hot. I didn’t add any pockets but I did lengthen it 4” so it was just below the knee (my favorite go-to length). 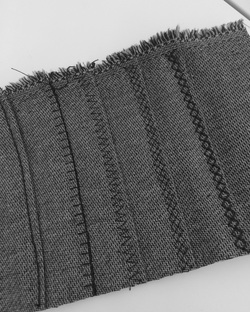 The skirt goes together quickly and I have to say the topstitching opportunities make this skirt fun to make. My “It’s in the Details” Pinterest page, where I put fun finishing ideas from the internet, served as inspiration here. I put a shout out on Instagram for a vote on which stitch to use on the seams. The blanket stitch won out and I’m so glad I used it! We’re always looking for ways to use those decorative stitches on our machines and here is a perfect place. 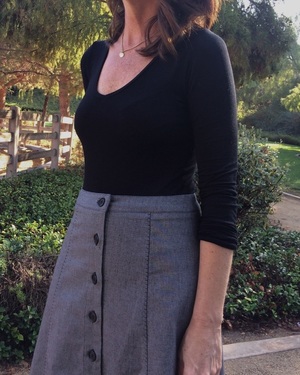 Surprisingly, the most basic black button seemed the only way to go even though I had imagined silver buttons. The topstitching really needed to be the focal point so simpler was better. I have a wintery skirt in the works for next week with really fun trim. Stay tuned! Happy Sewing,
Diane 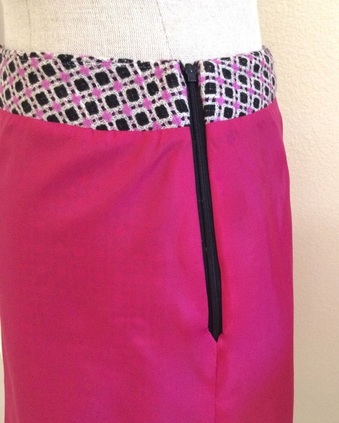 Deep down inside, I must be a little granny because I love to line my skirts (I've been known to wear a half slip but don’t judge). Cotton, linen or otherwise, making the the inside as pretty as the outside is part of the fun of sewing. I recently made McCall’s 7096, a six gore unlined skirt, out of a wool boucle. Needless to say I wanted it lined. Since I have a skirt blog series coming up soon, A "How To" for skirt linings seems appropriate. 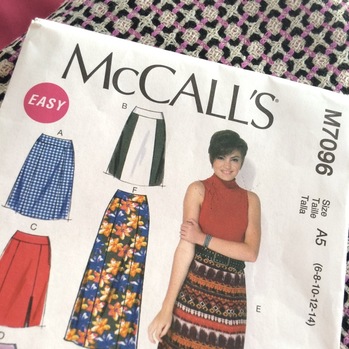 A lining should be as smooth as possible as the last thing we want to do is add bulk to the inside of a garment. Making a lining with as few seams as possible is the goal. I turned this six gore skirt into a simple one piece front and one piece back lining. Here’s how to do it: 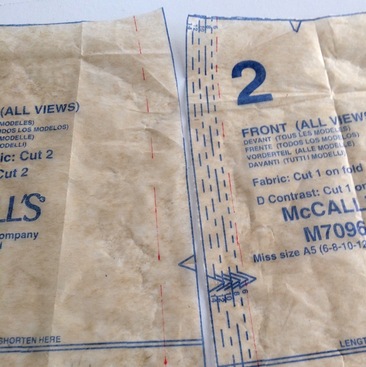 Draw the stitching lines on the front and side front pieces along the front seamline. 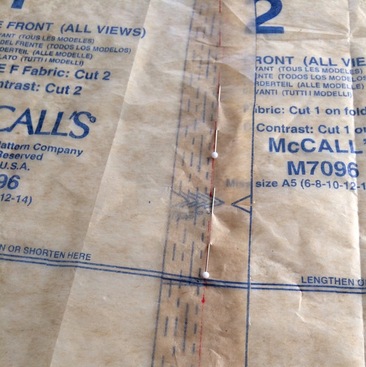 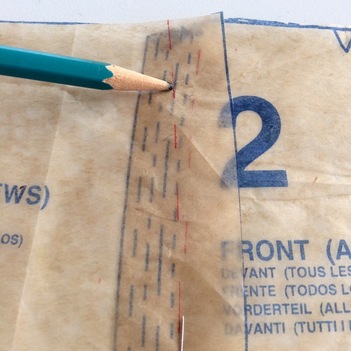 Overlap the stitching lines and pin together. Go as far as you can while keeping the pattern pieces flat. They will spread into a “V” near the top. 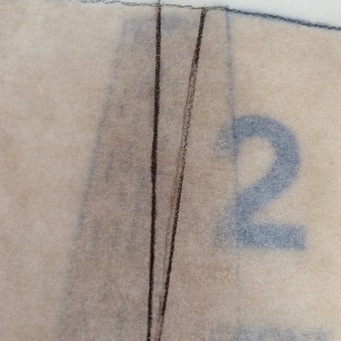 Place tracing paper over the pinned pattern pieces and trace the outside and the “V” at the top of the pattern. This forms the new dart or pleat. 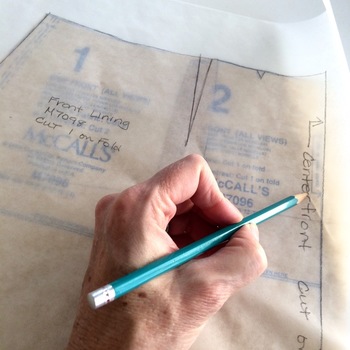 Make all the pattern markings on the new pattern and repeat for the back. Cut off the hem allowance from the original pattern (in my case I cut off 1 1/2” as stated on the pattern.) There it is! Easy peasy, right?
Enjoy! |

About MeHi! I'm Diane, a wife, mom, sewing teacher and pattern designer from sunny Southern California. I share my sewing adventures here on the Blue Dot Blog formerly Gatorbunnysews. For more info click here. 

Categories
All
Archives
October 2022
|


 RSS Feed
Proudly powered by Weebly