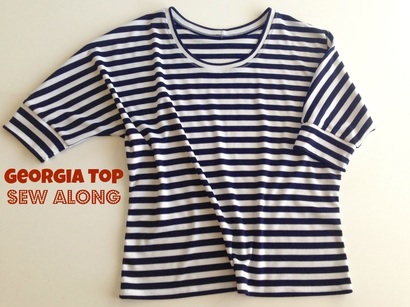
 I'm happy to bring you the Georgia Top Sew Along! The Georgia Top is a versatile knit top pattern you will make over and over. She's gonna be your best friend AND you can make her in under TWO hours! Here's a sew along with full color photos to help guide you through and you'll learn everything you need to know to get begin sewing on knits. Blue Dot instructions are fully illustrated and divided into areas of construction or steps. Working on one area at a time takes the mystery out of garment construction and helps you learn how to sew. For example, when you finish the "Neckline" construction, you'll know how to construct a neckline on any basic t-shirt pattern, with or without instructions. Georgia has 4 major steps: Bands, Neckline, Body and Finishing 4 steps....easy peasy, right? Okay....are you ready to have a new top in under two hours? 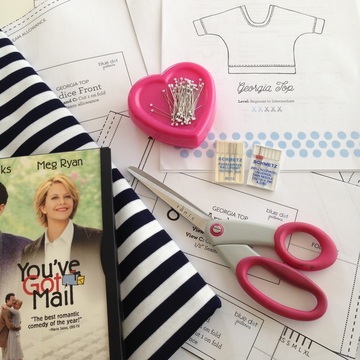 Here's what you'll need:
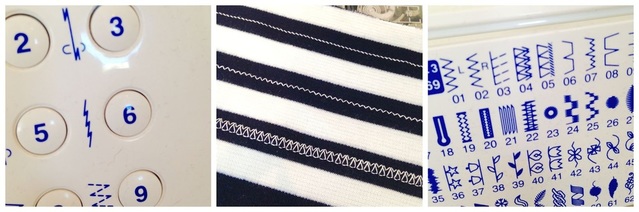
 Some things you should know before we get started (and before you sew with any knits): You don't need a serger to sew with knits. Certainly it can make it easier and faster but I'm here to tell you, and more importantly show you, how to do it with your regular machine. All knits are different so every time I start a project I make a test swatch to see which stitch works with my fabric. After putting a ball point needle in my machine I try different stitches:
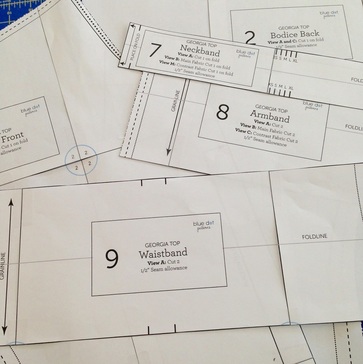
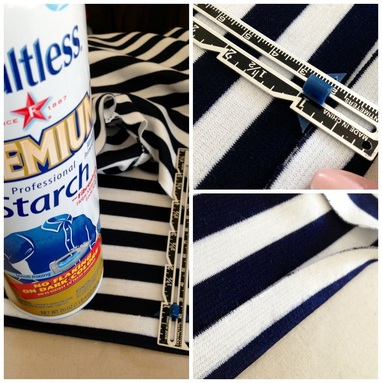
 Pattern layout and cutting: I decided to make my Georgia a tunic length so I added 3" to the hem of the front and back pattern pieces and hem the bottom instead of adding a waistband. 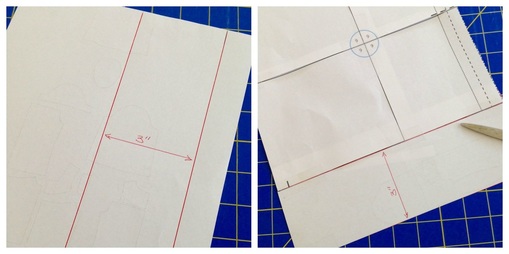 I used a navy and white stripe mystery knit I bought on my trip to the NY fabric district. It's the weight of a ponte knit with great recovery (it bounces back to shape after it's stretched). Because I used a stripe I took the time to line up the stripes before I laid the pattern pieces on the fabric (see below). 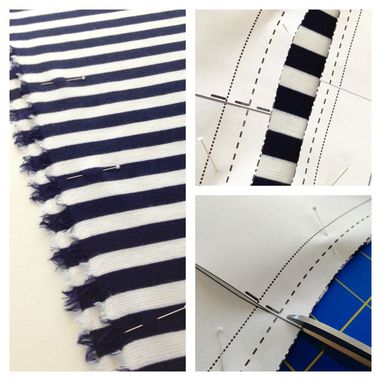 Pin your pieces down (using the layout in the pattern), cut them out and mark the notches with a 1/4" clip from your scissors at each notch, center front and center back. Notes about sewing: All seam allowances are 1/2". RST (means "right sides together" or pretty sides of the fabric facing each other). Now you're ready....here we go! Step 1: Bands With RST, stitch armbands and neckband ends together forming a circle. Press bands in half. 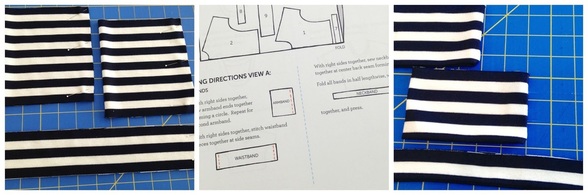 Step 2: Neckline With RST, stitch front to back at shoulders. Press seam toward the back. 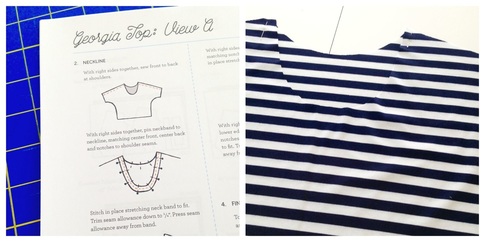 With RST, pin neckband to neckline matching center fronts, center backs and notches to shoulders. 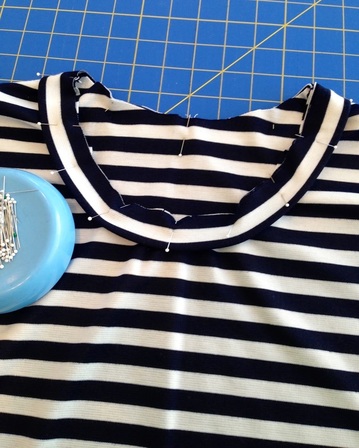 Stitch in place, stretching neckband to fit. Tip: To make your neckband even, be sure the distance between the left edge of your foot and the fold of your neckband are equal. 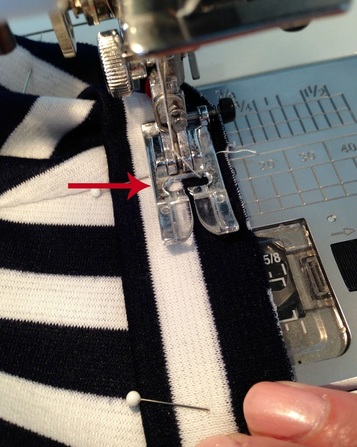 Step 3: Body and Sleeves With RST, stitch front to back at side seams. Press seam toward the back. 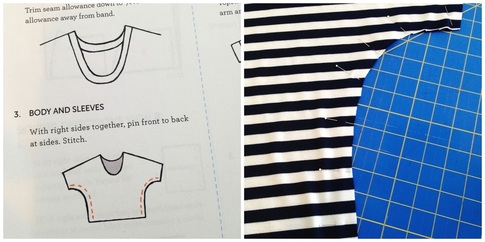 With RST, pin armband to arm, matching notches and underarm seams. Stitch in place stretching armbands to fit.  Step 4: Finishing (yes you're already there!) I'm leaving the waistband off and opting for a straight hem. If you add the band it attaches the same way the neckline did. Most people are afraid of hemming knits but follow these steps and you will be an expert:
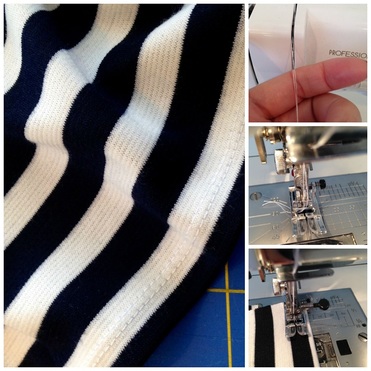 With your twin needle, topstitch the neckline 1/8" from the neck band. Repeat for the armband. 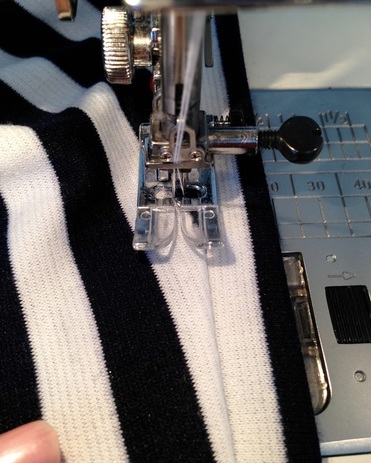 It looks great! 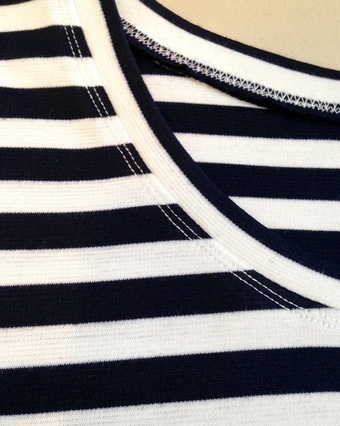 That's it guys! You're done! I bet your chick flick hasn't even ended! 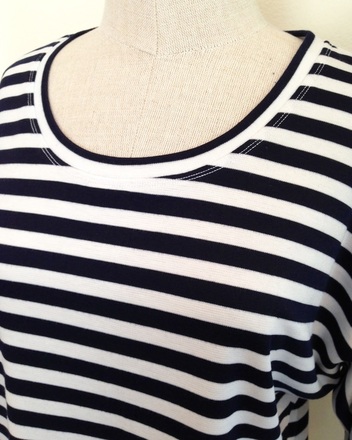 I'd love to see your finished Georgia. Send me a pic.
Enjoy your sewing....and your movie. Diane
2 Comments
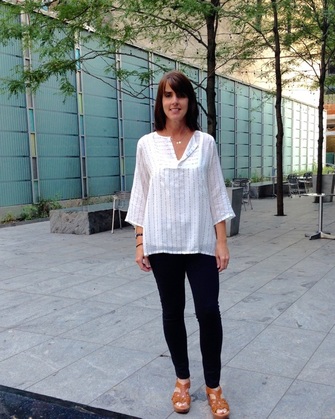 I'm excited to announce I'm in the Sew Mama Sew Citronille Pattern Challenge! Fiddlehead Artisan Supply (lots of yummy goodies there) is bringing the French Pattern line, Citronille, to the United States for all of us to enjoy. French designer Astrid de Larocque-Latour has created this sweet collection of women's and children's patterns and I had the pleasure of sewing up the Zebulon Top for the challenge. 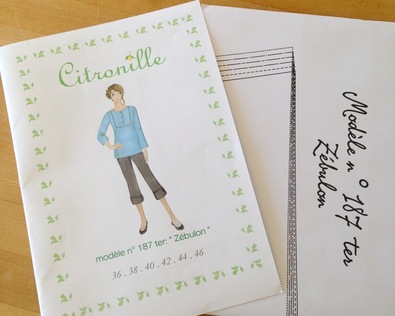 The Zebulon pattern is a versatile women's tunic pattern (it comes in children's sizes, too) that would be beautiful made up in any number of fabrics, from quilting cotton to silk crepe. I decided to make my blouse up in an unexpected lightweight wool gauze with subtle sequins. Elegant and so French, right? 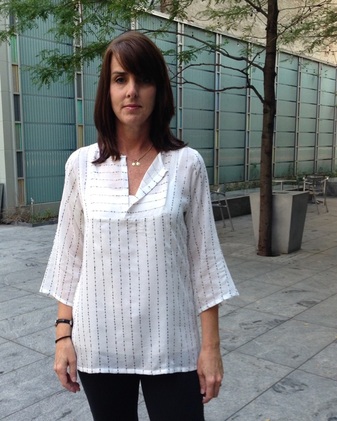 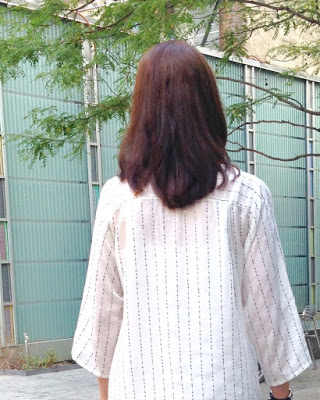 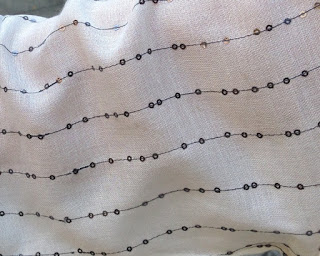 All of the instructions are in French but an English translation page is included. The patterns come with illustrated instructions and although this sewed up easily, I would recommend it for a sewist with some sewing experience. To make construction easier, I marked the pattern pieces with English translations and marked the sleeves with notches at the cap, front and back. 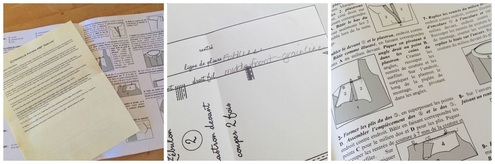 The construction is pretty straight forward but because my fabric has a loose weave, I used tear away stabilizer at the corner of the inset and I added 1/2" wide strips of interfacing to the front opening to help it lie flat. I shortened the sleeves 3" (I always think a 3/4 sleeve is more flattering), cut the inset crosswise for some interest, and left the buttons off because the sequins are enough adornment. 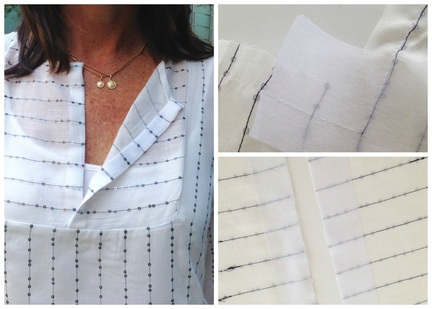 This was my first experience sewing with a pattern in French and by the end of it I felt very sophisticated and European. I mean, I'm practically French now. When you see me in my tunic you may think I fill my house with fresh flowers, wear red lipstick and eat croissants but don't be fooled, I just finished downing a NY bagel with cream cheese when I snapped this picture. 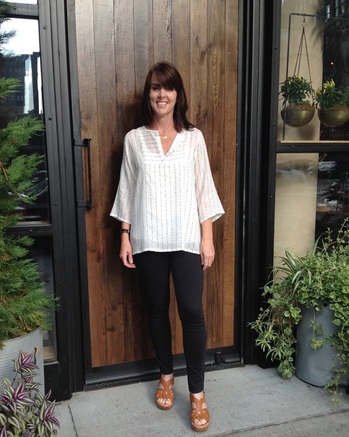 I took these photos while on my trip to NYC. What a fun place for pics and the perfect place to wear my new tunic! 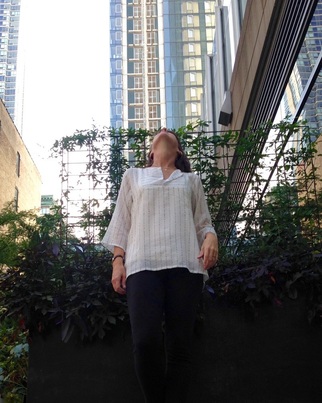 I'm in great company in this challenge so be sure to visit my fellow bloggers and their projects. We're using a variety of Citronille's patterns so you'll get a good look at the offerings: Michelle Morris of That Black Chic Sherri Sylvester of Thread Riding Hood Tenille Brien of Tenille's Thread Maris Olsen of Sew Maris Ari Green of Max California Marisa of Thirtynine Sara Johansen of The Sara project Natalie Strand of Vegetablog Jessica Wright of Willow & Stitch Sara Homer of Now Try This Kelly Donovan of Craftree And as a special treat, Sew Mama Sew is having a pattern give away! Hop on over for your chance to win (because if you don't win somebody else will!)
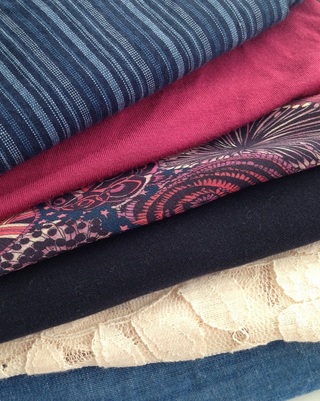
Happy sewing my friends! 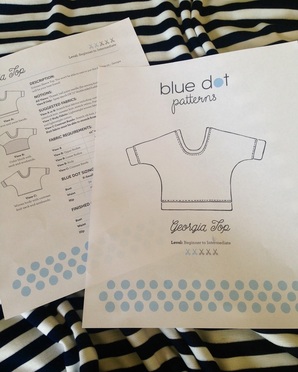 I just got back from a whirlwind trip to NYC for my husband's show in Chelsea. The weather was crazy, the city was busy but I still found it all so inspiring. Far and away, my favorite part of the trip was seeing my husband's paintings on the walls of the gallery.   Often, he invites me out to his studio at our home to look at paintings while he's working on them. I look forward to his invitations because I love watching the process of creating a new body of work and dodging globs of paint on the studio floor. But the best part is when the time comes to view the paintings up on a wall, well lit and in a beautiful space. And as a bonus...no paint on my shoes!  "Beauregard" I was able to steal a selfish couple of hours to "drive-by" the fabric district, City Quilter and M&J Trimmings. A few pieces of fabric found their way home with me as did some ribbon trim. All in all however, I didn't go crazy buying too much but I did come home energized to sew. 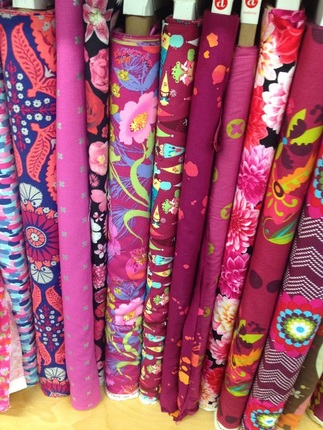 Some "Beauregard" inspired fabrics from City Quilter Don't ask me how it happened but I went to NYC and came back with Georgia on my mind. I found a couple of really fun knits in the fabric district and decided it would be fun to do a post on my Georgia Pattern and show you how I make it in under 2 hours! 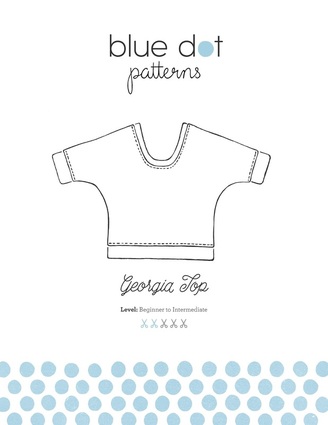 This sounds like a great time for a sale so I'm putting Blue Dot's The Georgia Top PDF pattern on sale at 50% off, yep that's only $6 until the end of this month! You can check out my patterns on Etsy, too. Yay!  So my friends, grab yourself some knit and the Georgia PDF pattern and let's make it together. I'll be posting my "Georgia In Two Hours" post next week on the blog. I hope you'll join me!
 I'm pretty sure I felt a breeze this morning so fall must be on the way which makes me giddy since fall sewing is some of my favorite (except I say this about spring sewing too so I can't be trusted). Either way, I'm looking ahead to the new season and with that trying to get a plan, even a loose one, underway, inspired by The Wardrobe Architect Series at Colette, of course. 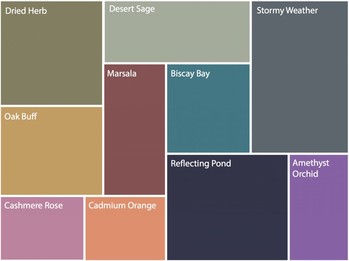 Like all of us, I have limited time to sew so making pieces that work well together is the name of the game and color is a great place to start. I started by looking at the Pantone Fall 2015 color chart which has lots of colors I like to wear (mostly jewel tones) but really my own sewing room was the place to go. I pulled together some of the fabrics on my cutting table and a couple from my stash and found my fall wardrobe emerging from my sewing room. 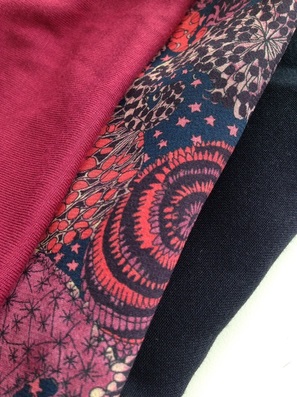 Berry seems to be a favorite as with navy and I just finished making a blouse in the silk Liberty above from my Blue Dot Pattern that's next to be released (stay tuned, more on that later). The solid fabric is a t-shirt I already have and the navy fabric is a lightweight wool that will likely turn into a Grainline Morris Blazer. 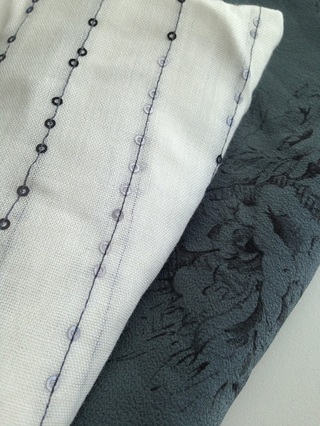 I'd like to keep black/gray as one of my neutrals since I have so much of it in my closet. I'm setting aside the cream wool gauze with baby black sequins for a tunic and the gray toile crepe is cutout and ready to stitch. It'll be my second sample for a BD dress pattern that's also soon to make it's debut.  The denims and chambrays will be pieces I wear the most and the tencel chambray will be perfect made up in Sewaholics Granville shirt (like the one I made here). I'm not yet sure what the stripe and lace will turn into but almost certainly they will be inspired by Madewell.
Sewing from my stash makes me really happy and now that I've made a list here, I can see I'm further along in my fall sewing and planning than I thought. What are your fall plans? |

About MeHi! I'm Diane, a wife, mom, sewing teacher and pattern designer from sunny Southern California. I share my sewing adventures here on the Blue Dot Blog formerly Gatorbunnysews. For more info click here. 

Categories
All
Archives
October 2022
|

 RSS Feed
Proudly powered by Weebly