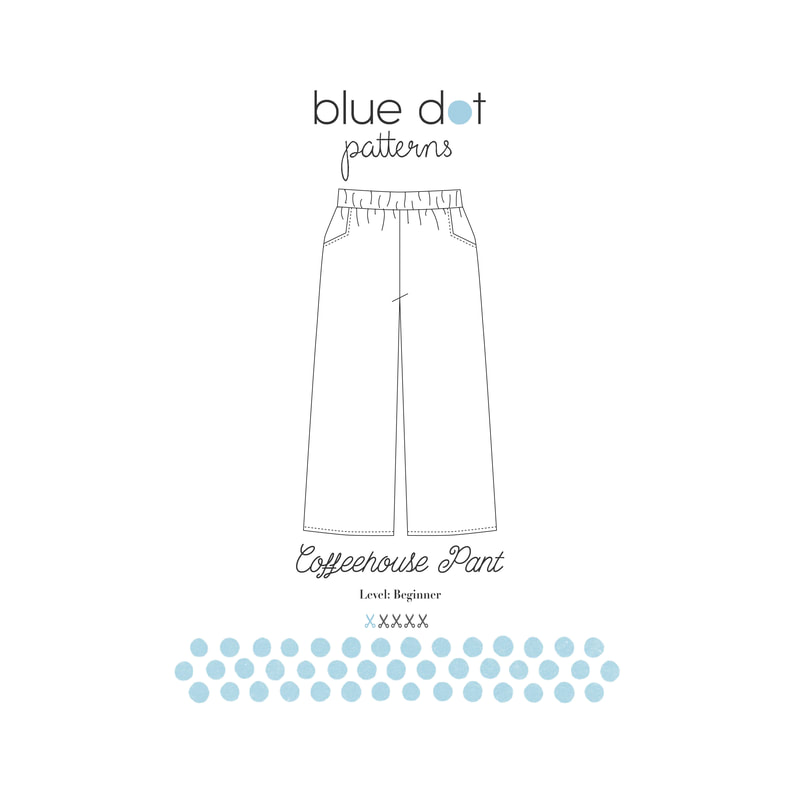
 I've been experimenting in the sewing room lately because I've been inspired by many of the details you sewists out there are putting on your clothes. I'm ready to make fewer garments with more details and embellishments. My lifestyle and the climate I live in really lend itself to simple, comfortable and easy to wear clothes. The Coffeehouse Pants are just that and are a blank slate for creativity!
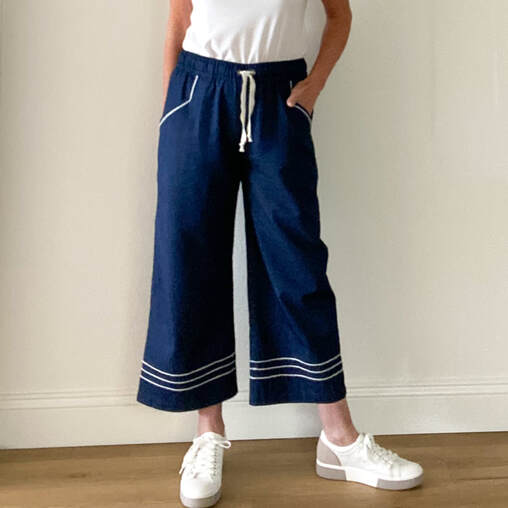
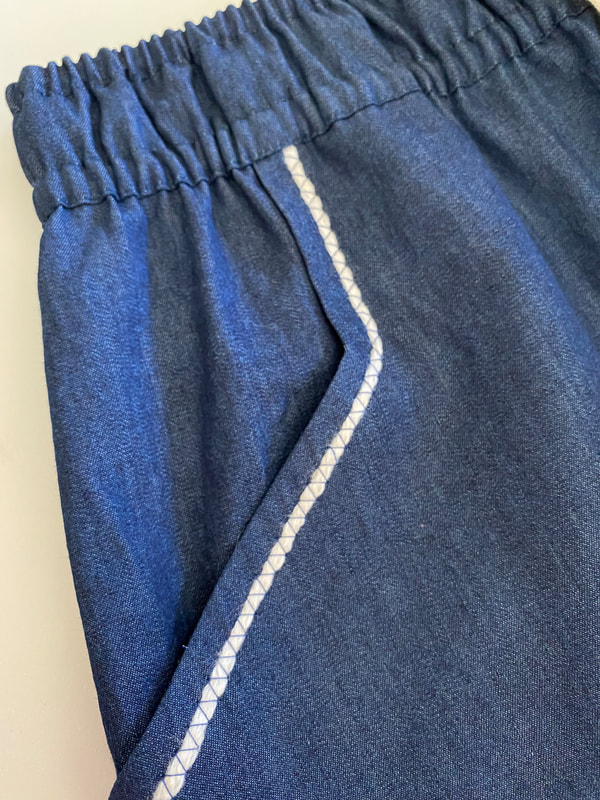
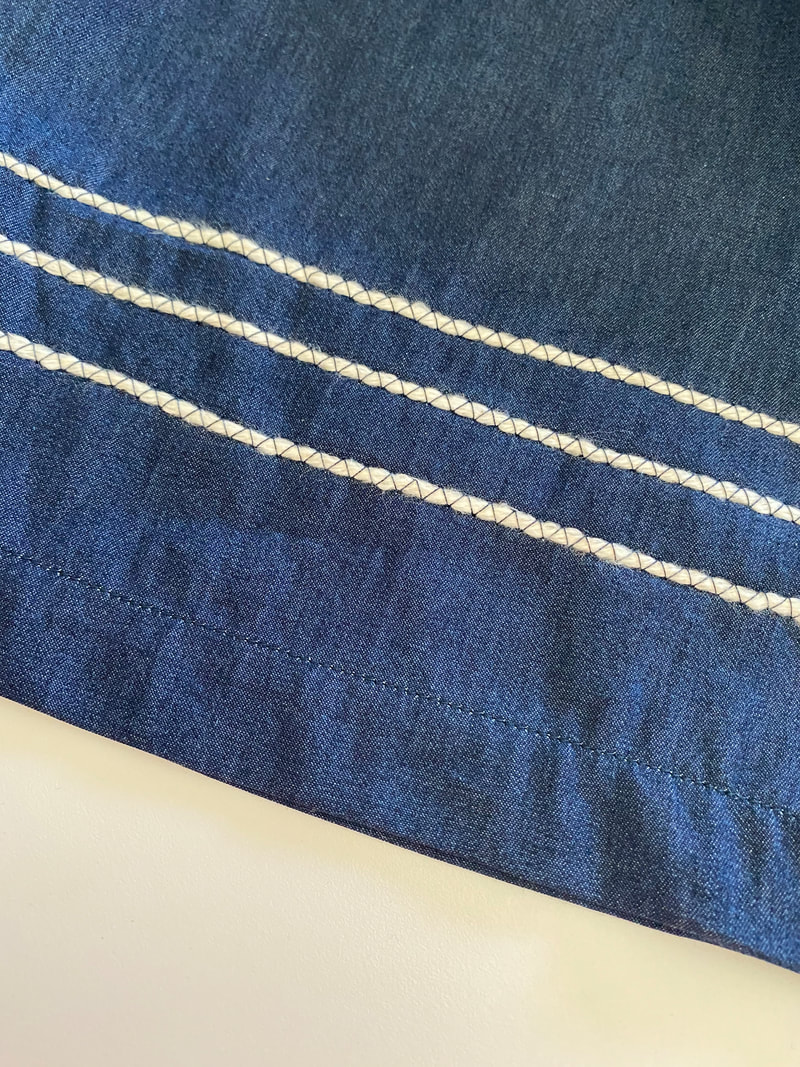
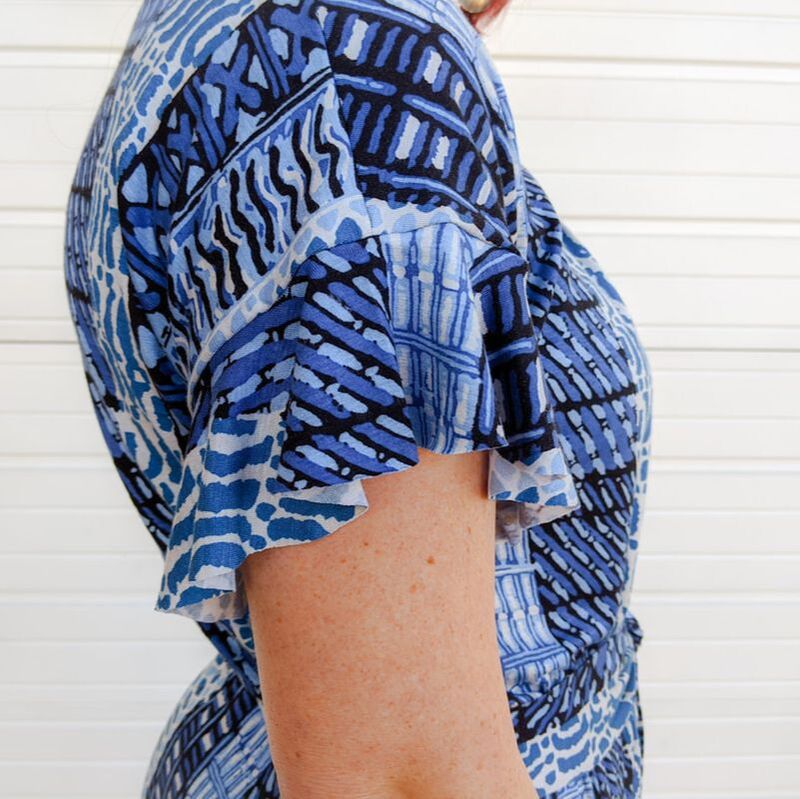
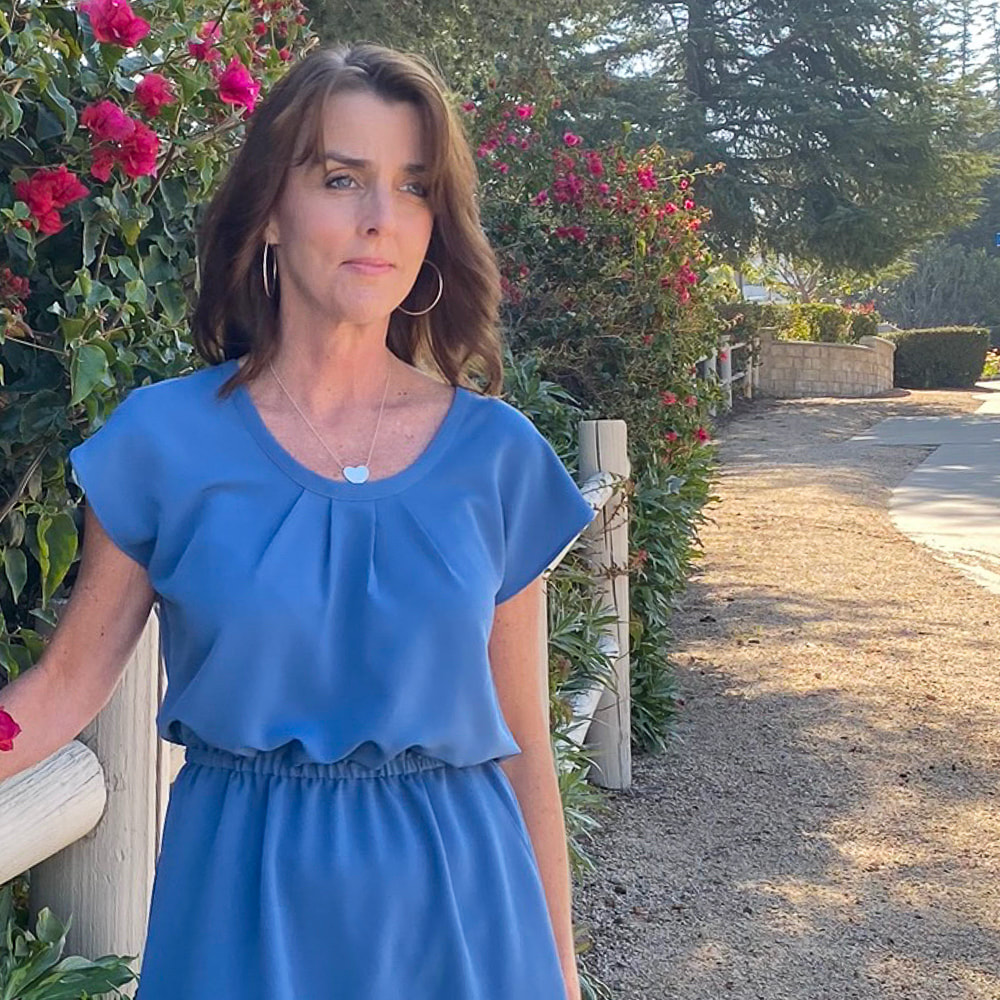
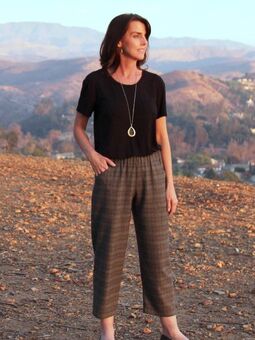
These are an elastic waist, straight leg cropped pant. I've made so many of these and I wear Coffeehouse Pants at least 4 days a week. But in all of my makes, I've never embellished the pant leg. I've been experimenting with "couching" which is a technique where you take a fiber, in my case I used scraps of yarn that I had from left over crochet projects, and use the zig zag stitch or other wide stitch to anchor it down. 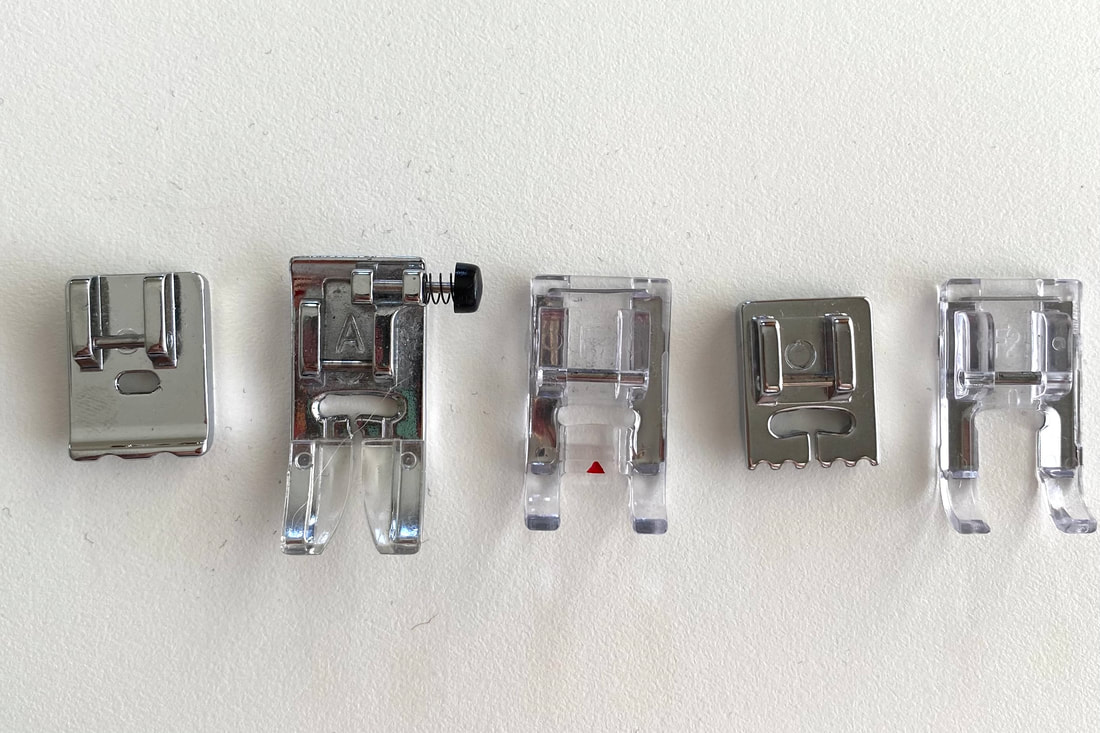 I used the "trial and error method" (turns out I've used this method A Lot in my sewing career... eh-hem!) with lots of different feet on my machine and found there were actually several ways to do this. I tried (from left to right) the piping foot, regular foot, clear view foot, pintuck foot and open toe foot. All but the open toe foot worked for me but my favorite is the clear view foot (that little arrow keeps me right on track and I'm able to load the yarn under the back of the foot and through the opening keeping it feeding smoothly). This foot or a foot very similar probably came with your machine so you may be able to get by without purchasing something new...although new feet are really fun! 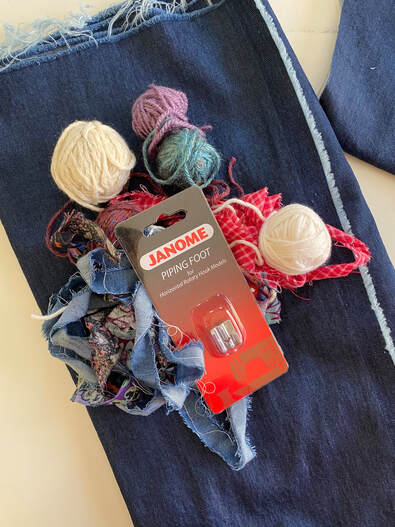 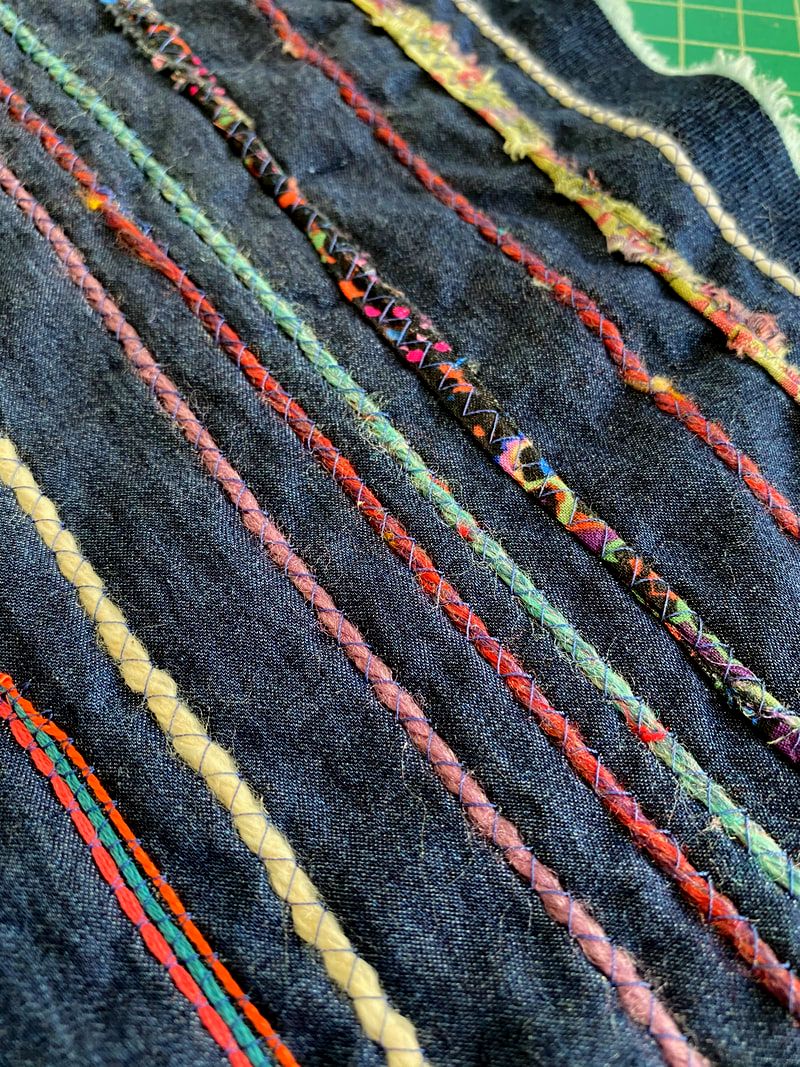 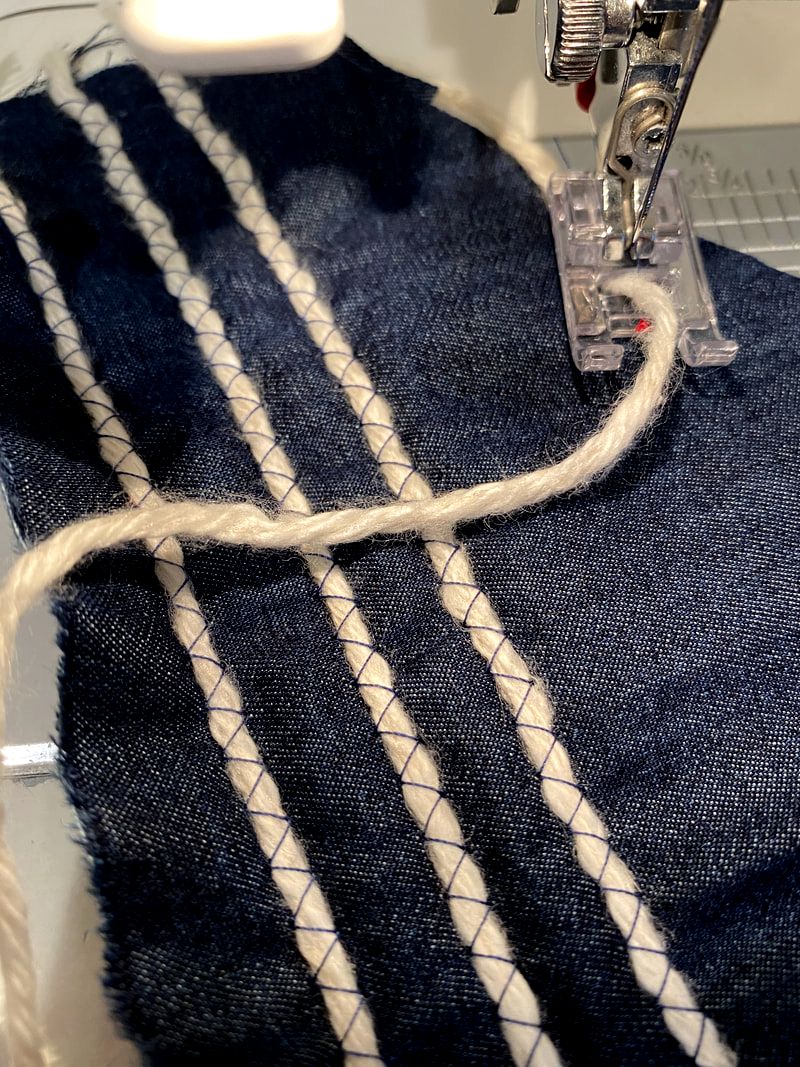 To experiment I used worsted weight yarn, double and triple yarns and scraps of fabric. I'm not gonna lie, it was difficult for me to decide which way to go. I decided to go with the creamy colored nubby yarn (you can see how I loaded it through the foot above) but do expect to make other pairs with the same fabric and different colored embellishments. Already, I made a denim top with black and white yarn. To say I got obsessed with all of this could be accurate but I prefer to think of it the same way my friend Cari did..."Diane, you have your creative flow going." Yup, that's it, I have "flow". Everybody needs a friend like that! 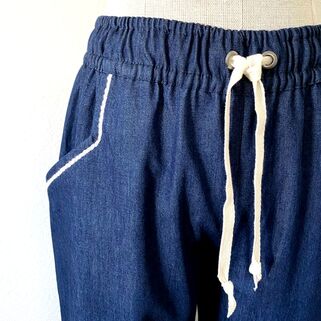 I used a 4 ox. dark wash denim which really is the weight of a chambray, widened the leg slightly and added a twill drawstring with grommets. I added the yarn to the pockets and 3 rows of stitching 3/4" apart beginning 2 1/2" from the hem. They're comfortable, fun and it feels good to make something creative and unique and "in the flow"! 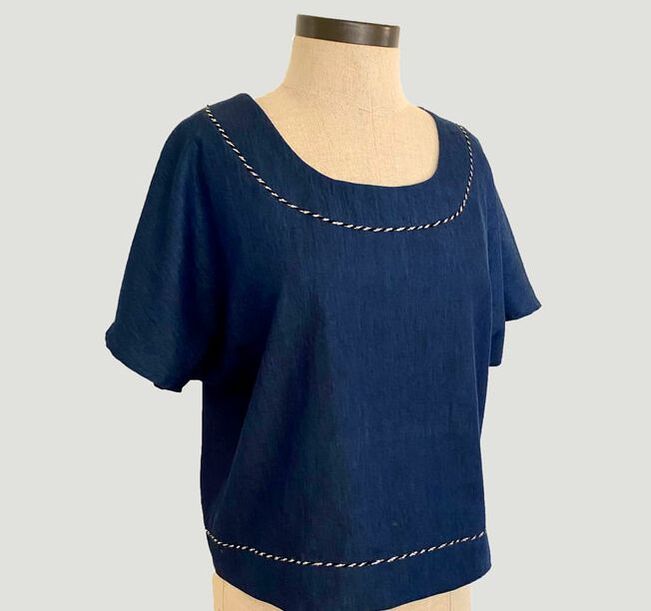 Here's sneak peek of the top I made with black and white twisted yarn. It's a pattern that's coming out very soon!
The Thanksgiving Sale is here so now's the time to grab the Coffeehouse Pants pattern or ANY PATTERN FOR 20% OFF, no code needed now through the 28th! Happy Sewing Friends! Diane
4 Comments
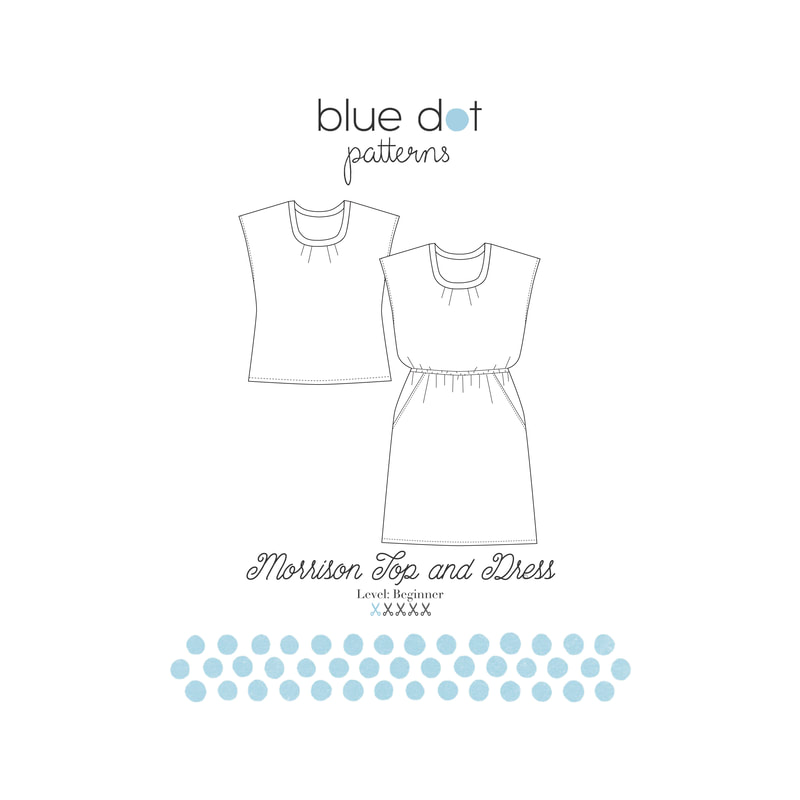
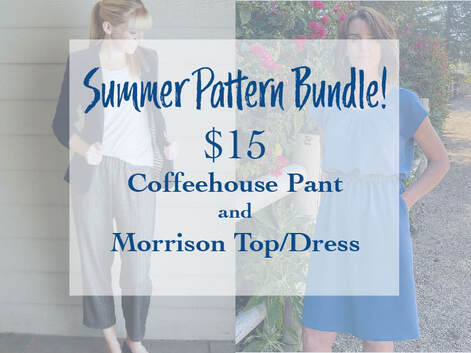 So really, how many times can you use a pattern? Time, money and space are all valuable to us and as sewists, using a pattern multiple times is a great way to use the resources we have. Today, I bring you a quick blog post packed with lots of photos to show how, with the "$15 Summer Pattern Bundle" that includes the Morrison Top and Dress and the Coffeehouse Pant PDF patterns, you can create loads of garments.
I start with the Morrison Top and Dress pattern which can be made up in both a knit and woven fabric. This simple pattern (the top is only 3 pieces) can be made up as a maxi-dress, an elegant silk shell, paired with the Coffeehouse Pants a faux jumpsuit, flouncy dress and a casual t-shirt. There's more inspiration out there in ready to wear and Pinterest (check out the Morrison Board). I even have a sewing friend that made 5 beautiful pair of summer PJ's using the Morrison Top and Coffeehouse Pant patterns. I'm inspired!
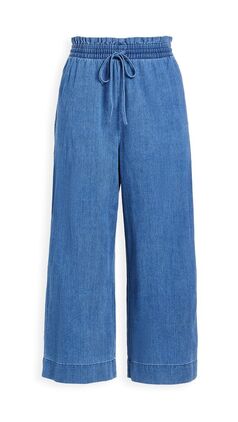
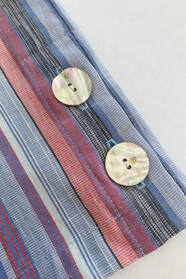
The Coffeehouse Pants are also a quick sew and fun made up as a beachy pant but also nice in a plaid or striped suiting. You can add a button placket to the hem (there's a post here) or a drawstring or even a paperbag waist. 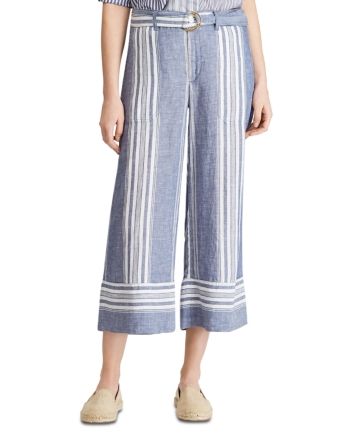  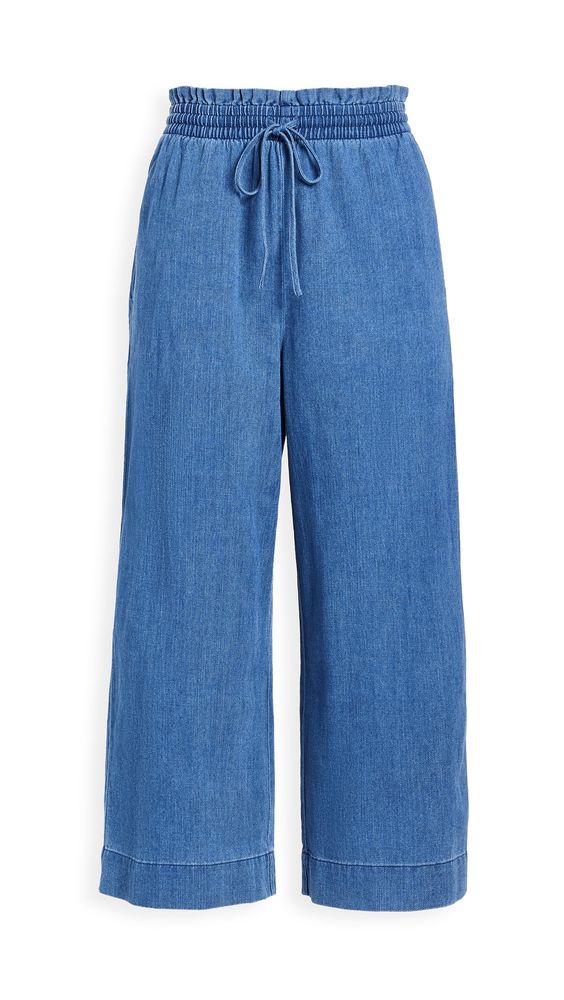 The Coffeehouse Pinterest board has more ideas including playing with stripes and adding embroidery.
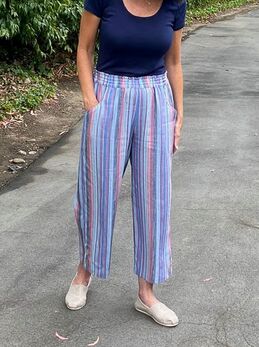
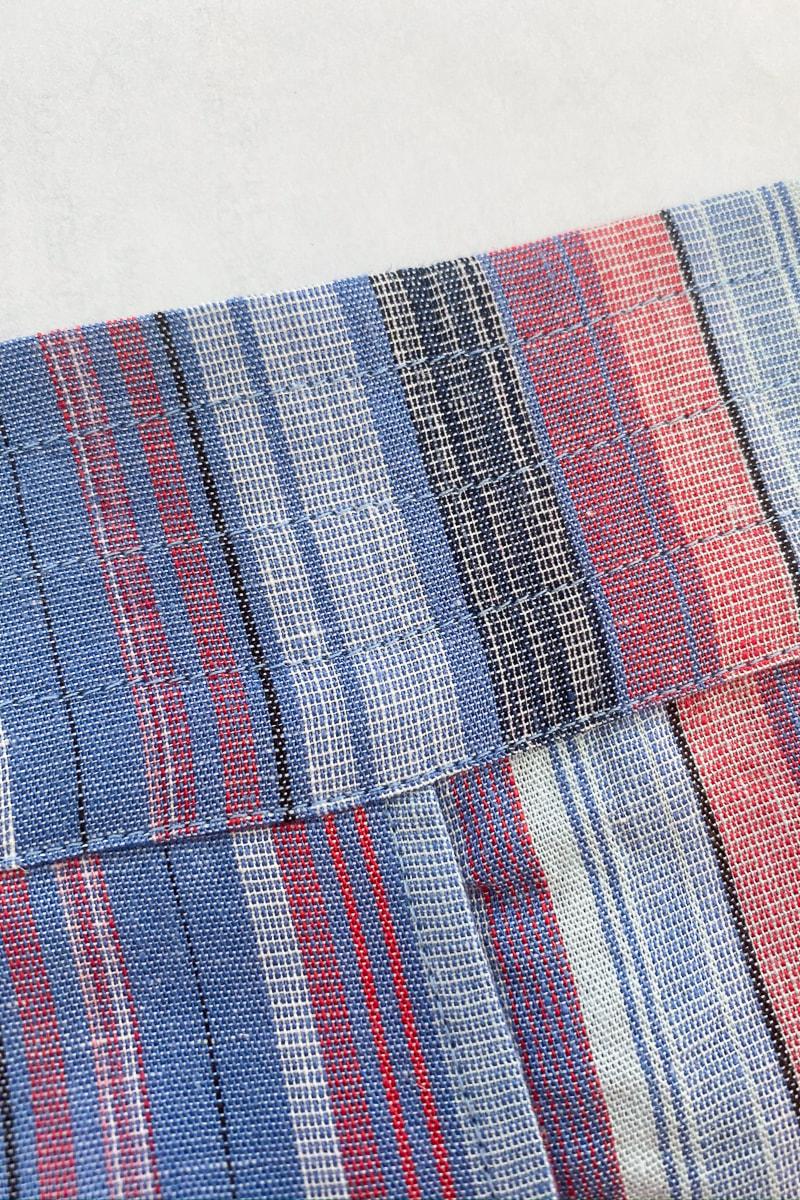
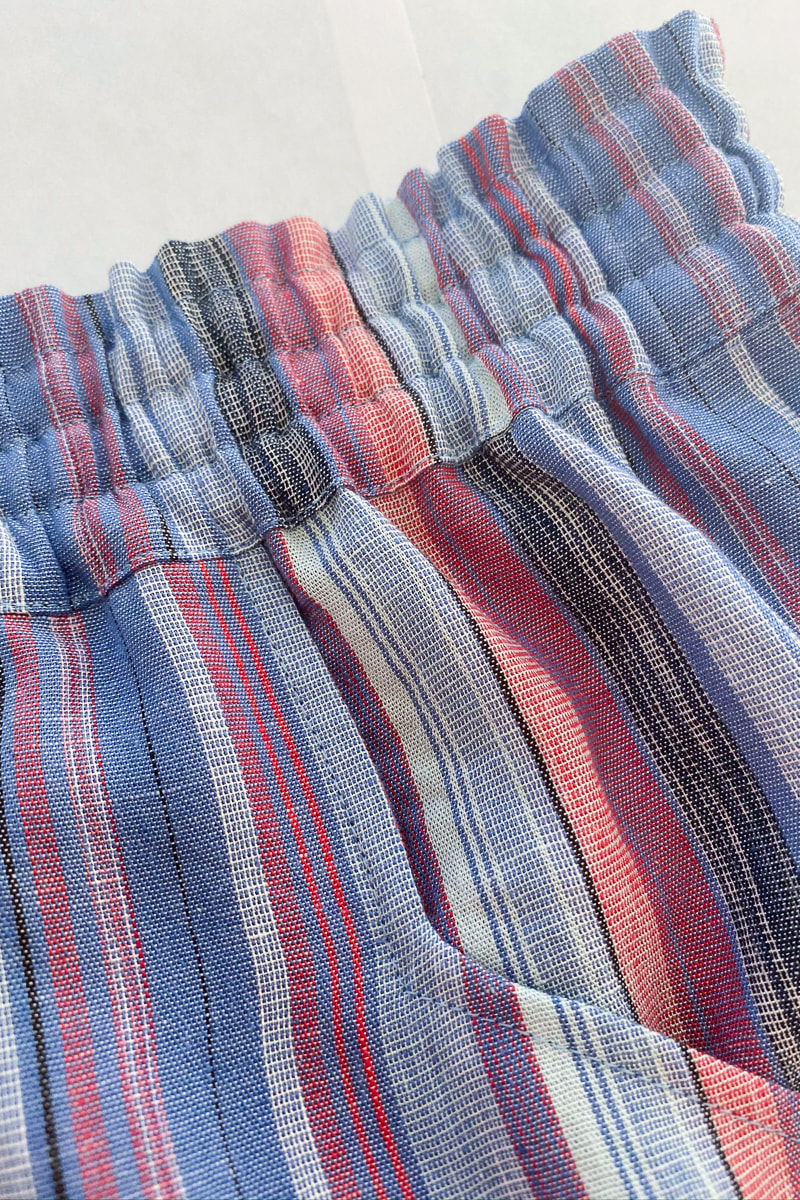
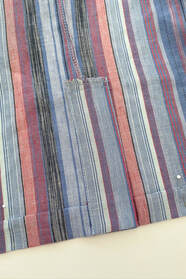
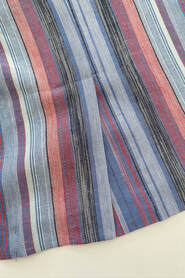
These are just 2 patterns that I love but there are so many more we can use to build our wardrobes. The options for reusing a pattern are really endless! I'm working on a project using up some remnants that I will share soon! Have fun sewing! Diane  I recently made a pair of super soft Coffeehouse Pants in a rayon/linen blend. Now those of you with any experience with stripes, know it can take some finesse to make them look good. In the case of an uneven stripe, the school of thought has been that they can't be matched. But I'm here to say that they can! We should start by defining an uneven stripe. An uneven stripe has different stripe colors and widths that don't form a symmetrical pattern. Here is an example of pants in uneven stripes that haven't been matched: 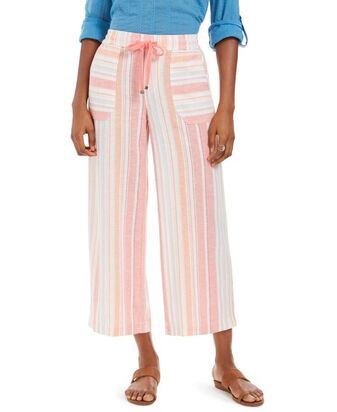 Usually when we make pants we attempt to match the stripes in the center front and center back so they form a "V" shape. But here, there's no match at center front. Here's how to fix it. Normally when we lay out fabric, we fold the fabric in half lengthwise. With an uneven stripe, you get stripes that don't line up. If you look at the red stripes in the pic below, you can see they're almost opposite in the lengthwise fold. 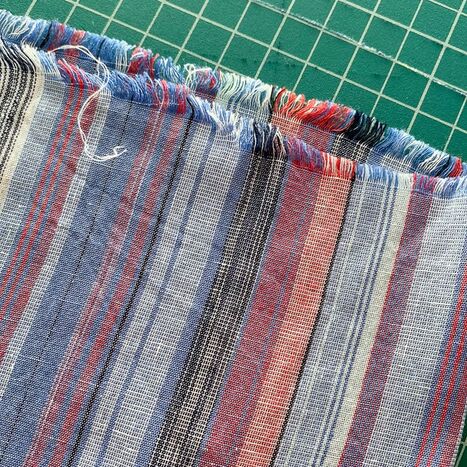 The solution comes in the way you fold the fabric before layout. If you fold your fabric on the CROSSGRAIN, you can avoid this entirely. In the photo below, I folded the fabric crosswise and now all the stripes line up: 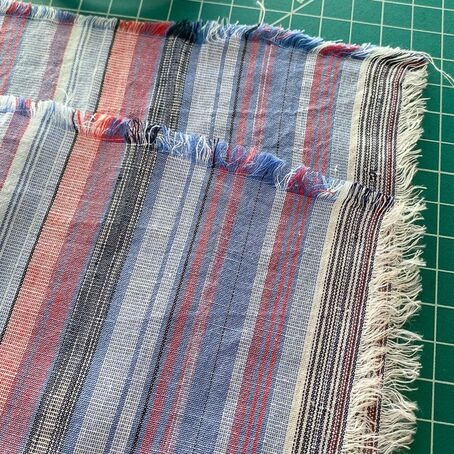 Since the fabric was folded on the crossgrain, my pant pattern pieces were laid out side by side: 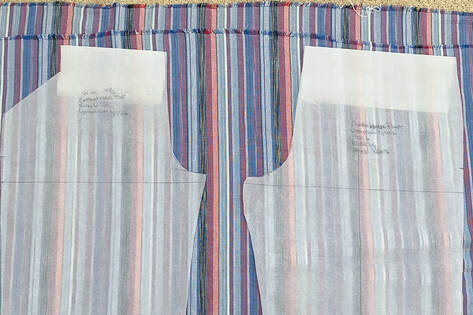 Here's the match I got on the center back seam: 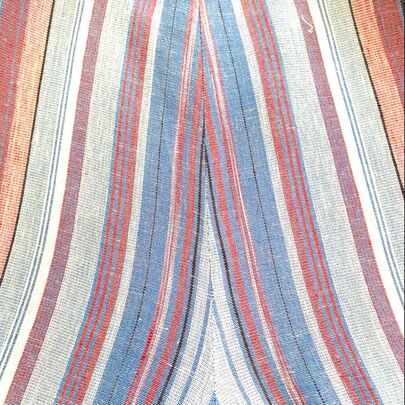 It's so simple but a complete game changer! Keep the crosswise fold in mind before purchasing your fabric for an uneven stripe project so you're certain to buy enough fabric.
I hope this helps all of you! Stay well and keep sewing, Diane  A sewing project can start forming from different inspirations. Sometimes it's a fabric, or a need I have in my closet but in this case it came from ready to wear. I've seen some adorable striped pants around and couldn't wait to make my own.
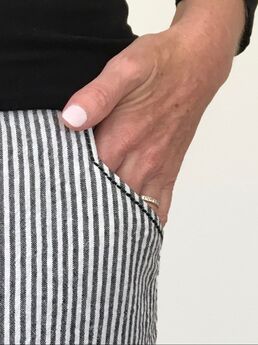
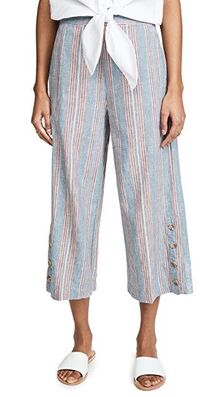
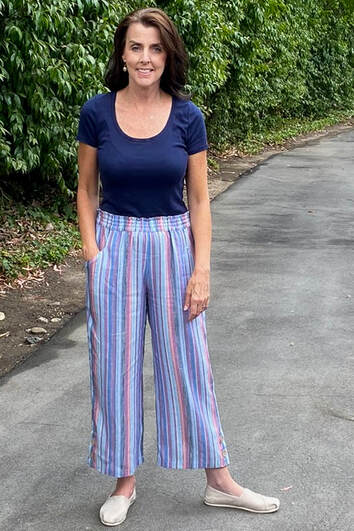
These pants are from Madewell and since I love elements of both I combined them into one pant. I added a button placket at the hem and made a channel elastic waistband. These are easy additions to an already simple pant, but the details really make it special. 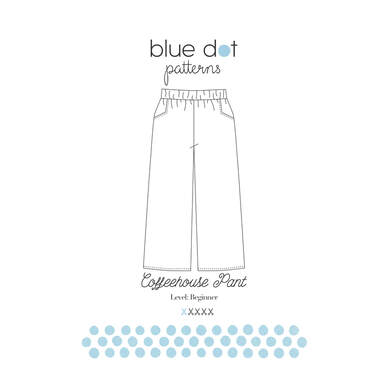 I chose a linen/rayon blend uneven stripe as the fabric and paired it with the Coffeehouse Pant pattern. Here are the changes I made to get the look I wanted:
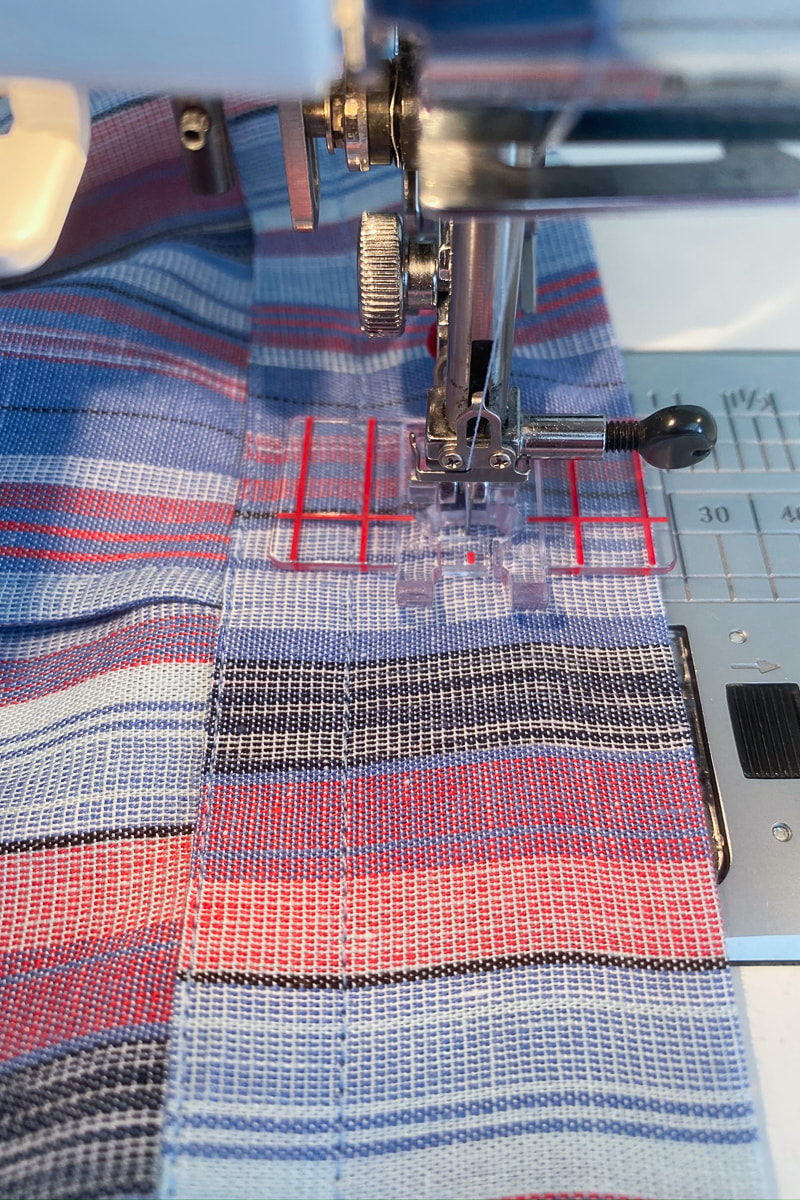
I was able to use the waistband pattern as is and just added 3 rows of stitching each 1/2" apart. I used this nifty seam guide foot I have for my Janome machine to keep all the channels even. I'm really happy with how it came out and the band is really comfortable.
To make the placket, I added an extension at the outside hem on both the front and back pieces.
I'll be adding a blog post soon on how I worked with the uneven stripe. It can be done, so those of you who shy from these fabrics, don't dismay because they can be tamed. Stay tuned!
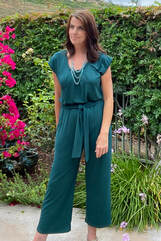
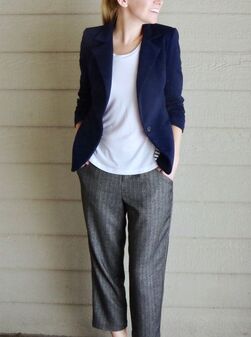
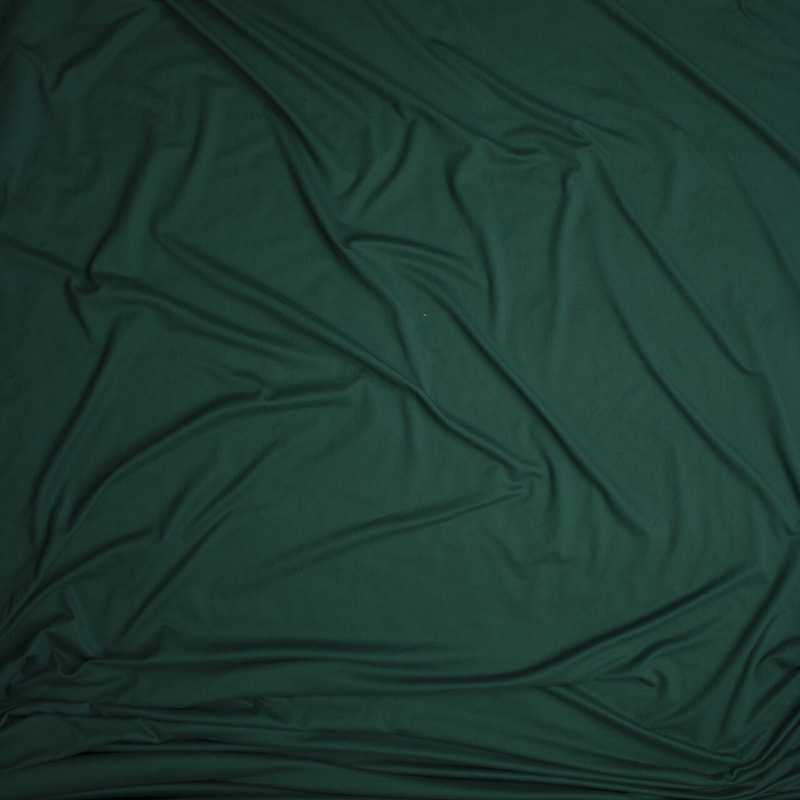
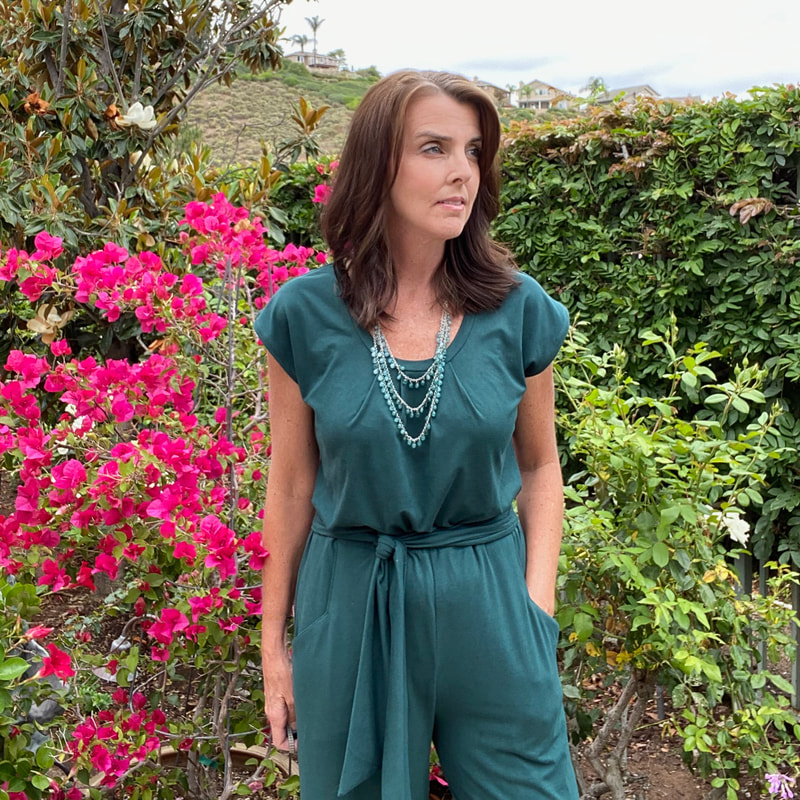
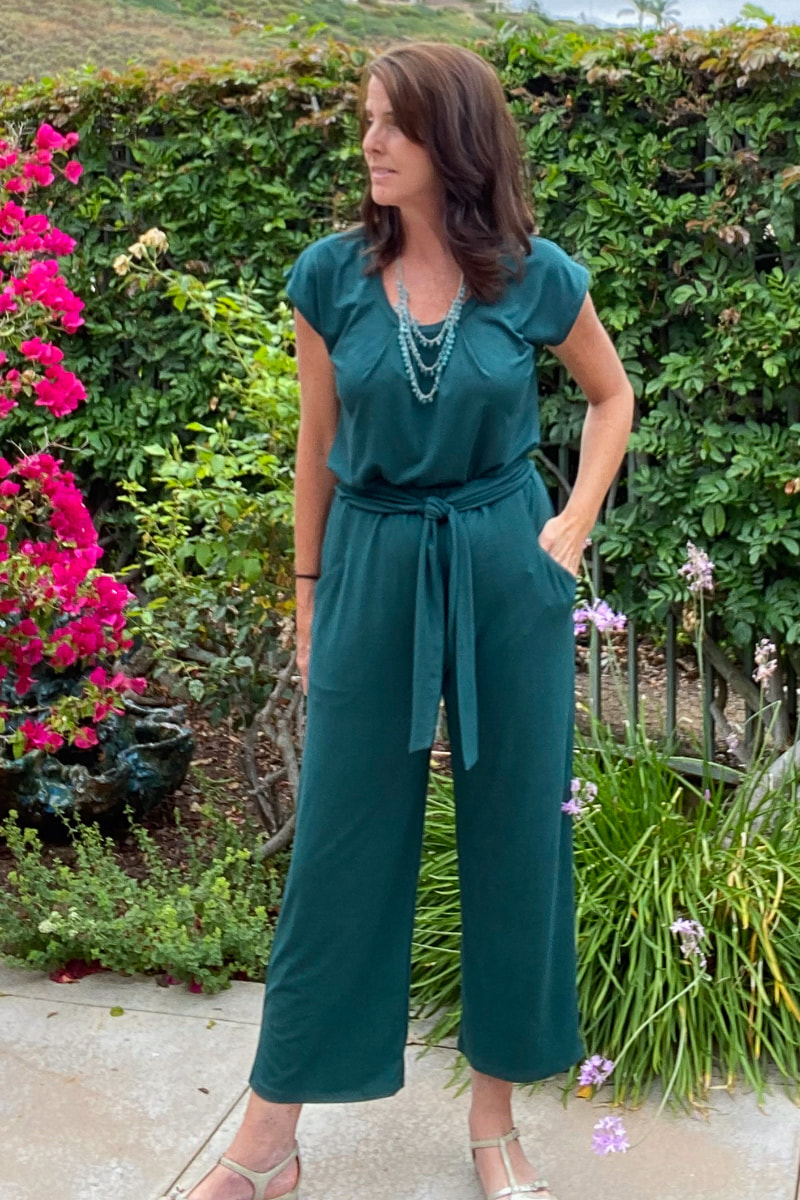
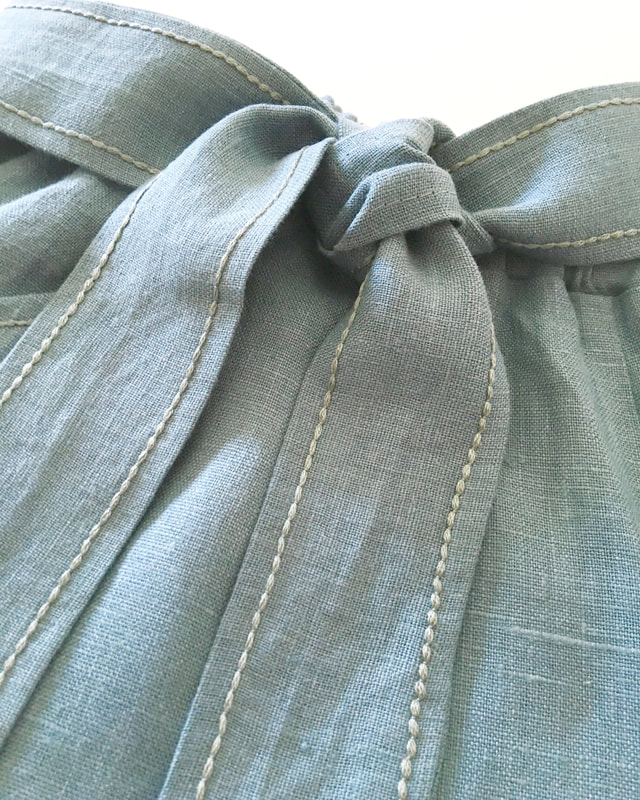
The Coffeehouse Pant PDF pattern is combined with the Morrison Top/Dress PDF pattern in a "Summer Bundle" for just $15! Happy sewing, friends! I hope you're all well. Diane 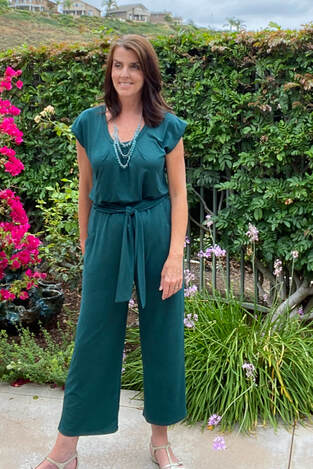 Jumpsuits are all the rage, both in the stores and in the pattern books. I’ve been inspired by all the different versions out there (I love this one from Made By Laquana) but I have to admit, I’ve been reluctant to make one since I really don't want to deal with the "operational issues" that come with wearing a jumpsuit. The best part of sewing, however, is we have the opportunity to solve these fashion issues that might otherwise hold us back. I made up two of my most used patterns in the same fabric and now have my faux jumpsuit and as a bonus, two additional separates for my wardrobe. I'm excited to be a guest blogger for Cali Fabrics and have the opportunity choose fabric from their large collection of knits for my "jumpsuit". The emerald green double brushed poly from Cali Fabrics was my jumping off point for this project because I knew I wanted something comfortable and in a beautiful color (it comes in a large selection of both solids and prints, too!). If you haven’t used double-brushed poly before, it’s definitely a knit to try. It’s stable (keeps it’s shape), soft, washable and doesn’t curl when you work with it. If you’re new to knits and need something light to mid weight, this is a great place to start. And on top of it all, it’s pretty wrinkle free so it travels well. The fabric has a 59" inch usable width and took 4 yards to make the top, pants and tie. I paired the Morrison Top and Coffeehouse Pant patterns (both are in a "Summer Bundle" sale for $15!) because they are versatile enough to adapt to a project like this. Needless to say, I have several versions of these patterns already in my closet but reinventing them as a jumpsuit makes them look completely different. I sewed the top in a straight size 6 and made a few easy changes to the pant pattern to give it the “jumpsuit” look I was after. Here are the changes I made: Widened the pant leg 4”: At the pant hem, I added 1" to the width at both the inner and outer leg and blended the seams. Added 4” to the rise: I raised the rise on the front, back, pocket and pocket facing pieces. This included 2 1/2” to bring it to true waist and 1 1/2” for a fold over casing. Used 3/4” elastic: Instead of the 1 1/2” the pattern calls for, I used narrower elastic since it would hit at the true waist. Made a fold over casing instead of a waistband: This reduced bulk at the waist. Added a 3” x 58” self tie. I cut a 7" x 59" piece of fabric, folded it over, right sides together, and stitched.  As I was making this outfit, I realized this would be a great option for a capsule wardrobe. Make up these two pieces in a navy or black double brushed poly and you'll have a great foundation for a mini wardrobe. Add a striped cardigan and floral skirt and you'll have a weekend getaway capsule that's easy to pack and wrinkle free. So many projects, so little time!
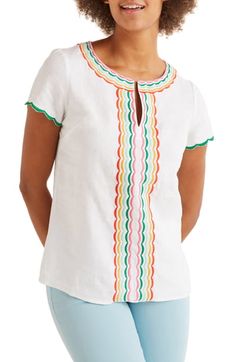
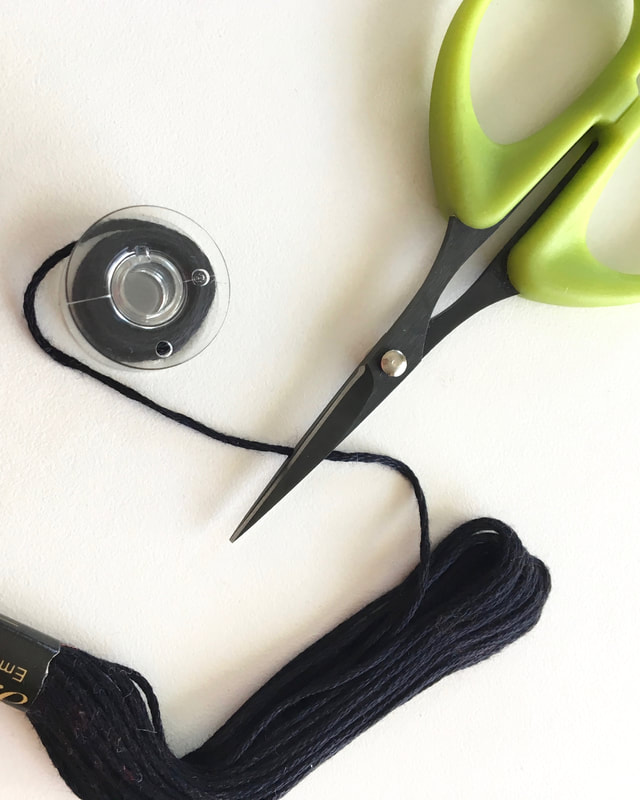
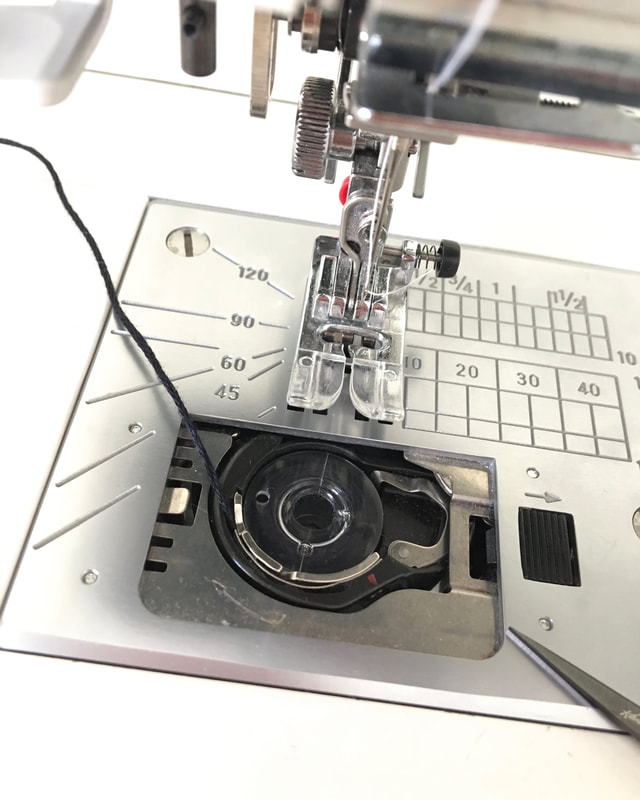
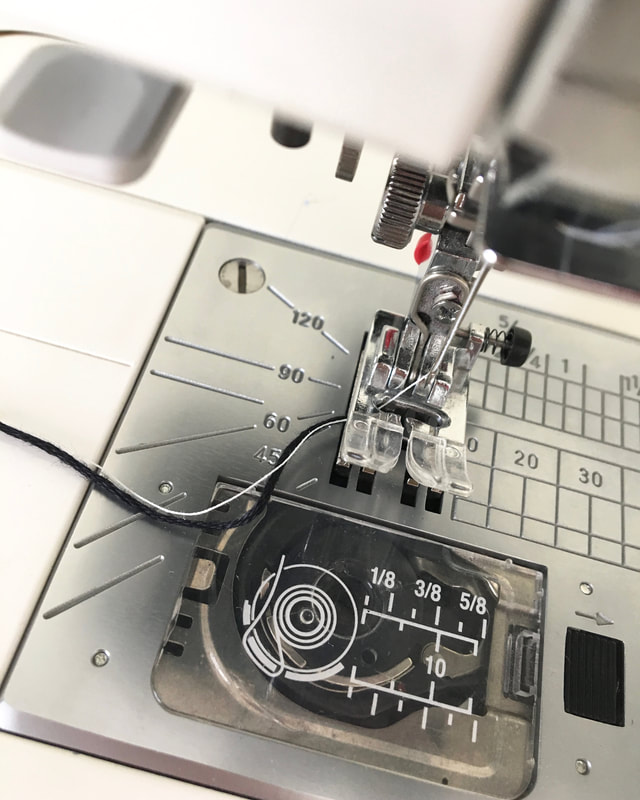
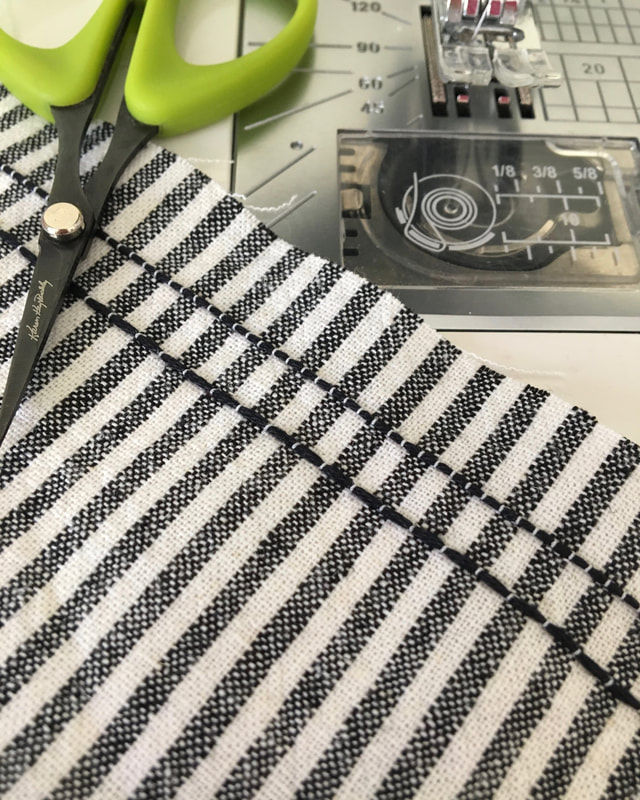
I want to thank Cali Fabrics for the beautiful fabric and inspiration. It's always a pleasure working with you and your gorgeous fabrics! Happy Sewing, Diane 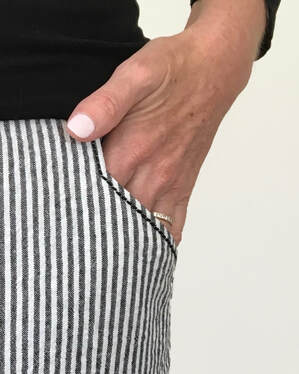 I'm happy to share with you a topstitching technique I use quite often in my sewing. I used it here on my Coffeehouse Pants both on the pocket and on the hem (see below). This is one of those sewing tricks that I've shared in my sewing classes and people don't believe that it actually works because it sounds too easy! Although reverse bobbin work is something we often see in quilting or "art to wear", I think it's perfect for everyday garment sewing and it's a whole lot of fun for something so quick and easy. 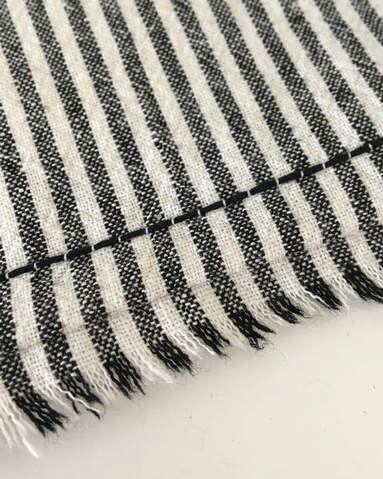 Reverse bobbin topstitching is stitched from the wrong side of the fabric so when you look from the front you are actually looking at the bobbin thread. If you load some chunky or interesting thread that might normally be too thick as an upper thread, you can load it in the bobbin and use it. It can be a thread for hand embroidery or machine...I've used different types. Here's how to do it:
Enjoy my friends. And I'd love to see examples of your stitching!
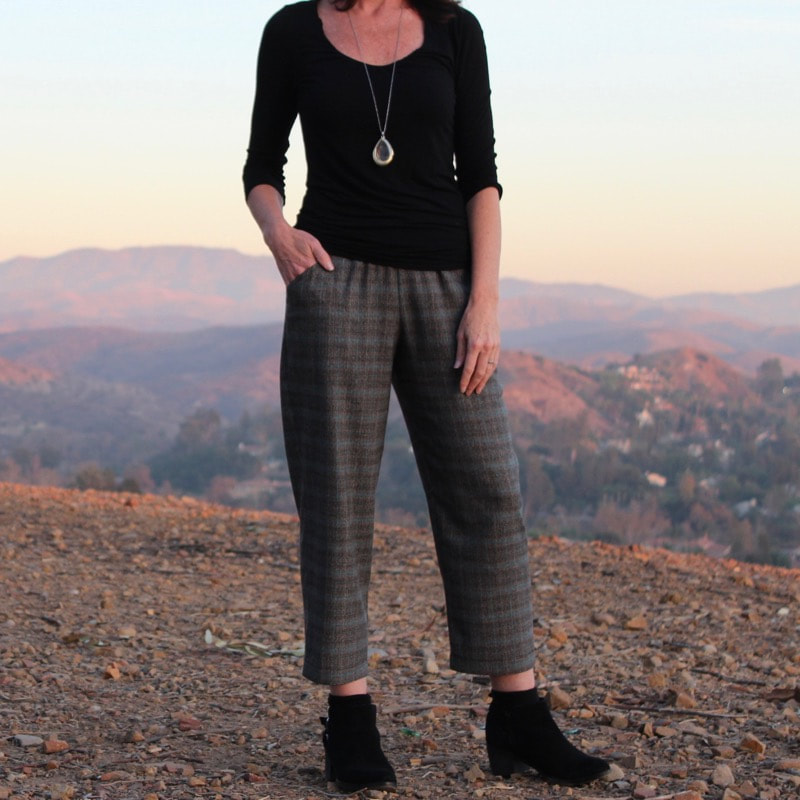
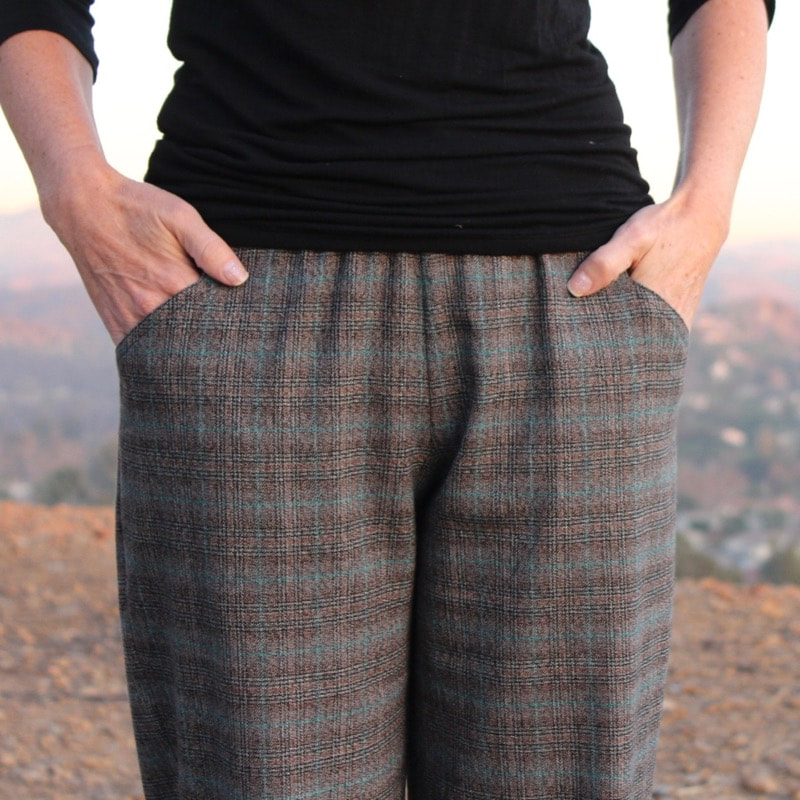
Happy Sewing! Diane 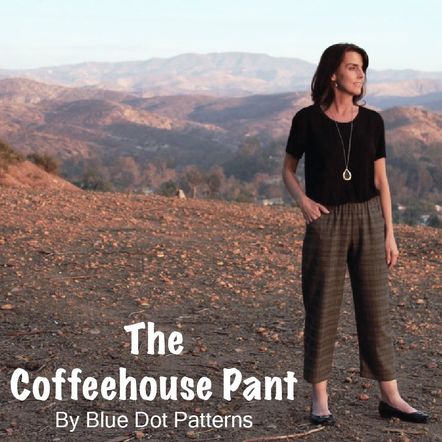 I’m very excited to start the new year with a new pattern! Say "Hello" to the Coffeehouse Pant! It’s an easy to wear and even easier to sew ankle length pant with front notch pockets and an elastic waist. It's available today and is on a NEW RELEASE SALE for 20% off here on the website and at Upcraft Club until January 14th! 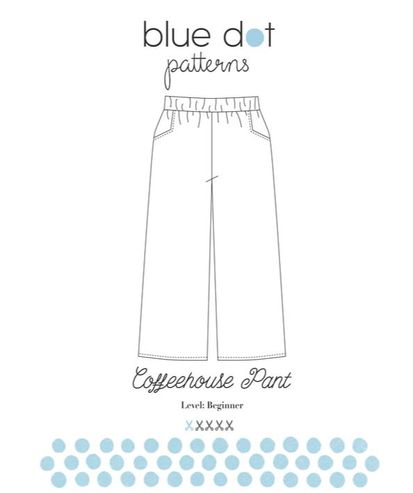 Let me introduce you...
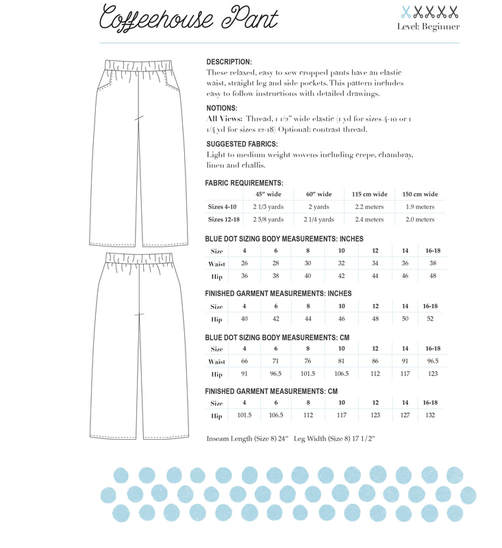 The Coffeehouse Pant sews up nicely in light to medium weight fabrics ideally with some drape. Linen, challis, crepe and chambray would all be good choices. Look at the darling pants Kyla from LifebyKy made out of a soft suiting.  Grab a copy at 20% off at Upcraft Club and on the BDP website through January 11th! Don't forget to tag all your makes #Coffeehousepant and #Bluedotpatterns. Enjoy!
|

About MeHi! I'm Diane, a wife, mom, sewing teacher and pattern designer from sunny Southern California. I share my sewing adventures here on the Blue Dot Blog formerly Gatorbunnysews. For more info click here. 
Categories
All
Archives
October 2022
|


 RSS Feed
Proudly powered by Weebly