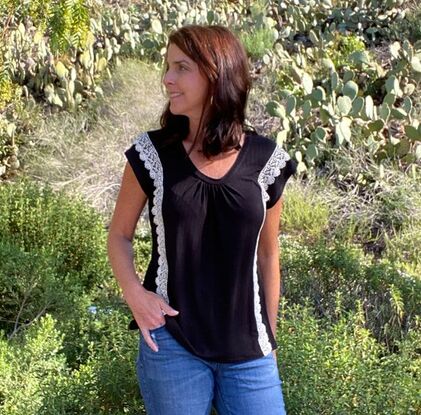
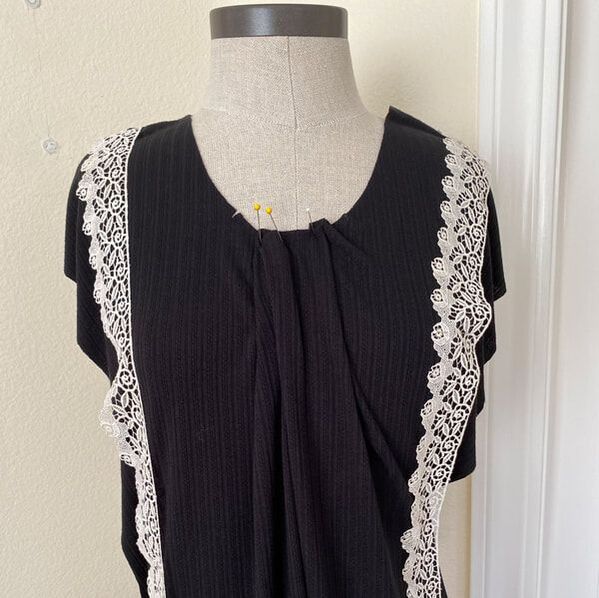
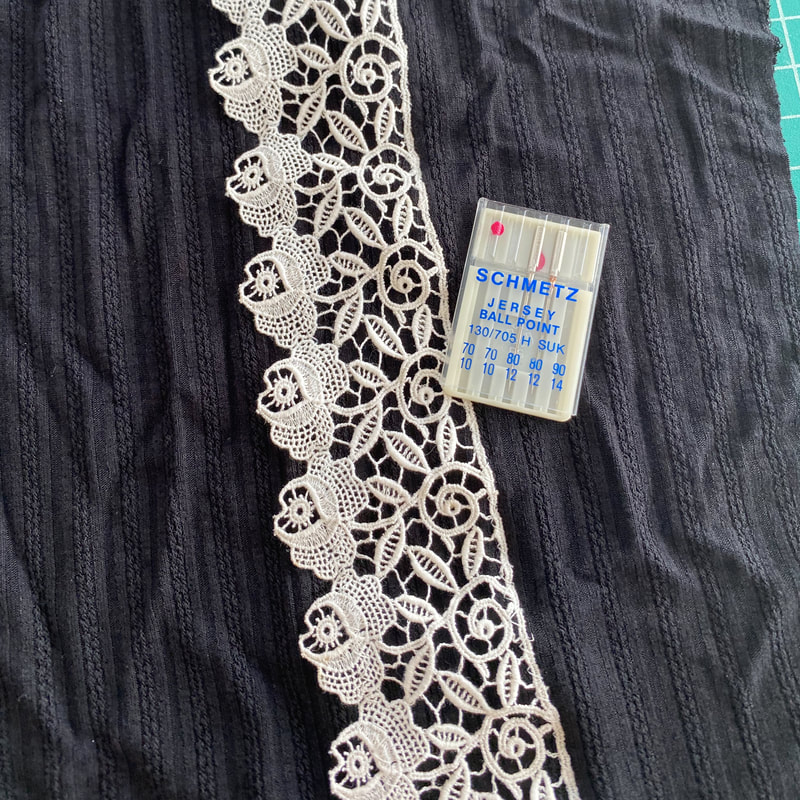
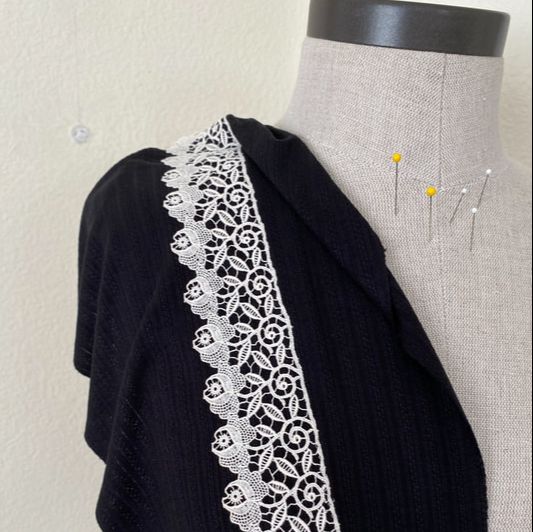
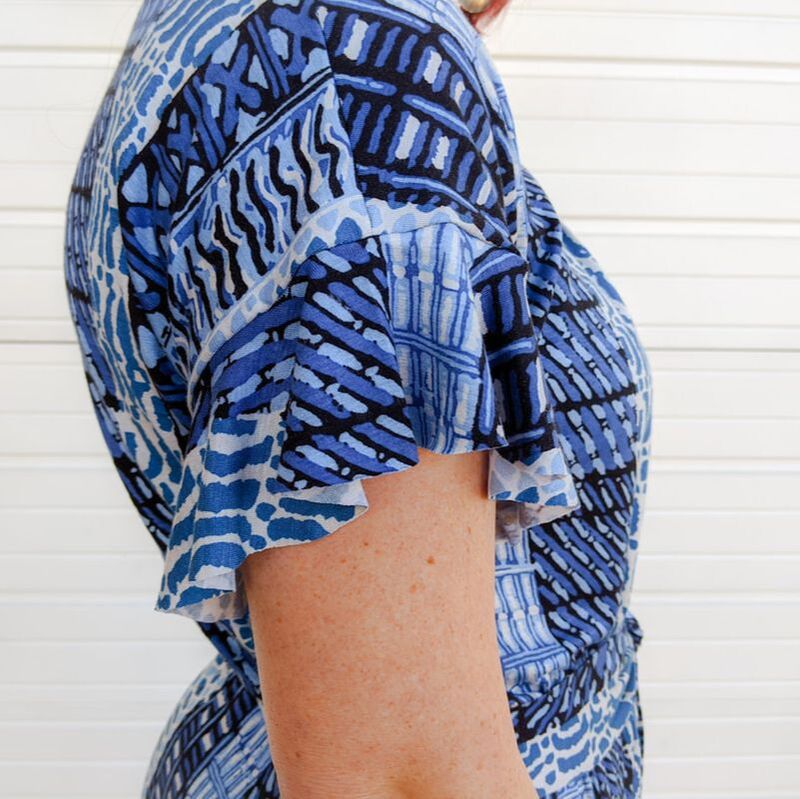
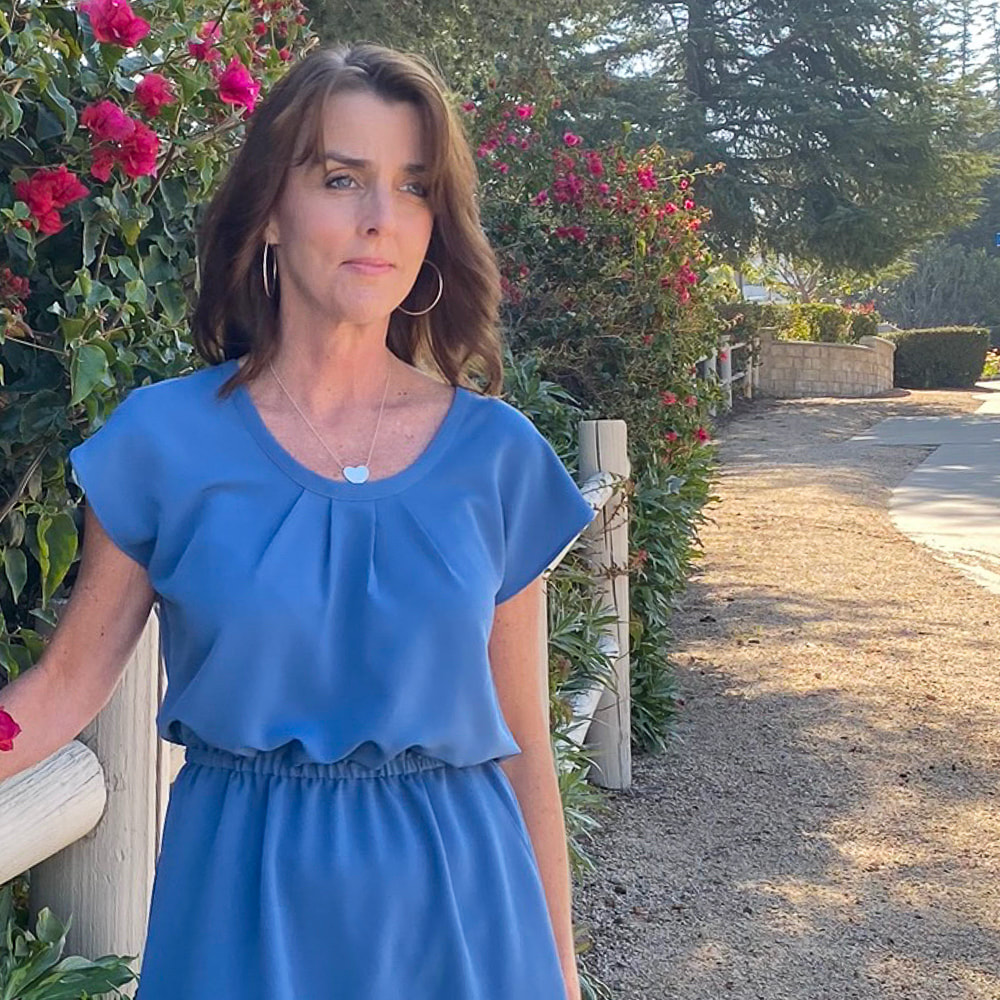
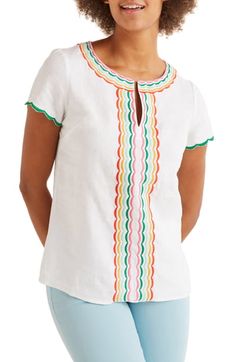
 The Garnet Hill catalog is often a source of inspiration for me. They have casual clothes, suitable for warm weather and most importantly work well for my lifestyle. So today, since the Morrison pattern is on sale this month, I have a Morrison t-shirt Garnet Hill style. 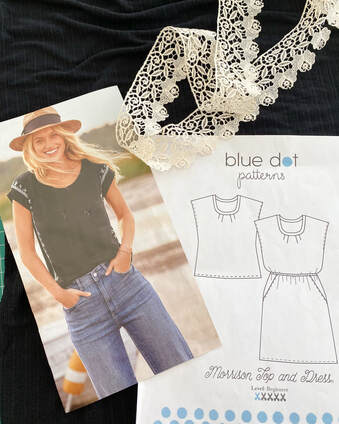 The Morrison Top pattern is a versatile pattern and a great base for creativity. I'm using a rayon/spandex black pontelle knit and vintage lace from my friend Lisa's grandma's collection. I've been looking for the perfect project for the lace and here it is. And I have just enough to trim the front. It's meant to be!
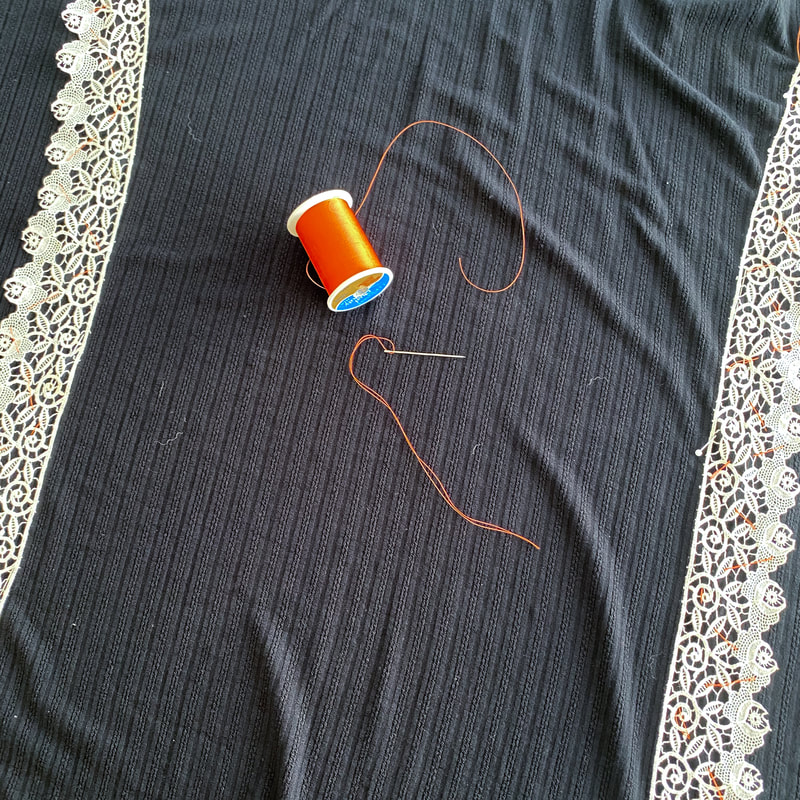
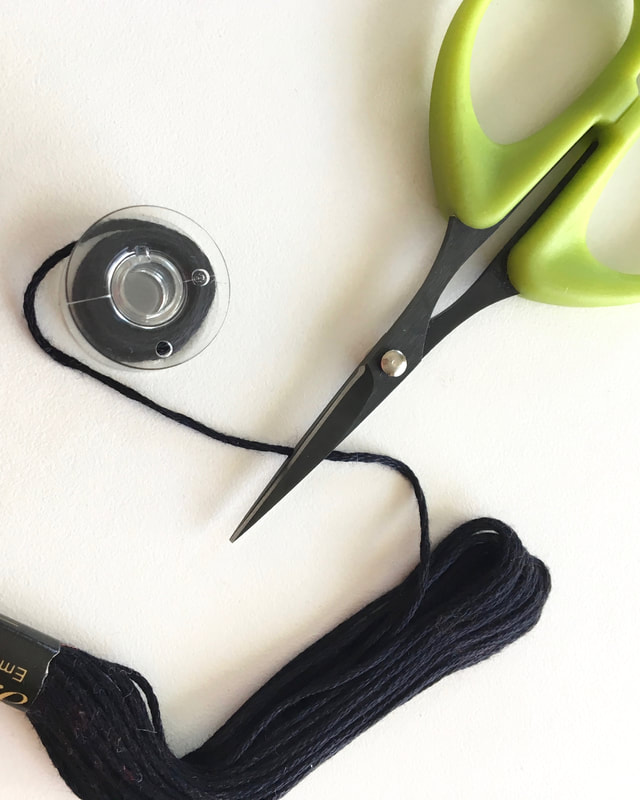
Aftern I cut the top out, I put it up on the dress form to see which direction to lay the lace. I liked the placement on the left side because it laid against the body best. I pinned it on and did a quick hand baste. I know hand basting is not everyone's favorite thing to do but I've found it saves me time in the end. This is delicate lace and I know it wouldn't do well if I had to take out stitches. I save bits and pieces of thread for a job like this and something in a contrast color so I can take it out easily.
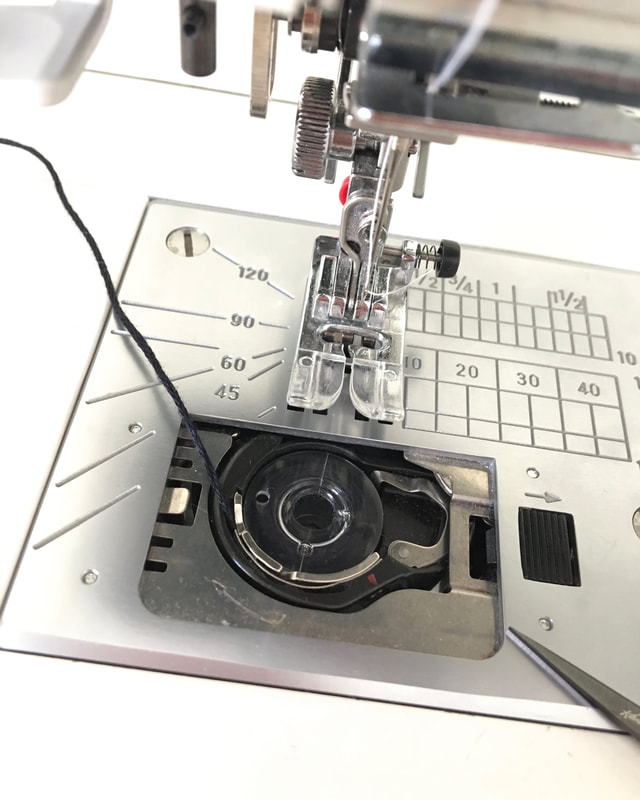
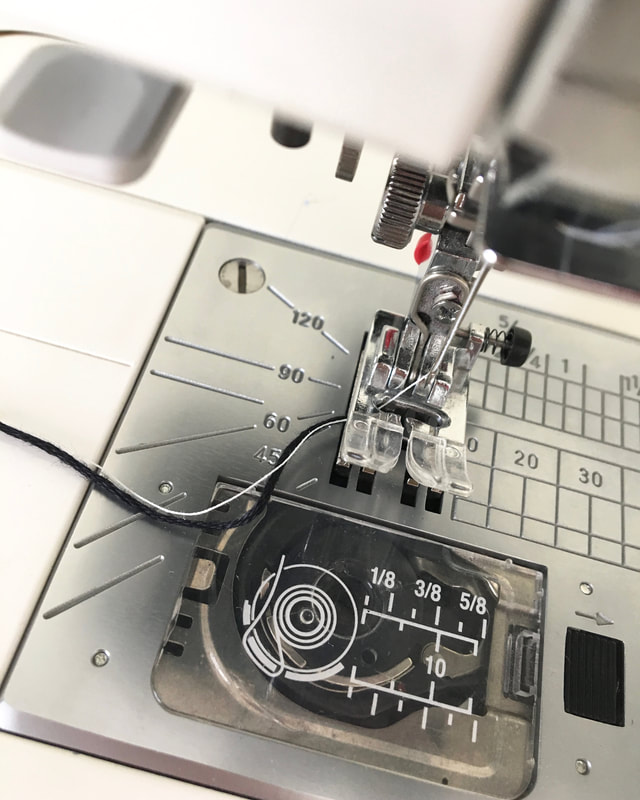
I had a tiny bit of lace left, so I did a practice run to test the needle and stitches. I used a wide and long zig zag on both sides of the lace and a lightweight ball point needle. When I was happy with the result I moved on to the shirt. It turned out nice and smooth and you can't see the stitches. I'll admit, I held my breath through most of the stitching.
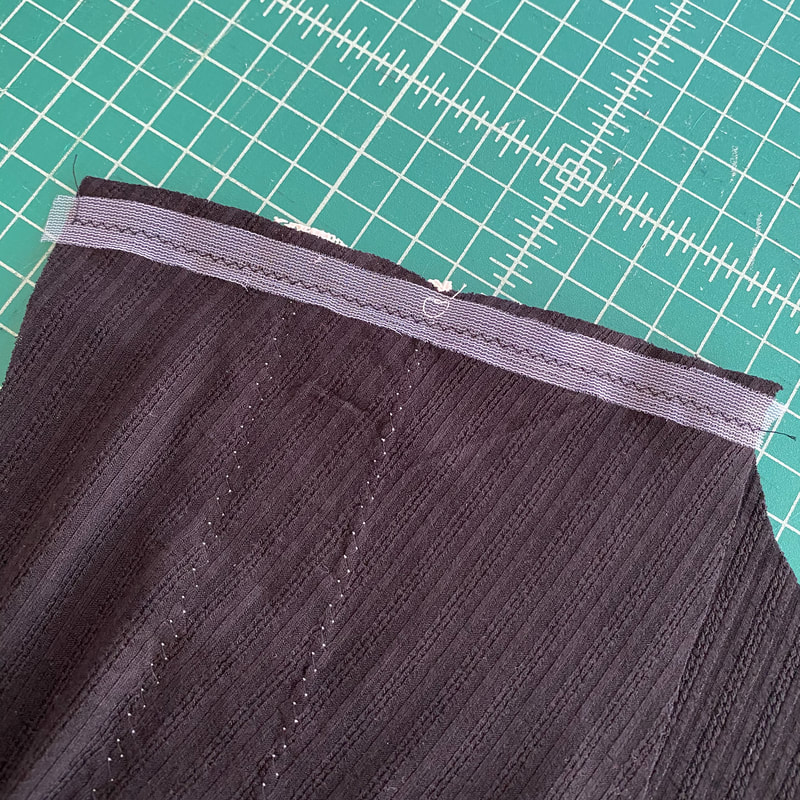
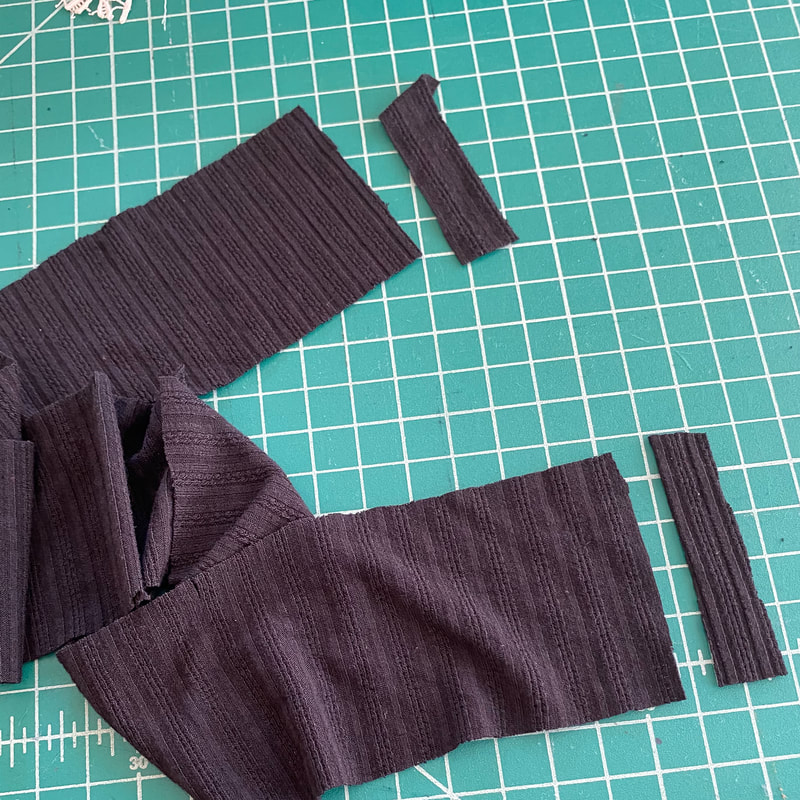
I put the shoulder seams in with stabilizer and then I was ready for the neckband. This knit is very drapey and whenever I have a fabric like this I shorten the neckband so it holds the shape better and doesn't sag. I ended up taking off 3/4" on both ends of the band. 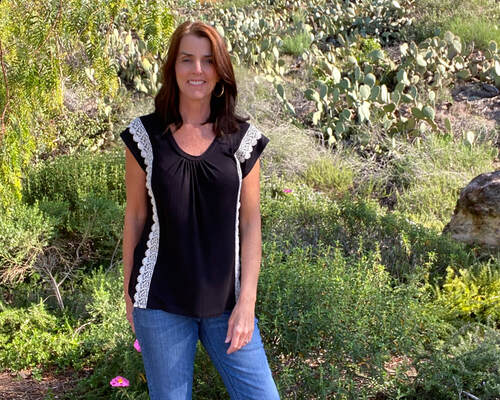 I'm happy with the result and even happier than I would be if I bought it. It made me happy to use the lace Lisa shared with me. Thank you Lisa for the generous gift! I've already worn it several times (and even washed it...gentle cycle in a mesh bag) and know it'll be in heavy rotation this summer.
The Morrison Top pattern is on sale for just $8 for the month of April, no code needed. Happy Sewing Friends, Diane
1 Comment
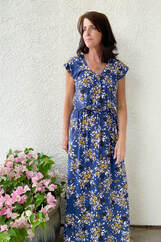
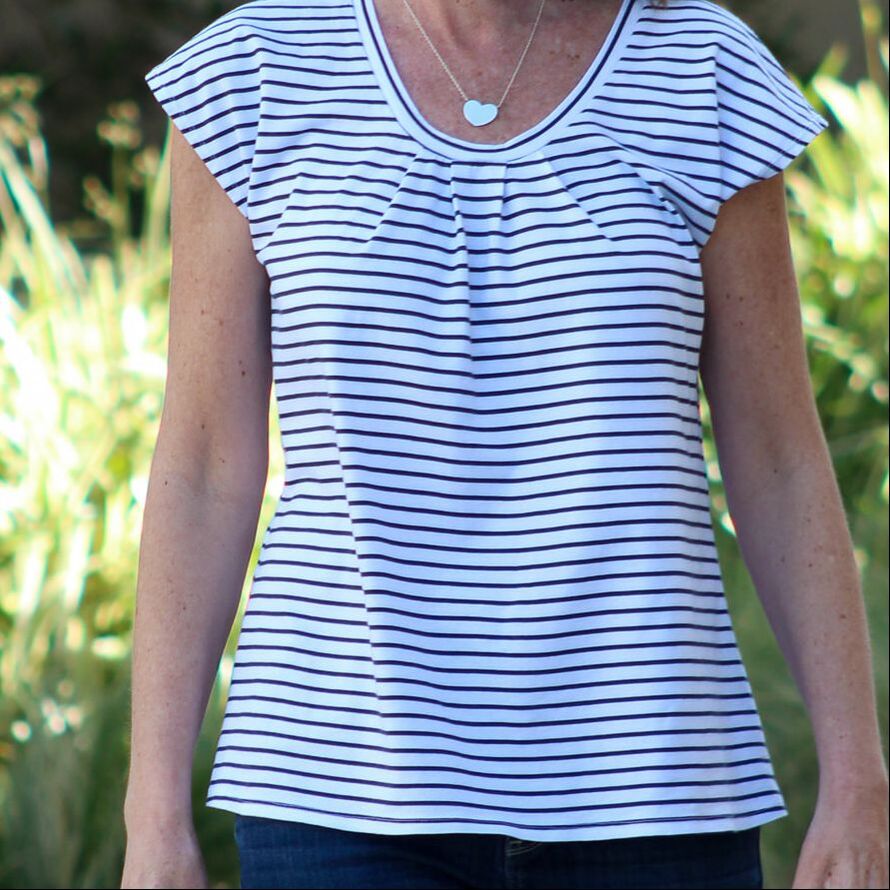
 So really, how many times can you use a pattern? Time, money and space are all valuable to us and as sewists, using a pattern multiple times is a great way to use the resources we have. Today, I bring you a quick blog post packed with lots of photos to show how, with the "$15 Summer Pattern Bundle" that includes the Morrison Top and Dress and the Coffeehouse Pant PDF patterns, you can create loads of garments.
I start with the Morrison Top and Dress pattern which can be made up in both a knit and woven fabric. This simple pattern (the top is only 3 pieces) can be made up as a maxi-dress, an elegant silk shell, paired with the Coffeehouse Pants a faux jumpsuit, flouncy dress and a casual t-shirt. There's more inspiration out there in ready to wear and Pinterest (check out the Morrison Board). I even have a sewing friend that made 5 beautiful pair of summer PJ's using the Morrison Top and Coffeehouse Pant patterns. I'm inspired!
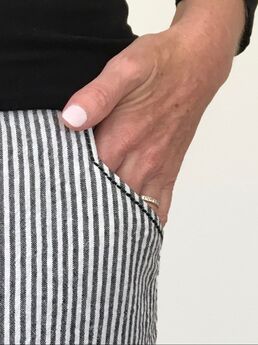
The Coffeehouse Pants are also a quick sew and fun made up as a beachy pant but also nice in a plaid or striped suiting. You can add a button placket to the hem (there's a post here) or a drawstring or even a paperbag waist. 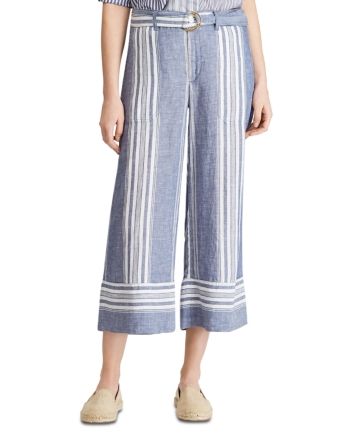  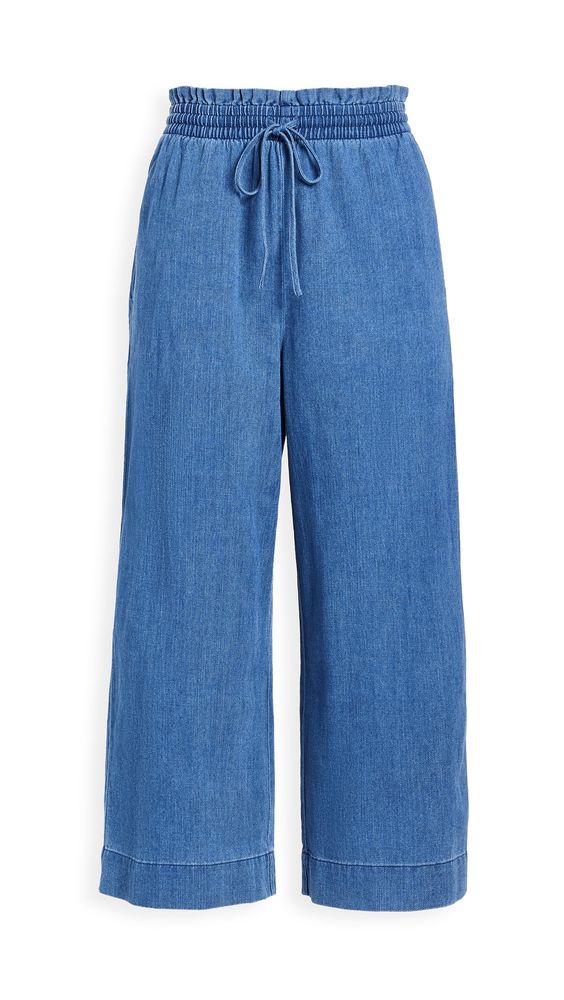 The Coffeehouse Pinterest board has more ideas including playing with stripes and adding embroidery.
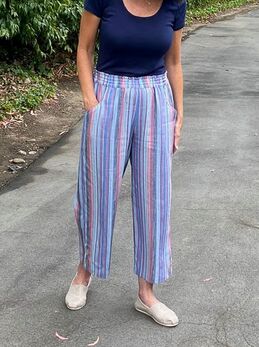
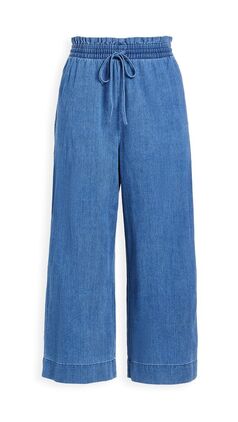
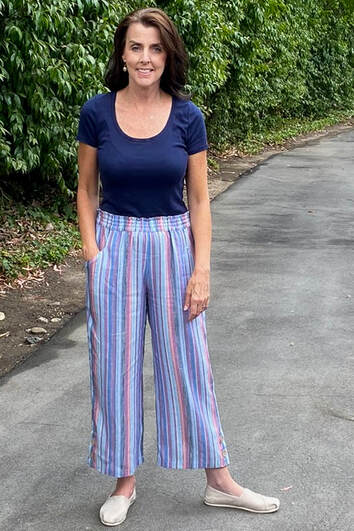
These are just 2 patterns that I love but there are so many more we can use to build our wardrobes. The options for reusing a pattern are really endless! I'm working on a project using up some remnants that I will share soon! Have fun sewing! Diane  A sewing project can start forming from different inspirations. Sometimes it's a fabric, or a need I have in my closet but in this case it came from ready to wear. I've seen some adorable striped pants around and couldn't wait to make my own.
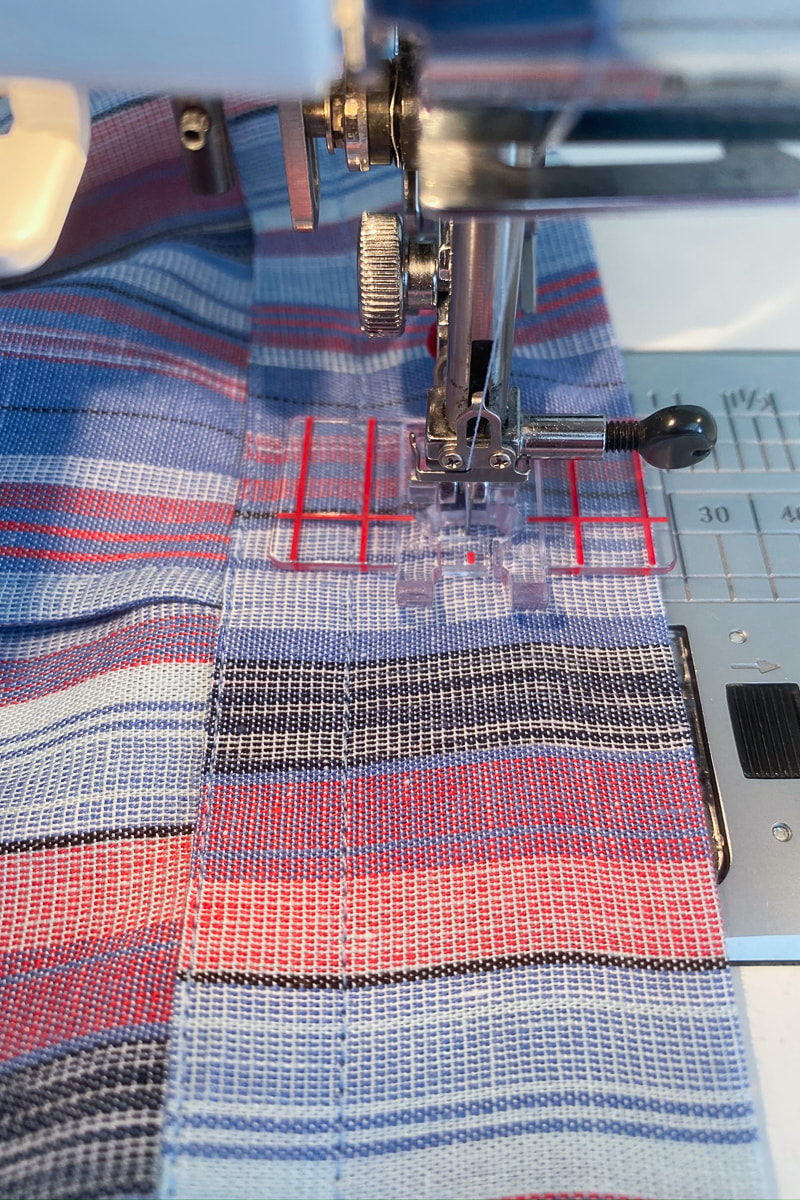
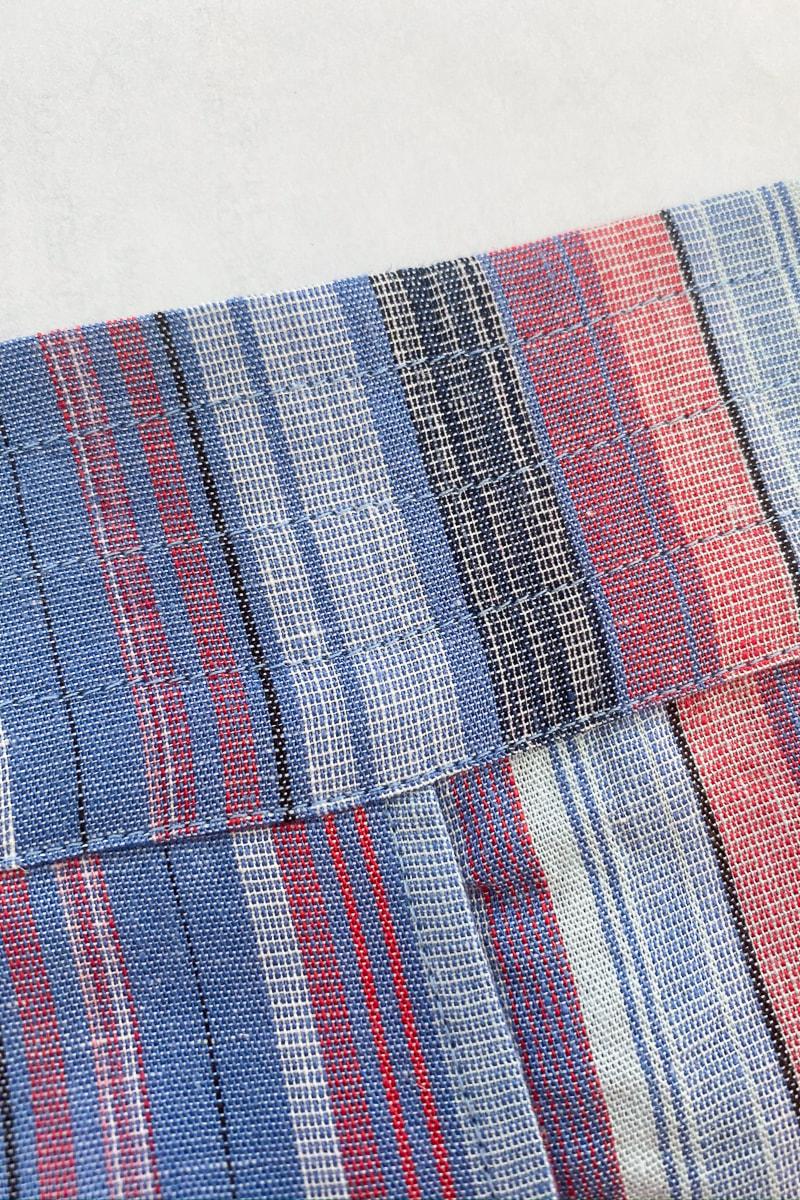
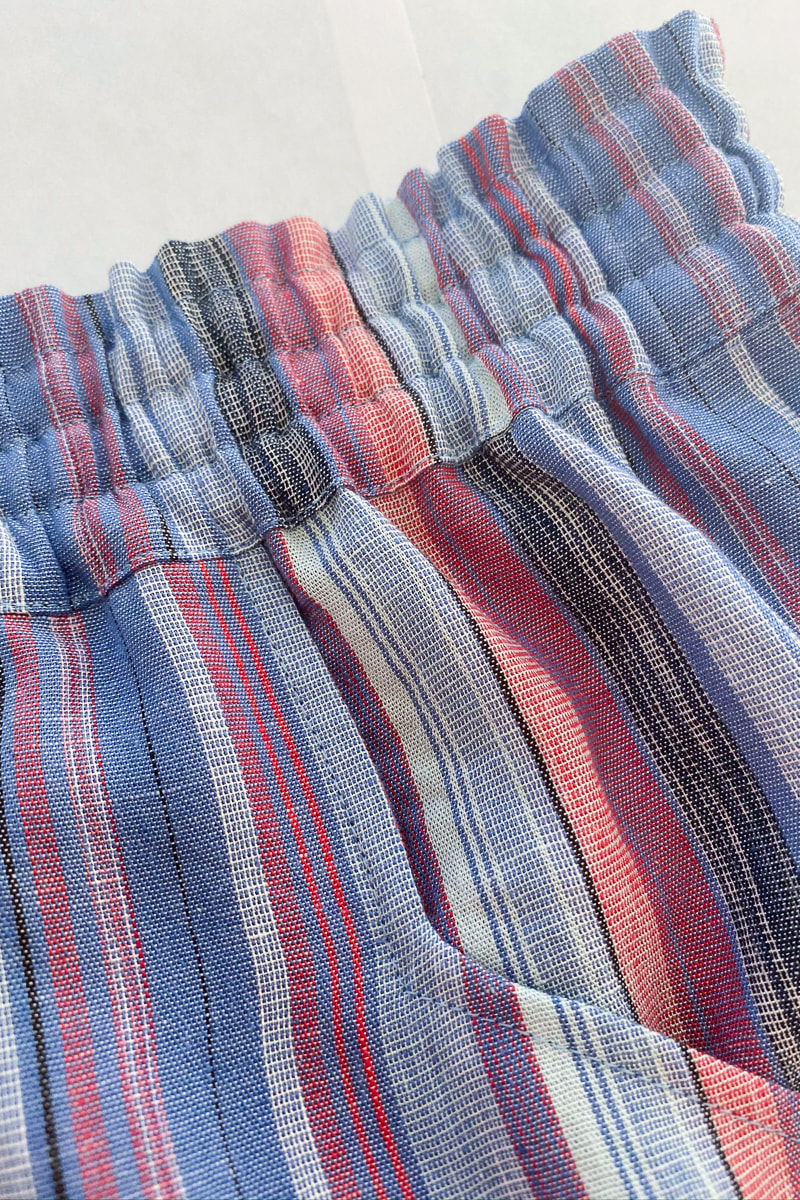
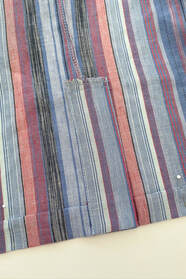
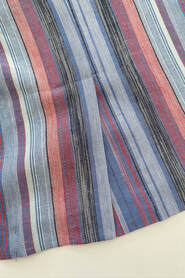
These pants are from Madewell and since I love elements of both I combined them into one pant. I added a button placket at the hem and made a channel elastic waistband. These are easy additions to an already simple pant, but the details really make it special. 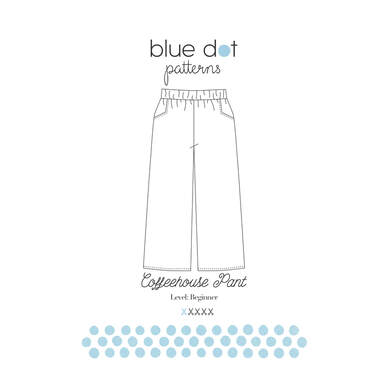 I chose a linen/rayon blend uneven stripe as the fabric and paired it with the Coffeehouse Pant pattern. Here are the changes I made to get the look I wanted:
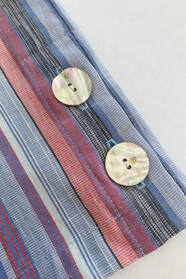
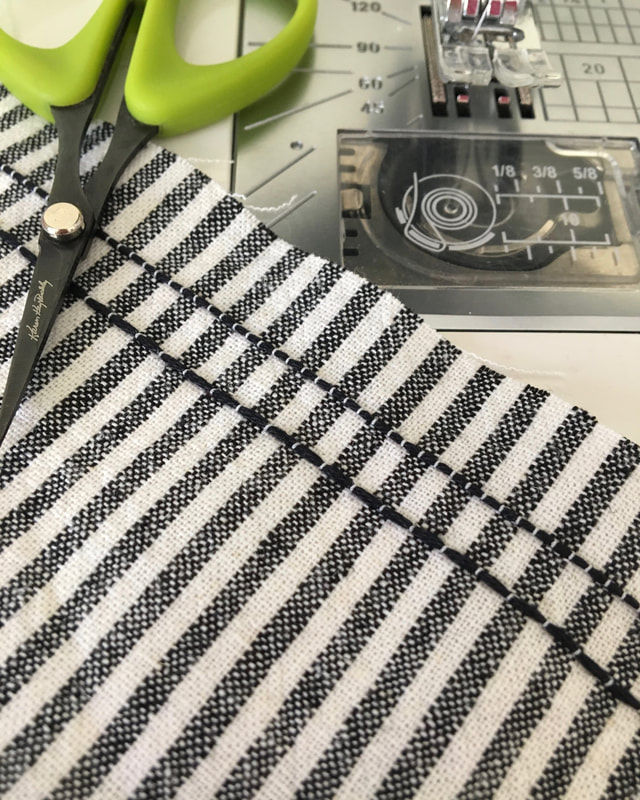
I was able to use the waistband pattern as is and just added 3 rows of stitching each 1/2" apart. I used this nifty seam guide foot I have for my Janome machine to keep all the channels even. I'm really happy with how it came out and the band is really comfortable.
To make the placket, I added an extension at the outside hem on both the front and back pieces.
I'll be adding a blog post soon on how I worked with the uneven stripe. It can be done, so those of you who shy from these fabrics, don't dismay because they can be tamed. Stay tuned!
The Coffeehouse Pant PDF pattern is combined with the Morrison Top/Dress PDF pattern in a "Summer Bundle" for just $15! Happy sewing, friends! I hope you're all well. Diane 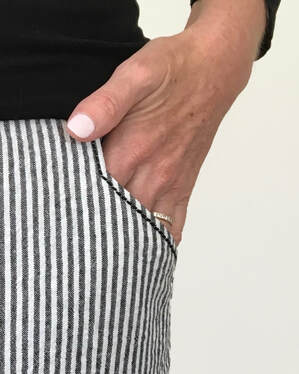 I'm happy to share with you a topstitching technique I use quite often in my sewing. I used it here on my Coffeehouse Pants both on the pocket and on the hem (see below). This is one of those sewing tricks that I've shared in my sewing classes and people don't believe that it actually works because it sounds too easy! Although reverse bobbin work is something we often see in quilting or "art to wear", I think it's perfect for everyday garment sewing and it's a whole lot of fun for something so quick and easy. 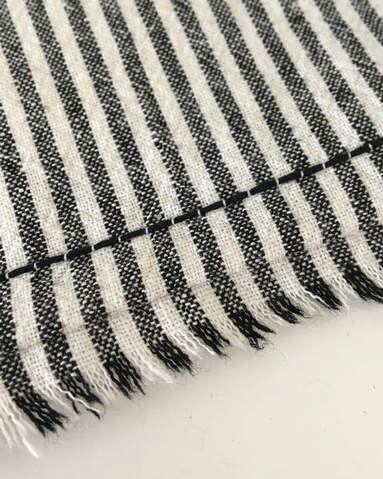 Reverse bobbin topstitching is stitched from the wrong side of the fabric so when you look from the front you are actually looking at the bobbin thread. If you load some chunky or interesting thread that might normally be too thick as an upper thread, you can load it in the bobbin and use it. It can be a thread for hand embroidery or machine...I've used different types. Here's how to do it:
Enjoy my friends. And I'd love to see examples of your stitching!
Happy Sewing! Diane 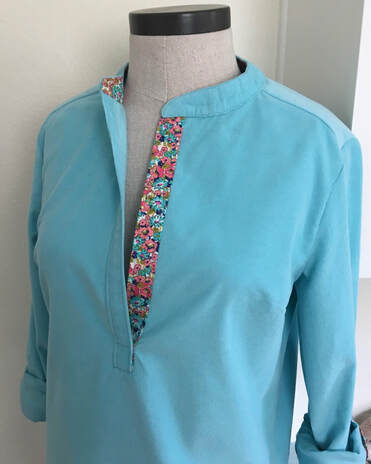 Sometimes you find yourself in a place you'd never expect or even know is possible. It’s happened to all of us too many times to count, right? Well, I’ve found myself over the last few months in just such a place and I’m using sewing to get me through. I’m a pattern designer and up until 7 months ago I was also a sewing teacher. My dream job. First hand, I was able to see the life changes that come when someone learns how to take a flat piece of cloth and turn it into something. It can be truly magical! I’ve seen sewing mend a heart from a broken engagement and give someone who’s no longer a caregiver a sense of purpose. It’s helped those people who have, like me and maybe you, had a life change. 2 years ago I started feeling not quite like myself. It’s actually a long and drawn out story that I won't bore you with but over a period of several months and many doctors, I found myself plagued with vision issues, body weakness, numbness, fatigue, speech problems and difficulty walking and navigating stairs. My family, friends and students watched me change and I tried to hide my problems but it was getting more and more difficult and scary. After 16 months of doctors I landed in a brilliant university neurologist’s office and she ran hoards of tests and found I had Lyme disease. What? Shocking for all of us since they say “Lyme disease doesn't exist in California” which is a dirty lie, by the way, that thankfully my doctor didn’t believe. I was losing my sweet mom to pancreatic cancer at the time of my diagnosis so I put off treatment while I took care of her. Soon after I said “Goodbye” to my mom, I underwent treatment that cleaned out the Lyme bacteria but left me with additional nerve and muscle damage. Thankfully, I’m now on my way to recovery with physical and occupational therapy and the help of an army of family and friends. This really is going to be about the blouse, I promise.  Before this all happened, the “things” that made me tick were sewing and distance running. I now walk very slowly with the help of a bright blue walking stick I named “Eileen” which is an improvement over my former walker which I didn’t name (probably because I lost my sense of humor for a bit there). I may not be a distance runner anymore but I am happy with the leg progress I’ve made as I can walk further as each month goes by. My hands have not healed quite so quickly so sewing has turned out to be difficult and I’ll go so far as to say disheartening. But given my new disabilities/changes I’m trying to figure out how to get back in touch with myself while feeling separated from the things that made me tick (pun completely intended). But we’ve all been here. Well, maybe not exactly here but here in the sense that we all have hiccups and interruptions in our lives that take us away from the things that make us us. In my case it’s physical but maybe for you the interruption was a wonderful thing like having a baby, getting a new job or moving to a different city or something difficult like being a caregiver or recovering from a loss. So how do we find our way back? Or, the better question is how do we stay in touch with ourselves while embracing our current situation? Pretty philosophical for a sewing blog, but those of you who consider yourselves “makers” and you have trouble “making” for whatever life reason have all pondered this.  I can tell you the solution to some of my problems started with this shirt. Who knew McCalls 7360 would help me climb this hill? I call this shirt the “Happy Shirt” for obvious reasons, it looks happy. But really this should be dubbed “The Occupational Therapy Shirt” not as sexy a moniker but certainly accurate. When I first tried to sew after my treatment, I wasn’t strong enough to cut fabric and could only sit up for a short period of time. It was discouraging and thus I stayed away from my sewing room. I had ideas and the desire to sew but it was difficult to bring myself to try. With my initial sewing failure fresh in my mind, one of my first occupational therapy goals was “to cut fabric.” I’m not sure my therapist has ever had a patient with that goal but there it was. With practice and by using both hands (and the help of new easier scissors from my thoughtful husband and son) I did it! Since this went well I decided to really use sewing to help me heal. My next goal was to make a shirt with a collar. Don’t you just wonder what my therapist thought? My therapist said “Okay, in how long? Let’s quantify it. Don't think about how long it would take the “old Diane” but how long it will take you now.” “Well, the 'old Diane' would make this in 4-ish hours so the “current Diane” can do it in 8 hours. I’ll allow myself twice the time.” I said. “Great! Keep track of your time and let’s see how it goes. If it takes you longer it doesn’t matter, just do it.” She said. Setting goals has always worked for me and this new goal freed me up to walk into my sewing room, turn on the timer and start. Somehow this approach separated me from the disappointment of before and the sadness that comes with thinking about what I can’t do anymore and allowed me to move forward. More than 14 hours later here it is, my goal achieved! Yes, it took me more than 3 times what it would’ve before and the quality of my work is not the same but the maker in me is alive once again.
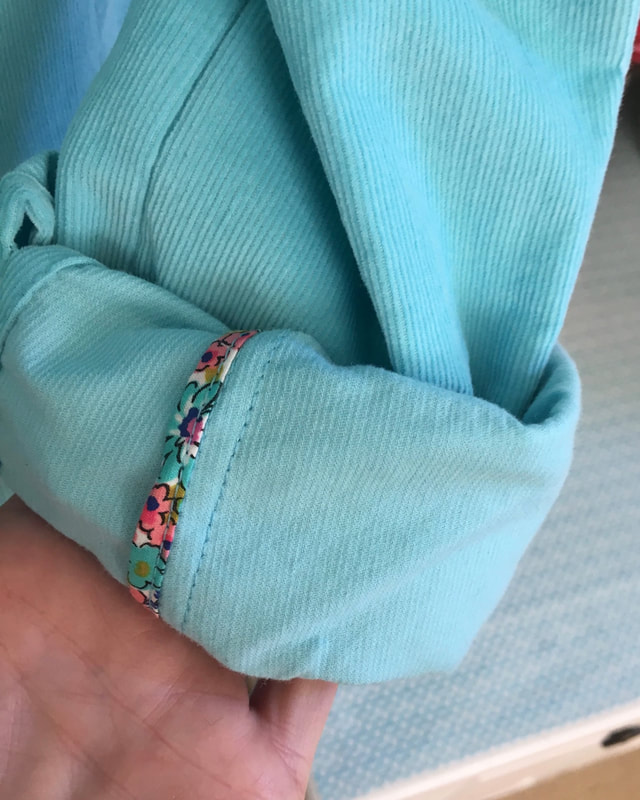
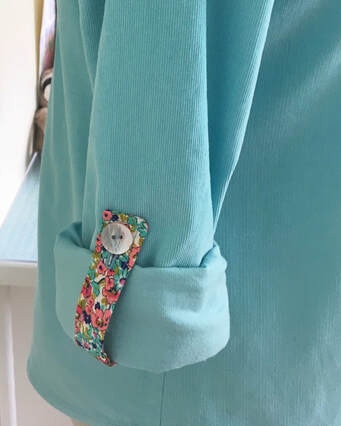
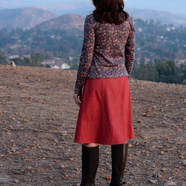
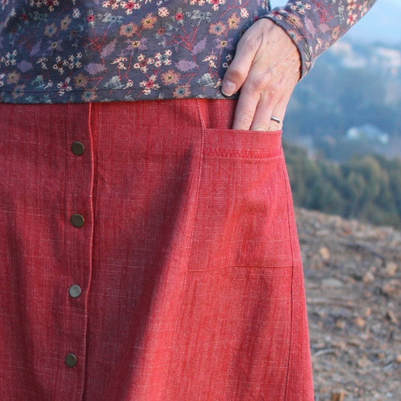
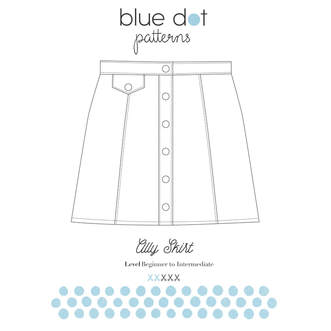
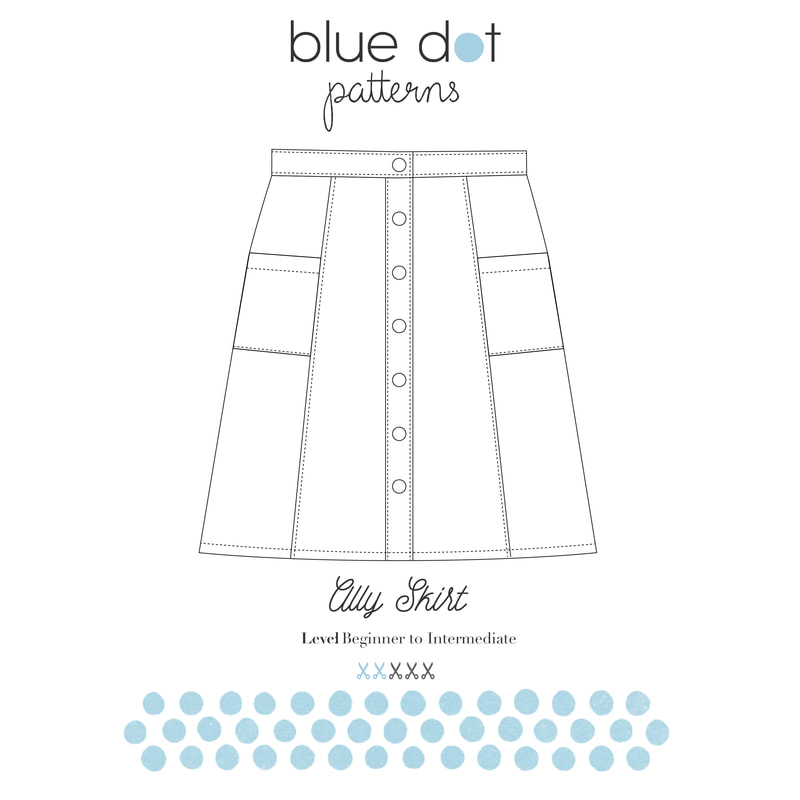
My doctor recently said to me when I asked how long it would take me to recover “We aren't going to talk about time, we are only going to talk about progress.” You can imagine how hard it was for the impatient me to hear that. But I thought about it for a few days, really digested it and decided to own it. It’s been just about the most helpful thing I’ve heard. I made something. That’s progress. We aren’t going to talk about the time it took. I’ve physically adapted to so many things and I can adapt my thinking too. It doesn’t matter how many things I make in a month or how perfect they are, I just need to make progress. Are you here too? Have you had a baby and you don’t have time? Can you find 15 minutes twice a week to make progress? Did your life change involve moving to a different place and you don’t have room to sew or a job where you work more? Can you pick up some hand work that will move your skills forward as you work in your kitchen or on your lunch break? Sewing is a great way to help me get back to me. I watched it happen in my students and now it’s my turn. Oh and by the way, I loved this pattern and the butter soft Robert Kaufman corduroy from Fabricland. I made a contrast under placket, tab and collar facing with 1/2 yard of the cotton lawn print. I even had enough of the floral to bind the sleeve seams so the rolled up sleeve looks finished. This shirt is a keeper…for so many reasons. If you made it to the end of this very long blog post, I thank you for taking the time. It felt good to get it out. Happy Sewing Friends! 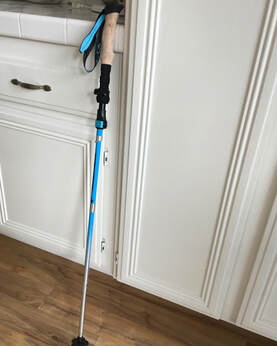 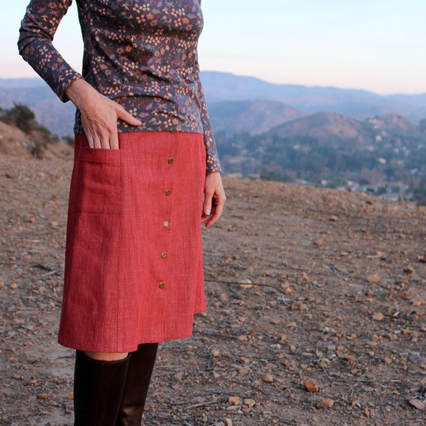 I'm still riding the "it's the new year and I have so many things I want to make" inspiration train so I thought I'd share not only my new Ally Skirt but also some inspiration. This skirt is made from a brick red denim from Fabric.com by Art Gallery Fabrics (did I know they made colored denim?) and brass snaps. 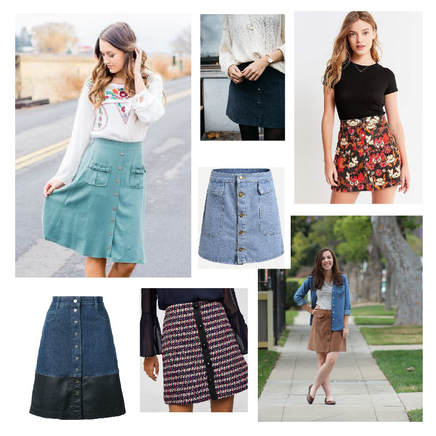 The Ally Skirt pattern is an easy and quick pattern to play with. It comes with 2 pocket options (flap and side seam) but it'd be really easy to add a patch pocket with ruffles (like the aqua cord skirt above) or an oversized pocket with flaps. I love the idea of adding contrast either by a solid placket on a print skirt or adding a leather border to denim (bottom left) like the $698 Stella McCartney version. Seriously, why not copy the good stuff and save yourself a few hundred dollars!
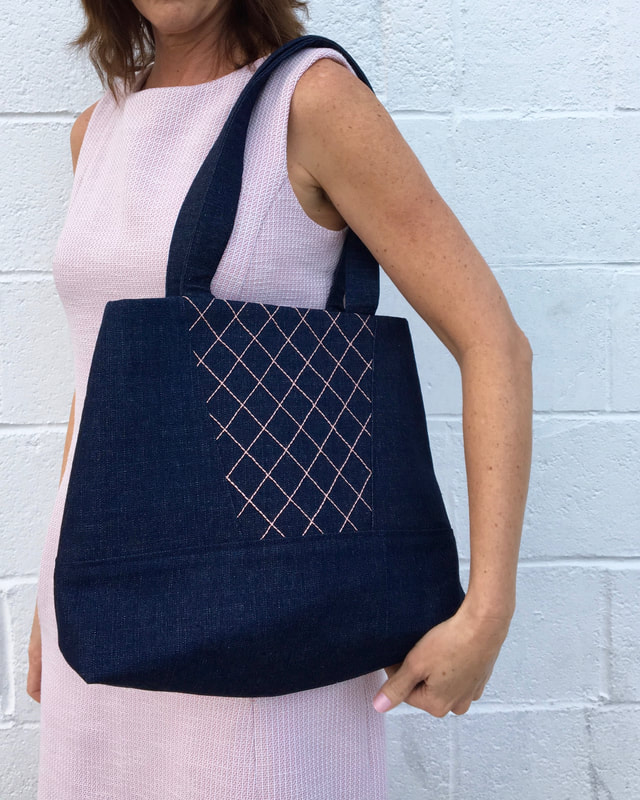
Here, I added a decorative machine stitch to the pocket. And in this version you can see the decorative stitches I added along the seams.
Be sure to check out my "Sassy Skirts" board on Pinterest for more. So much inspiration....not enough time, right?
What are you making? |

About MeHi! I'm Diane, a wife, mom, sewing teacher and pattern designer from sunny Southern California. I share my sewing adventures here on the Blue Dot Blog formerly Gatorbunnysews. For more info click here. 
Categories
All
Archives
October 2022
|


 RSS Feed
Proudly powered by Weebly