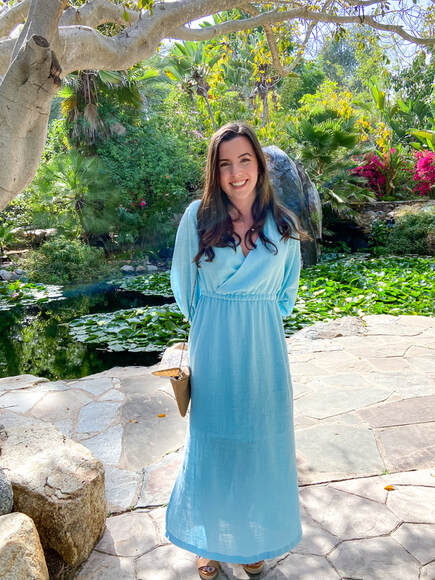
 A bright blue, breezy dress for a girl with a beautiful smile is the way to kick off summer sewing, right? I really enjoyed making this blue gauze dress for my daughter and I think she felt good about having something pretty to wear out after having so many months in, It's a simple and fun make and easy enough for a beginner or if you need a dress quick! 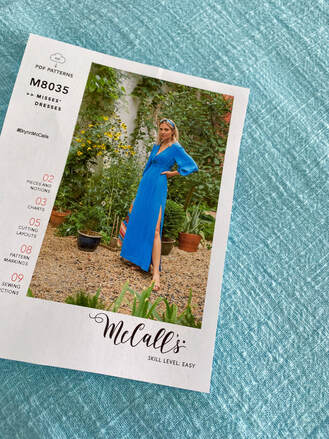 I used McCall's 8035 and this was my first time trying their PDF patterns. Now I sew with PDF patterns all the time (needless to say) and also with the Big 4 but I have to say I don't recommend using Big 4 PDF patterns. This printout was 55 pages!!! Just for the tile! I know one of the things we indie designers take lots of time on is the layout of our tiles because time and paper are precious resources. Also, there was no test square anywhere on the pattern so I printed out the skirt pieces and verified the finished measurements on the pattern to be sure my settings were right. That said, otherwise it was a good pattern. She chose a cotton/rayon gauze for the dress I got from Stylish Fabric on Etsy. I have to say this fabric is wonderful! I don't think it was even $8 per yard and it's soft and drapes a little bit closer to the body than some gauzes. It comes in lots of colors and washes really well.
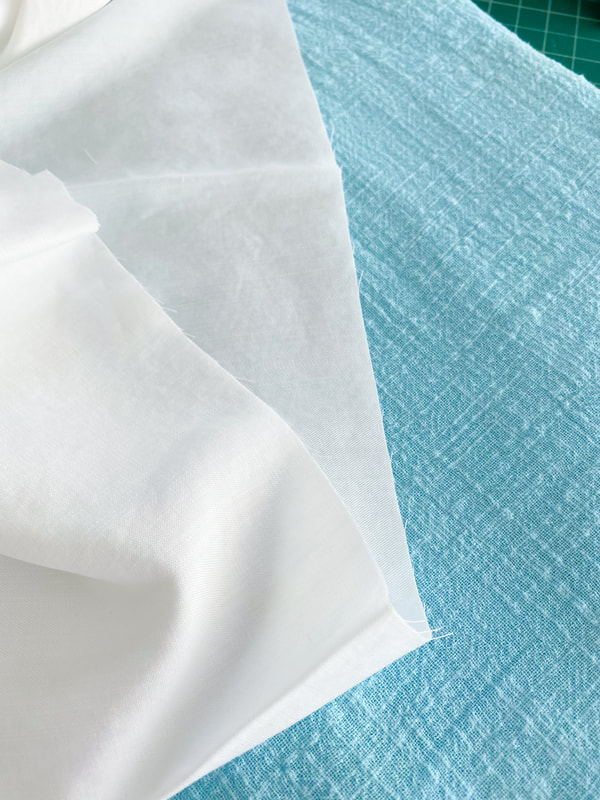
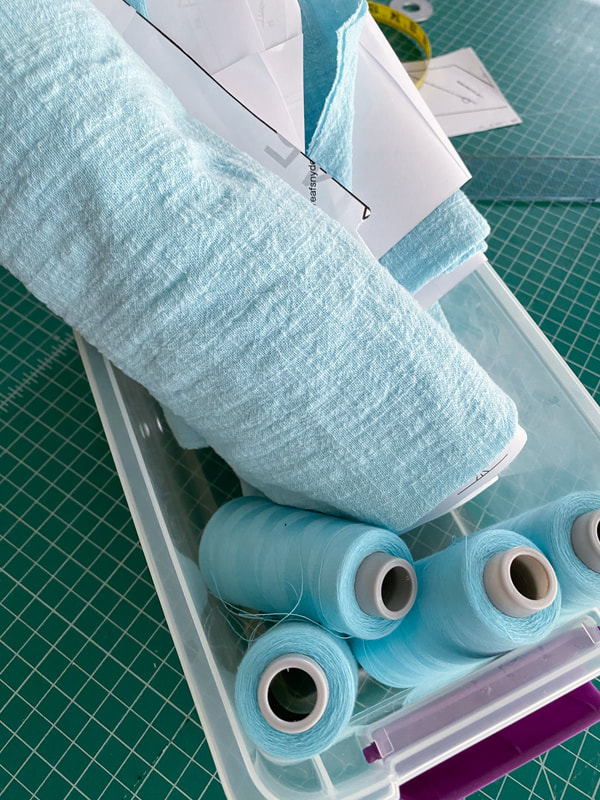
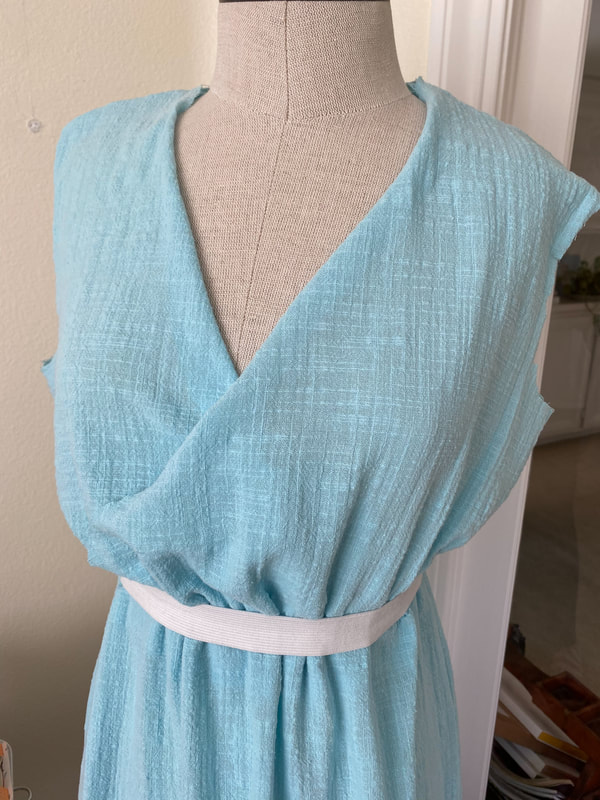
Lining cotton garments always send me into a quandary because most typical linings defeat the purpose of why we wear cotton garments. I decided to use this very lightweight white challis and it turned out to be the perfect option. I lined the bodice and half of the skirt (lots of maxi's are lined just to above the knee these days) and left the sleeves sheer. By complete luck, I had the perfect color serger thread and these days I've been cutting projects ahead and grouping them by serger color. Don't we all hate the serger rethread? The pic on the right shows where I was in construction for the first fitting. I basted just the bodice and skirt together (no lining) and wrapped the elastic around her to make any changes. I ended up shortening the bodice slightly and bringing in the side seam 1/4" on both sides. I also added a slit on one side. 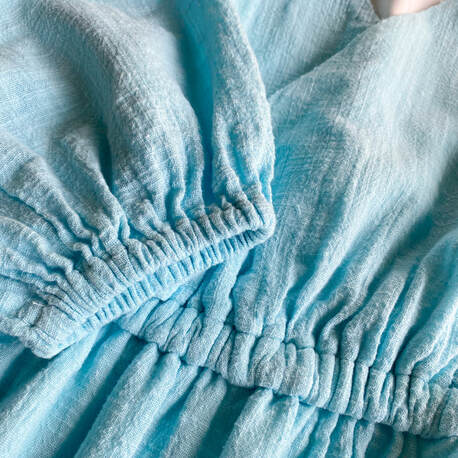 I prewash all my fabrics before I sew them with no fabric softener. The extra stiffness in the fabric helps with accurate sewing and crisp ironing. But after I finish the garment I do wash with softener. The stitches disappeared and the texture of this fabric got so yummy after washing. I purchased several gauzes this spring to see what I liked, and I was impressed by this one partly because when I press it, it still retains the "gauzy" texture. 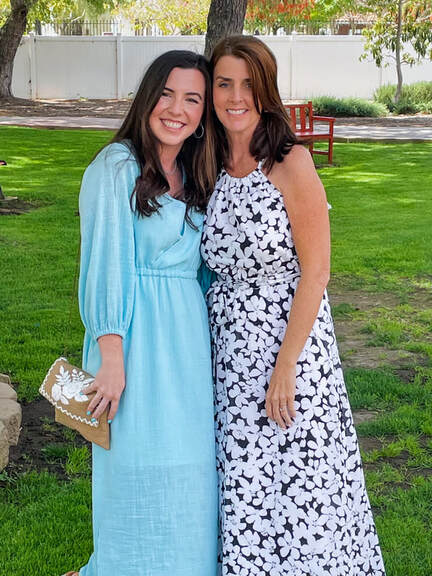 Mother daughter day! I'm wearing a self drafted dress I made about 6 or 7 years ago that I still love. Lots more projects on the sewing table. I'll share soon! Diane 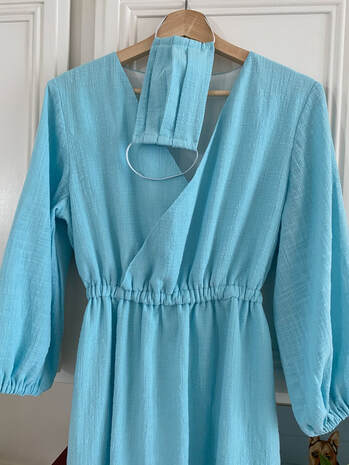
1 Comment
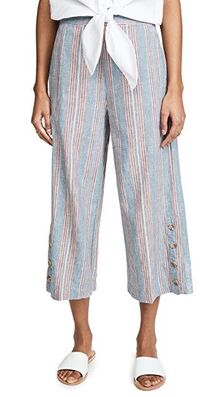
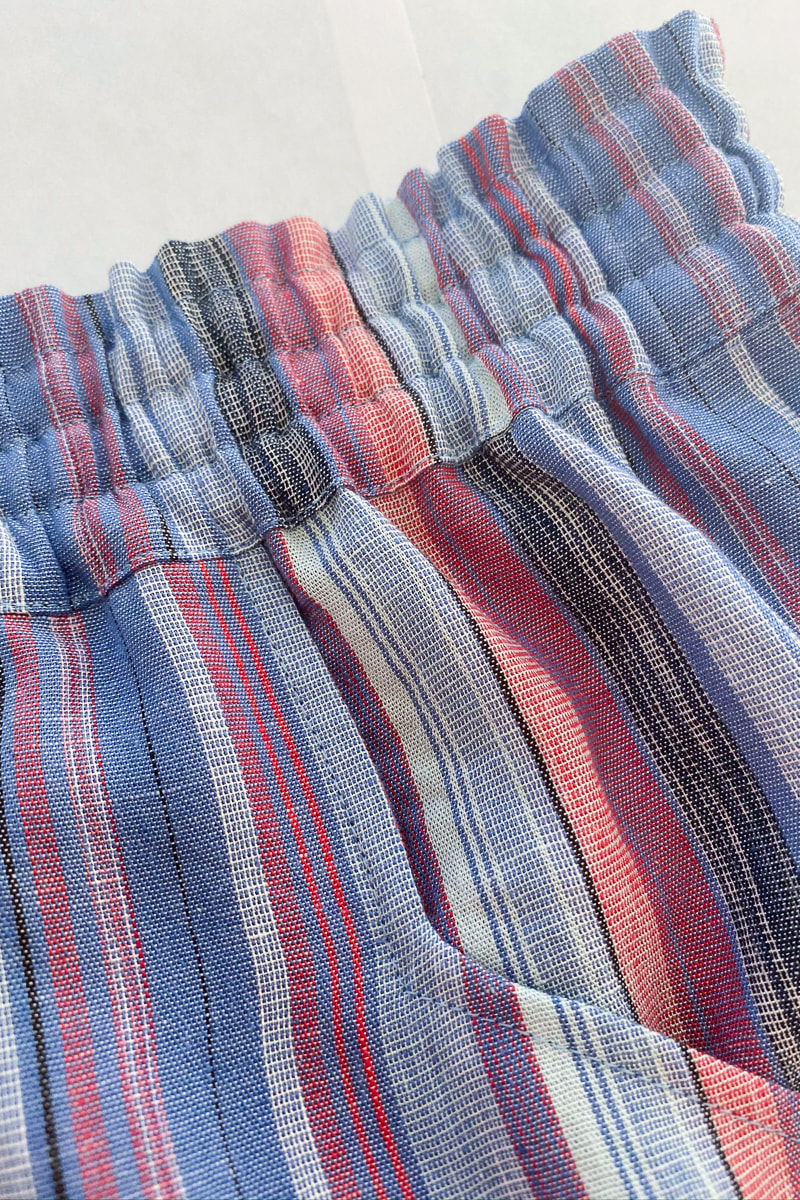
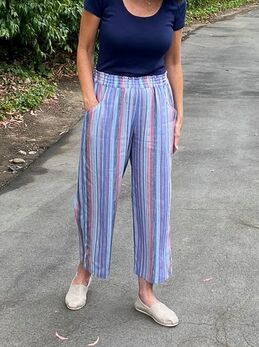
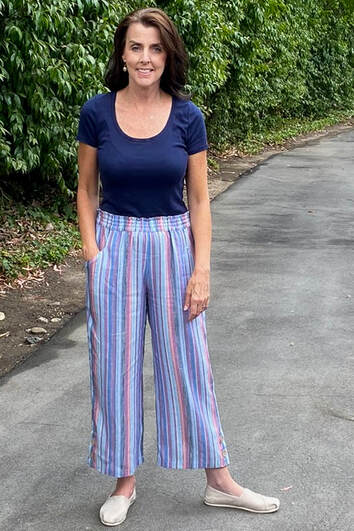
 A sewing project can start forming from different inspirations. Sometimes it's a fabric, or a need I have in my closet but in this case it came from ready to wear. I've seen some adorable striped pants around and couldn't wait to make my own.
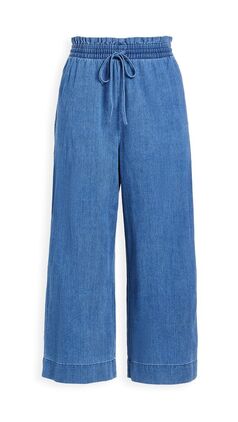
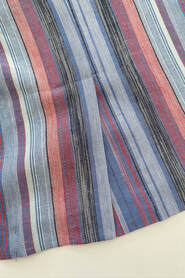
These pants are from Madewell and since I love elements of both I combined them into one pant. I added a button placket at the hem and made a channel elastic waistband. These are easy additions to an already simple pant, but the details really make it special. 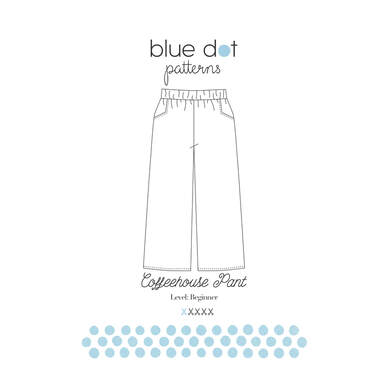 I chose a linen/rayon blend uneven stripe as the fabric and paired it with the Coffeehouse Pant pattern. Here are the changes I made to get the look I wanted:
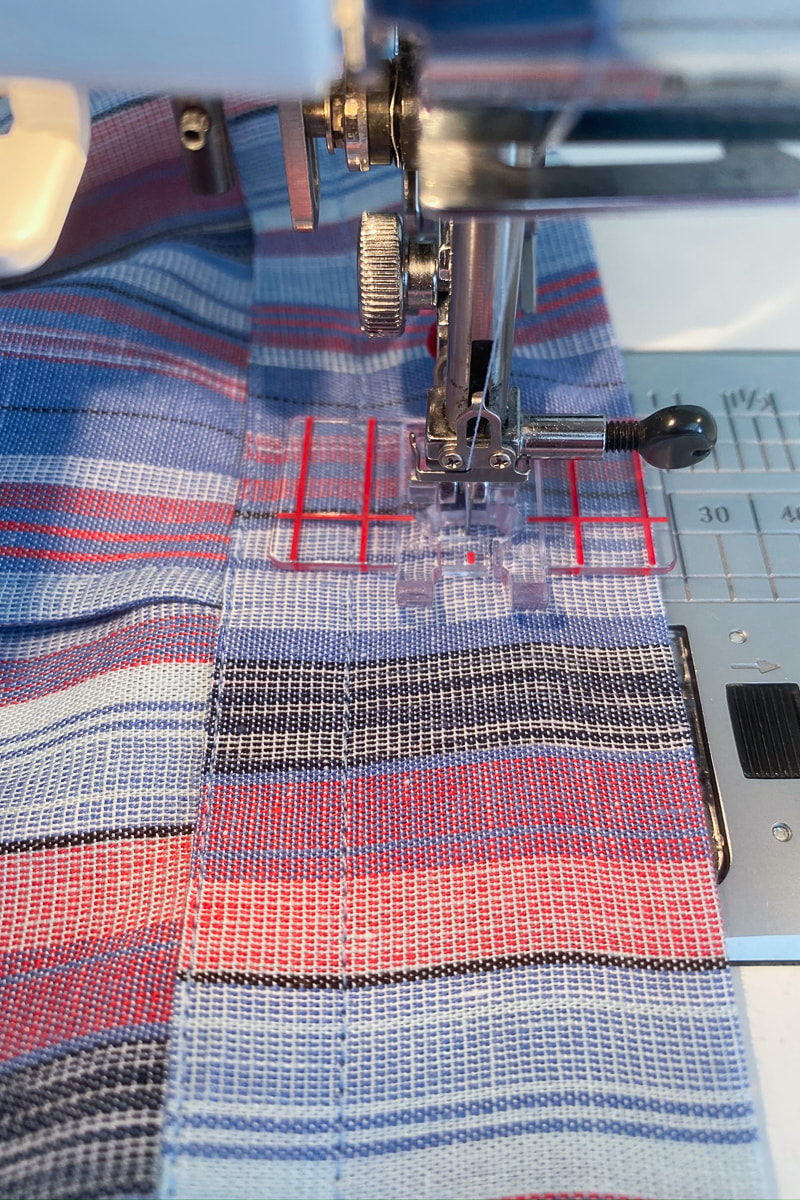
I was able to use the waistband pattern as is and just added 3 rows of stitching each 1/2" apart. I used this nifty seam guide foot I have for my Janome machine to keep all the channels even. I'm really happy with how it came out and the band is really comfortable.
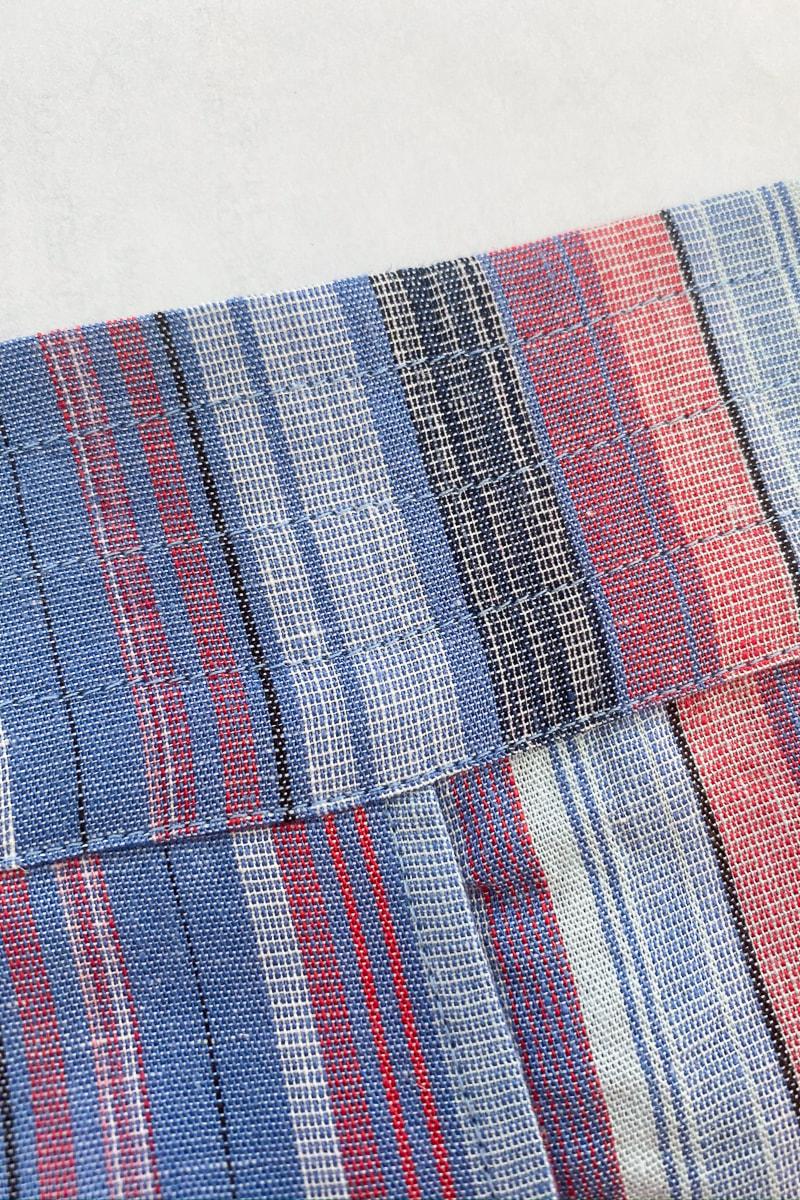
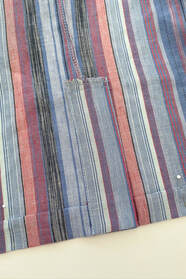
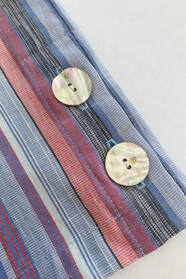
To make the placket, I added an extension at the outside hem on both the front and back pieces.
I'll be adding a blog post soon on how I worked with the uneven stripe. It can be done, so those of you who shy from these fabrics, don't dismay because they can be tamed. Stay tuned!
The Coffeehouse Pant PDF pattern is combined with the Morrison Top/Dress PDF pattern in a "Summer Bundle" for just $15! Happy sewing, friends! I hope you're all well. Diane  The summer sewing continues with the first maxi I've made in quite a while even though I wear them all the time. The Morrison Top and Dress pattern has turned out to be the basis for this summer's wardrobe. It's easy, quick and since I'm home most of the time right now, comfortable. 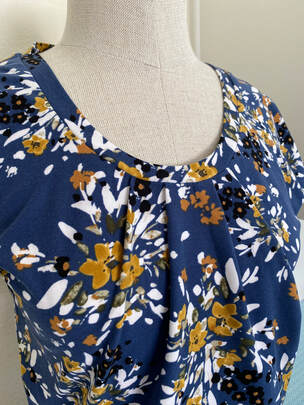 I purchased 2 yards of this double brushed poly online with the idea of making a dress or jumpsuit. When I got it I figured it might be too much print for a jumpsuit (plus how did I think I'd get a jumpsuit out of 2 yards?) and better in a dress. I had just enough for a maxi, whew! 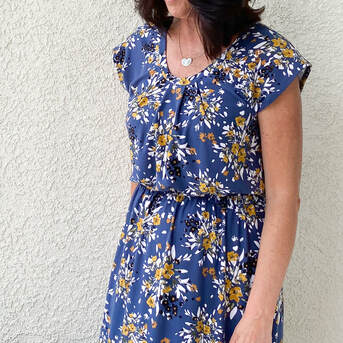 I measured my favorite maxi and made the skirt the same 41" length. After cutting, it went together in under 2 hours so it turned out to be a satisfying make. The total project was less than $20 because I already had the pattern (of course, but it's $10 on the website) and the thread. It will also travel well as this fabric doesn't wrinkle. What a dream! 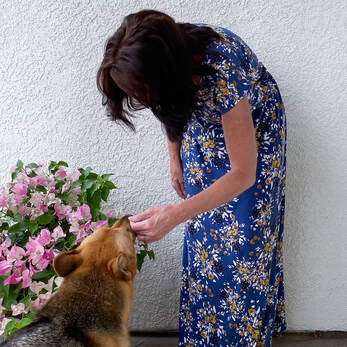 I did end up making that jumpsuit and I'll be sharing with you very soon!
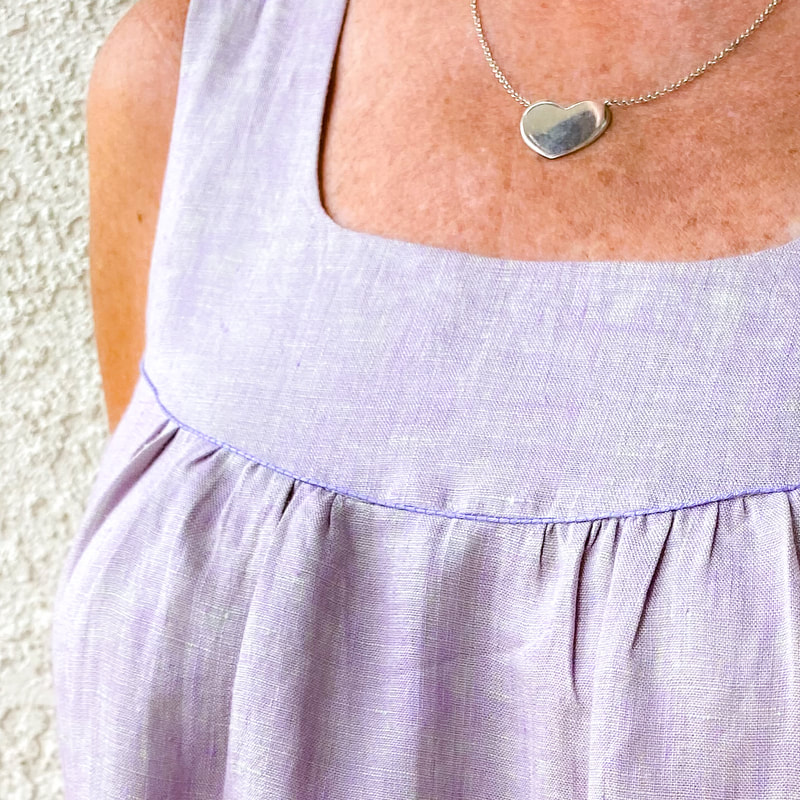
Be safe friends! Diane 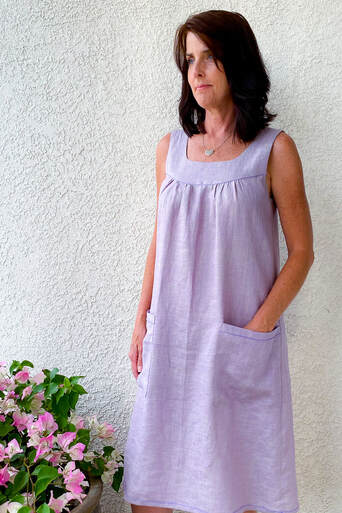 Once it starts creeping into the 90's here, I begin dreaming of summer shift dresses (check out my Summer Frock Pinterest Board), The ideal dress is comfortable in the heat, versatile enough to work in (water plants, sew and run errands too) and look good enough to go out to dinner because let's face it, who wants to cook when it's this hot?! Enter the Margo Dress!  As many of you know, one of my goals as a pattern designer is to create versatile patterns that can be used over and over. It's so much easier to start with a base pattern that you know works and use it as a jumping off point for creative and unique pieces. The Margo Blouse is one such pattern. 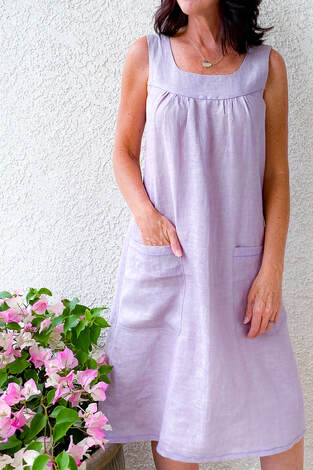 I used 2 yards of iridescent linen from my stash and coordinating DMC embroidery floss for the contrast stitching. Here are the changes I made:
That's it! Making the dress shorter or adding tiered ruffles would also make a beautiful romantic dress for the summer. Embroidery or lace added to the yoke would make a fun, bohemian feel. So many options! I have a Margo Blouse Pinterest board for even more ideas.
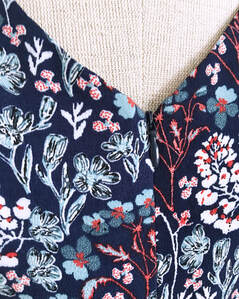
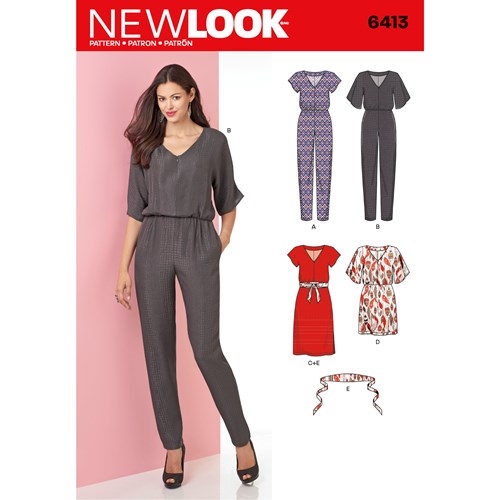
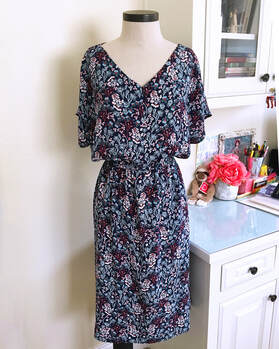
Happy Sewing, Friends! Diane 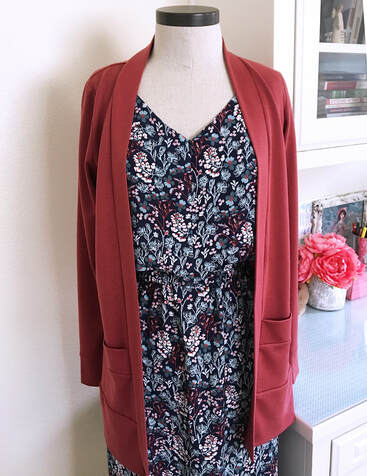 I just finished a dynamic duo to add to my summer wardrobe. Here's New Look 6413 and of course the beloved Blackwood Cardigan by Helen's Closet in a combo that I got really lucky to find. I've had my eye on this rayon crepe print at Fabricland (my local fabric store in O.C.) and was fortunate to find a dreamy lightweight french terry in a beautiful rose that goes perfectly with the print. When this happens...you have to bring both fabrics home.
This dress is really simple and perfect for a beginner or anyone that needs a quick project. It calls for a front bodice zipper which I thought would be odd but actually looks really nice. It's completely unnecessary for the dress (it would pull over without it) but you would need to put it in for the jumpsuit view. Since I made this as a sample for the fabric store I included it so people could see the pattern as it's written. 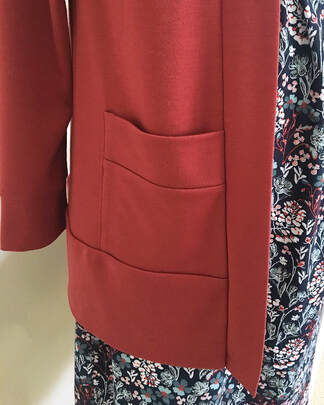 I don't think anyone needs another Blackwood cardigan review so i won't add one here but I've made 5 now if that says anything about it. But what I like about this one is the color. It's not a color I would normally look at but it turns out it goes with so many things in my closet! I probably have at least 3 other outfits for it.
Just a quick share today as I've got more dresses in the works.
Happy Sewing, Diane  Nothing makes me happier than when I see someone hack one of my patterns. I don't attach any pride to the pattern by expecting for the pattern to only be made as I first designed it. In fact, The Georgia Top is the perfect simple design to have at it. Now it's my turn... 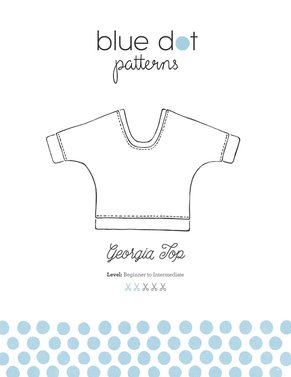 The cold shoulder trend is hotter than SoCal in August and Georgia needed to hop on that party wagon. This fan print rayon jersey came from my last haul from Craftsy. It's a cream background with peach colored Asian fans and is soft and cool for the warm summer.
This hack couldn't be easier and I think I finished sewing it in under 2 hours. It was one of those pieces I made in the morning and wore to my class in the afternoon. To start, I left the armbands and waistband off of view A. To make the cold shoulder I stitched the shoulder seam from the neck 2" and stitched the last 4" from the shoulder to the sleeve hem. I finished the opening by folding back the seam allowance and stitching in place. Seriously....that's it!  Because I want you to have fun with Georgia too, the pattern is 25% off now through July 4th!
Check out my Georgia Top Pinterest page with even more ideas! Have fun! Happy Sewing! 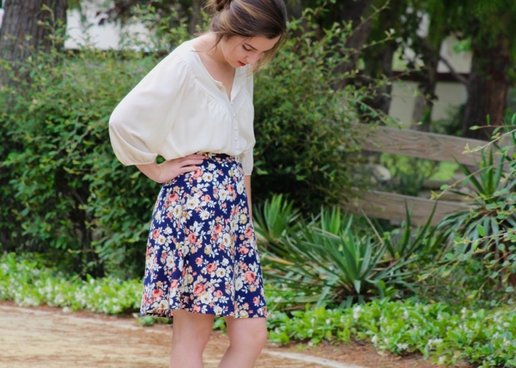 I set aside my selfish sewing for a bit to sew for my favorite girl. She's home from college and a girl needs something new when she comes home, right? I made a wrap skirt out of this rayon challis print she found at Joann. It was quick and easy and she's very happy. 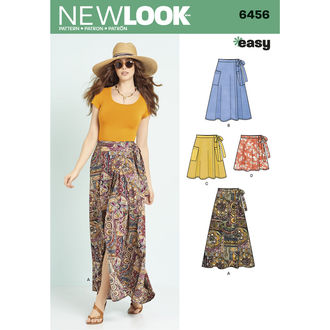 I used New Look 6456 and made View C and made no changes (not even to the length) and it's perfect. You really can't go wrong with a wrap skirt, they're an easy fit and easy to make. The fabric shrunk like crazy so I had a difficult time getting all the pieces out of the fabric. I think figuring out how to make the pieces fit took almost as long as making it. Cutting and sewing was under 2 1/2 hours and I only had a few square inches of fabric left over. Yay me! 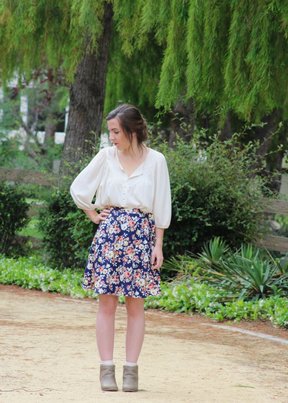 She's going away to work this summer and my plan is to make her another one before she gets back. Chambray maybe? I'm going to miss her so sewing for her will make me feel better. 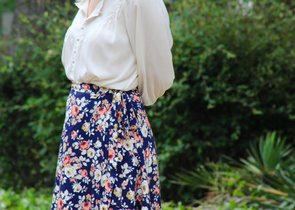 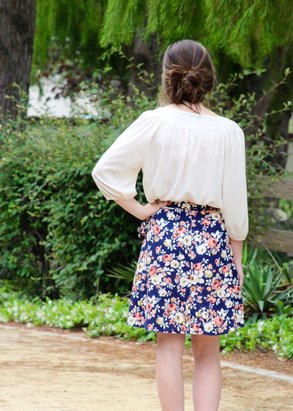 There's still so much more I've made and haven't blogged about. Coming soon!
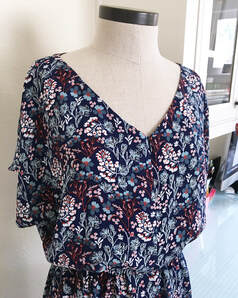
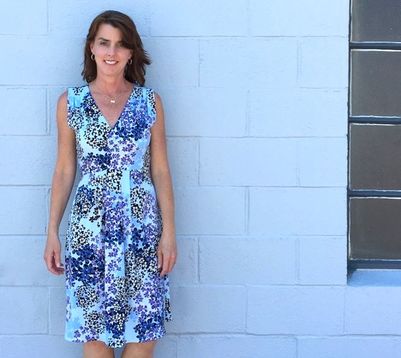 One of my students brought this fabric into class and I immediately fell in love! Not with my student (although she's wonderful and has amazing taste) but with the fabric. I thought about sliding it into my work bag when she wasn't looking or offering to buy it from her but instead she told me she got it from Craftsy and I was giddy to discover it was still available! Yay! For those of you that haven't purchased fabric from Craftsy, all of the their fabrics either come in kits or in precut lengths. I purchased a 4 yard cut so I still have enough for a blouse or shell.  I made McCall's 7381 View A in a size 12 straight out of the envelope but ended up making quite a few changes after I wore it the first time. This is a polyester/spandex knit and although I usually sew with natural fibers, I love the way this dress looks, feels and washes (which is a good thing since I purchased another knit just like it.) The dress calls for a woven fabric and has quite a bit of ease built in, so sizing down to a 10 would've minimized the alterations I needed (and the amount of time it took to take it apart!). 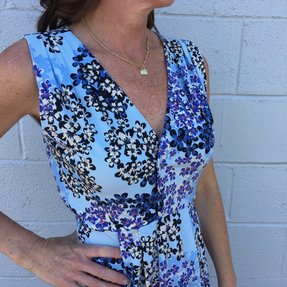 Here are the changes I made:
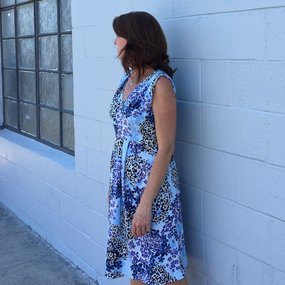 I'm happy I took the time to make the changes even though it took me almost as long to make the changes as it took to make the dress. Every time I need to make changes that require a lot of ripping out I spend days deciding if I should do it or not. I'm always happy when I take the time. "Unsewing" can be very discouraging but I highly recommend taking the chance sometimes. 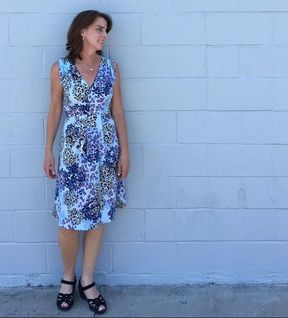 I've been sewing faster than I've been blogging so I have more to share with you. Summer sewing is in full swing and I couldn't be happier.
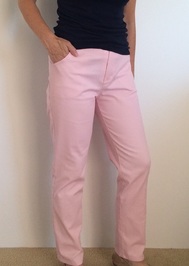
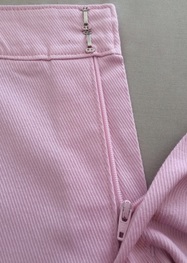
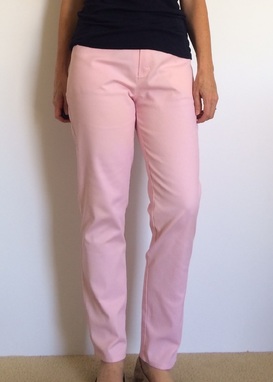 This is my last spring/summer make and it's taken me a while to post it. I bought this pink fabric last summer for a pair of pants but never got around to making them. There’s never enough time, right? So this year I made it a point to get to it even though it’s almost fall and I really won’t wear them much until the spring. I didn’t pay a whole lot for the fabric so I chose a new pant pattern and attempted a wearable muslin. 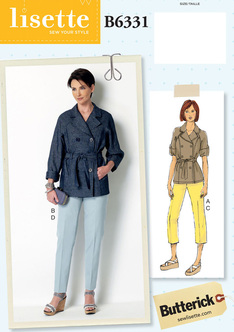 I used the Lisette Pattern 6331 by Butterick because I liked the narrow leg (there’s a cute jacket included in the pattern if you’re interested) and the opportunities for topstitching. There is a back yoke on the pants which makes me wonder if I should call them jeans or pants. They’re something like the Chevy El Camino. Is it a car or a truck?  I made all of my usual adjustments to the pattern which included adding 3/4” to the back rise and “scooping” out the crotch and redrawing the curve by copying the curve from my favorite pants pattern. This pattern has a straight waistband which almost never works for me so I ditched the waistband pattern entirely and used my own curved waistband. Typically when there’s a straight waistband on a pattern, the pants/skirt are drafted to sit all the way up to the waist, 80’s style. Now there’s nothing wrong with the 80’s (except for the red suede scrunchie boots I may or may not have worn) however, 1 1/2” lower at the waist would be more comfortable for me.
I don’t remember the fabric content of these pants but I can tell you it has ALOT of spandex and is quite stiff. The spandex thing is such a catch 22, isn’t it? We love how woven fabrics with stretch feel but it’s frustrating when a garment loses it’s shape after just a couple of hours. Don’t you hate the jeans you have that fit great in the morning but get the “baggy butt” by lunchtime? This is only part of my fit problem, however, so I still need some adjustments.
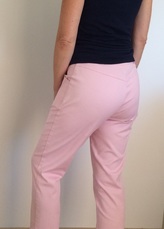
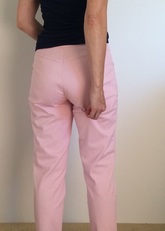
You can see in the photo that there’s too much fabric at the top of the back thigh. In the future, I’ll take out 2” horizontally at the top of the thigh (I know the pic on the right is a sketchy photo and I have no pride, but I wanted to show the problem in the hopes of helping other sewists, right?) and add the 2” back in at the hem before I make the next pair. The adjustment will look like this:  If I make these pants/jeans again I’ll change a couple of things:
I have a Dover Jacket that I turned into a dress under the machine right now. What are you sewing? 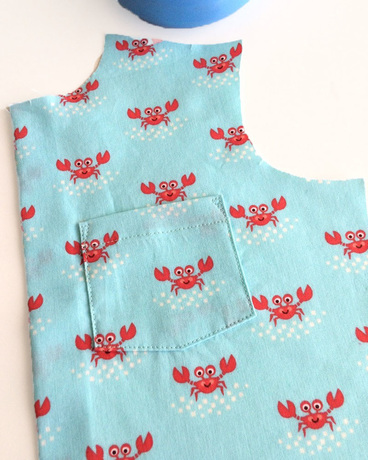 I made the tiniest little boy shirt out of this fabric and since the shirt was so small, I wanted to minimize the busyness of the pattern by matching the pattern on the pocket. Actually, if I were to be completely truthful, I really wanted to match the pocket because I love matching patterns and probably would never have another chance to line up "googly eyes". Learning to match a pocket is quick and this method works for prints, stripes as well as plaids. Here's how to do it: 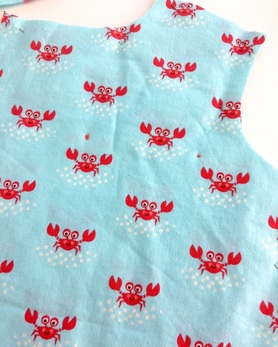 1. Transfer pocket placement dots to front of shirt. 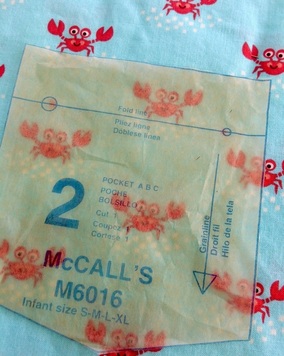 2. Place pocket pattern on the shirt so dots match. 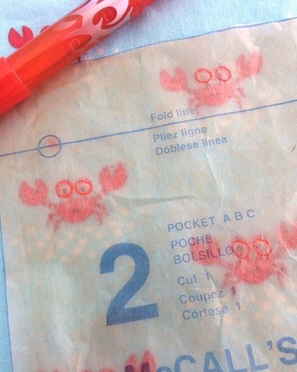 3. Trace design of fabric onto tissue ( I marked the "googly eyes" of the crab using a water soluble marker just in case it bled through the tissue and onto the fabric. This may or may not have happened in the past. Hmmm.) 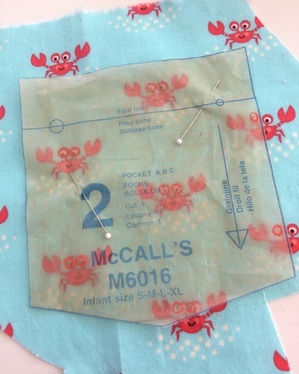 4. Place pocket pattern over shirt fabric, matching "googly eyes". Cut out the pocket. Here's how to prep the pocket and stitch it on: 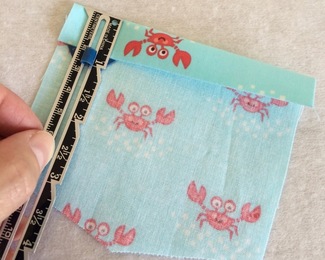 1. Fold over hem allowance. 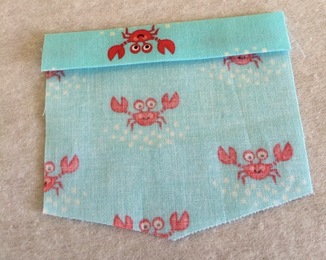 2. Fold under 1/4" under hem allowance for clean edge. 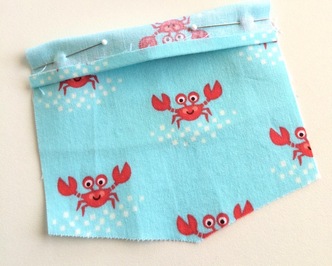 3. Fold hem back along the foldline, right sides together. 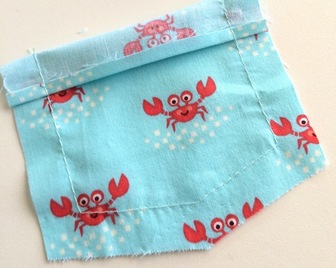 4. Stitch along hem allowance line (in this example it's 5/8"). 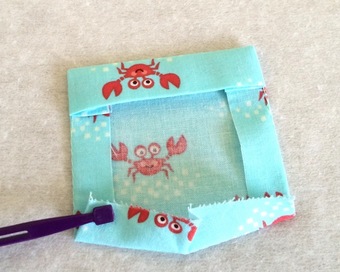 5. Turn the hem so the right side is out and press in along stitching line. Using the line as the guide insures that the pocket is even. 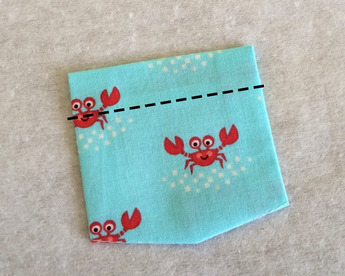 6. Stitch along top of pocket at hem (I completely forgot to photo this part...we will use our imaginations and pretend it's there, uh-hem.) 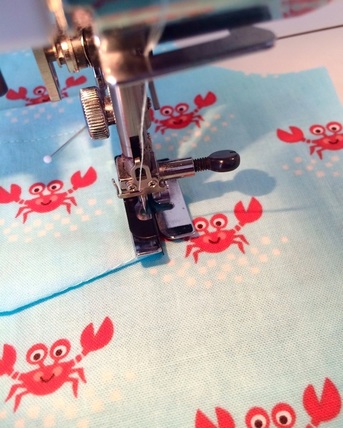 7. Place pocket on shirt, pin in place and stitch (I use my ditch foot for a really clean line.)  There's our pocket all ready to go! |

About MeHi! I'm Diane, a wife, mom, sewing teacher and pattern designer from sunny Southern California. I share my sewing adventures here on the Blue Dot Blog formerly Gatorbunnysews. For more info click here. 
Categories
All
Archives
October 2022
|


 RSS Feed
Proudly powered by Weebly