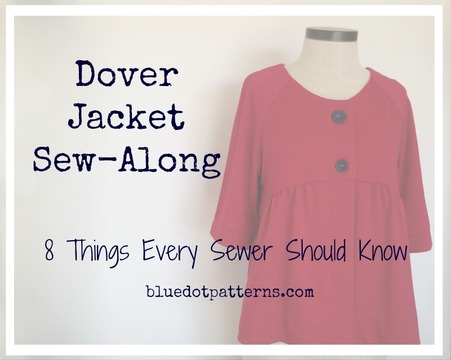
 We are on to day #2 of the Dover Jacket Sew-Along and today we are prepping to sew. By now we have gathered together our pattern, fabric and notions and we are ready to go. Today we will print the pattern, tape it together, pin, cut and mark our pattern and apply the interfacing. Start by printing out the test square page of the Dover pattern package, page 29, to verify your printer settings are correct. Be sure the printer is set to print at "actual size" and not "fit to page". When your printer settings are verified, print pages 11-40 for just the pattern pieces or all pages if you want a hard copy of the instructions. Taping together a PDF pattern can be daunting but really it's a whole lot faster than finding time to get to the fabric store and pick up a pattern OR a lot less expensive than having it shipped (I'm not going to even get into the instant gratification a PDF offers.) I have a tutorial here on the fastest way to tape together the PDF. 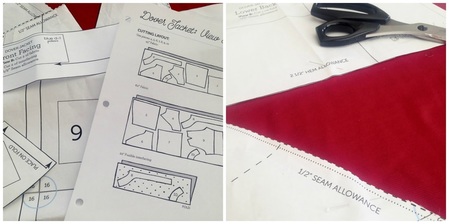 After everything is all together, cut or trace the pattern on the size you have chosen and pull out the instructions for View B. Blue Dot Patterns have separate instructions for each view of the pattern. Follow the pattern layout for the width of fabric you are using and pin all pieces down making sure to keep grainlines parallel to the selvedge and "cut on fold" pieces along the fold of your fabric. Cut all of the pieces out (but keep your pattern pieces pinned on to your fabric.) Sewing skill #1: Marking Pattern Pieces This is an essential step and in my experience as a sewing teacher, the one that students most want to skip. I can tell you, taking the time to mark your pattern now will save lots of heartache and time in the end. There are a myriad of ways to mark and I'll show you a few here. Notches: The short lines along the edge of the pattern are called "notches". On most commercial patterns, notches are triangle shaped but on Blue Dot Patterns they are simple straight line 1/4" long. To mark, take the end of your scissors and clip just to the end of the line. In addition, be sure to make a clip at all center fronts and center backs of any project (see photo on the right). These clips will help you line up the pieces throughout construction. 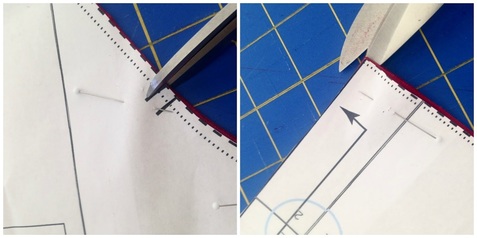 Tracing paper: One way to mark stitching lines, darts, pocket placement, buttonhole placement or any number of markings on the body of a pattern is tracing paper. It's a method that's been around forever and the supplies are really quite inexpensive. You'll need tracing paper (paper with chalk on one side, sold by the package) and a tracing wheel. The wheels come either smooth or serrated. I find the serrated leaves a more visible line than the smooth but you definitely need the smooth wheel for delicate fabrics that could be damaged by the serrations. To mark: Place the tracing paper chalk side down on your fabric and under your pattern piece. Take your tracing wheel and firmly run the wheel along the marking lines on the pattern. For Dover, this method works well for buttonhole markings and topstitching lines. 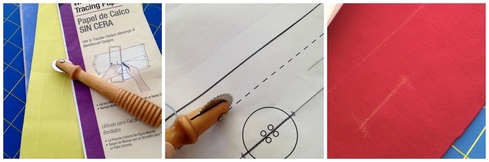 Chalk: Another option for marking patterns is chalk. It comes in lots of forms including pencils and squares. I will be showing the Chaco Liner 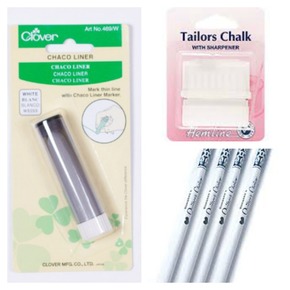 To mark the topstitching lines and buttonholes, measure how far in the marks are on the pattern and using a ruler, transfer the marks to the fabric by rolling the liner along the ruler. Often times, this gives a sharper mark than tracing paper. 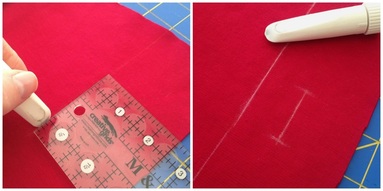 Sewing Skill #2 - Interfacing What is interfacing and why do we want to use it? Interfacing is a stabilizer that is added to a fabric or garment to provide structure or stability. We need it in many places including: shirt plackets, collars, facings, hems and anywhere fabric needs to be shored up. It comes in different forms but are primarily divided into fusible (iron on) and sew in. Both are used for different reasons but whenever I can use fusible, I do. 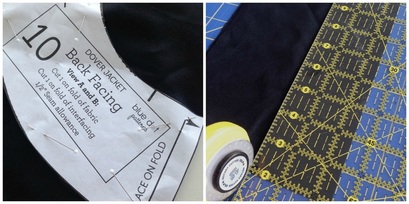 Cut facing pattern pieces out of interfacing and cut interfacing strips 2 1/2" wide for the hem and 1" wide for the sleeve. 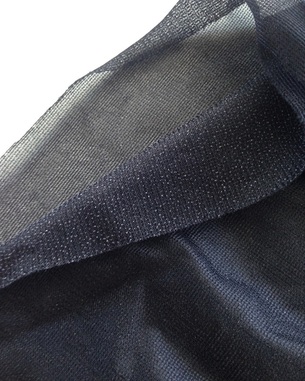 Using a light iron, place the bumpy side of your interfacing pieces down on the wrong side of the facings, lining up the edges evenly. Place a pressing cloth or thin piece of fabric over the interfacing and iron gently on the cloth. It's best to use an up and down gentle motion with the iron (pressing) as opposed to pushing down and moving the iron back and forth (this can make your fabric stretch and your interfacing move). The strips of interfacing for the hems will be used later 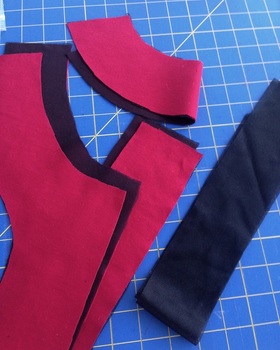 If you have questions, leave a comment and I will do my best to answer them.
Whoo-hoo! We are done for the day! Day #3 of our Sew-Along will be on February 19th. See you then!
0 Comments
Leave a Reply. |

About MeHi! I'm Diane, a wife, mom, sewing teacher and pattern designer from sunny Southern California. I share my sewing adventures here on the Blue Dot Blog formerly Gatorbunnysews. For more info click here. 

Categories
All
Archives
October 2022
|

 RSS Feed
Proudly powered by Weebly