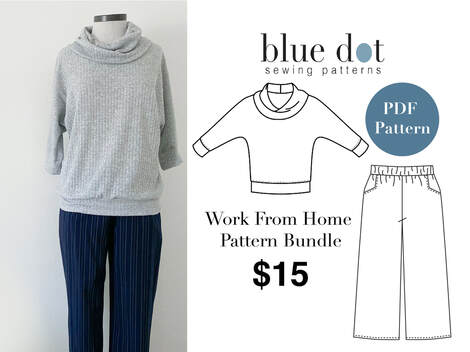
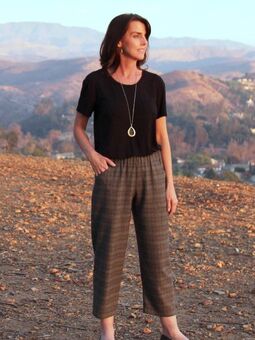
 I'm happy to announce for December the new "Work From Home" Pattern Bundle. The bundle includes both the Georgia Top (including the brand new "Cowl Expansion Pack") and the freshly updated Coffeehouse Pants. These easy to sew patterns are great if you're looking for a quick pick me up to your work at home wardrobe. Also, if you're a beginner and you're ready for your first mini wardrobe, this set is for you. The 6 files included are: Georgia Top fully illustrated sewing instructions with tiled print at home pattern. Georgia Top Copy Shop Files (2 page A0/US compatible printing) Georgia Top Cowl Neck Expansion Pack. Coffeehouse Pants fully illustrated sewing instructions, tiled/layered print at home pattern Coffeehouse Pants Copy Shop File ( 1 page US printing 36"x 48") Coffeehouse Pants Copy Shop Files (2 page A0 printing)
Enjoy the bundle and be sure and show us what you make! #coffeehousepants #georgiatop #bluedotpatterns.
Happy Sewing!
0 Comments
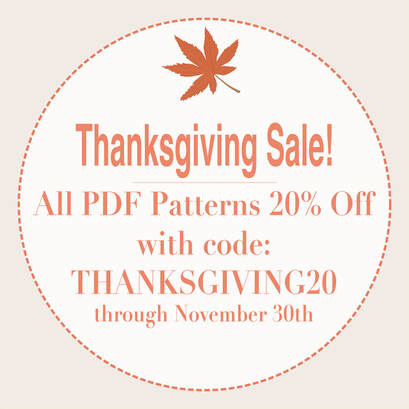 Thanksgiving in the U.S. is here and to celebrate, all PDF patterns are 20% off with code THANKSGIVING20.
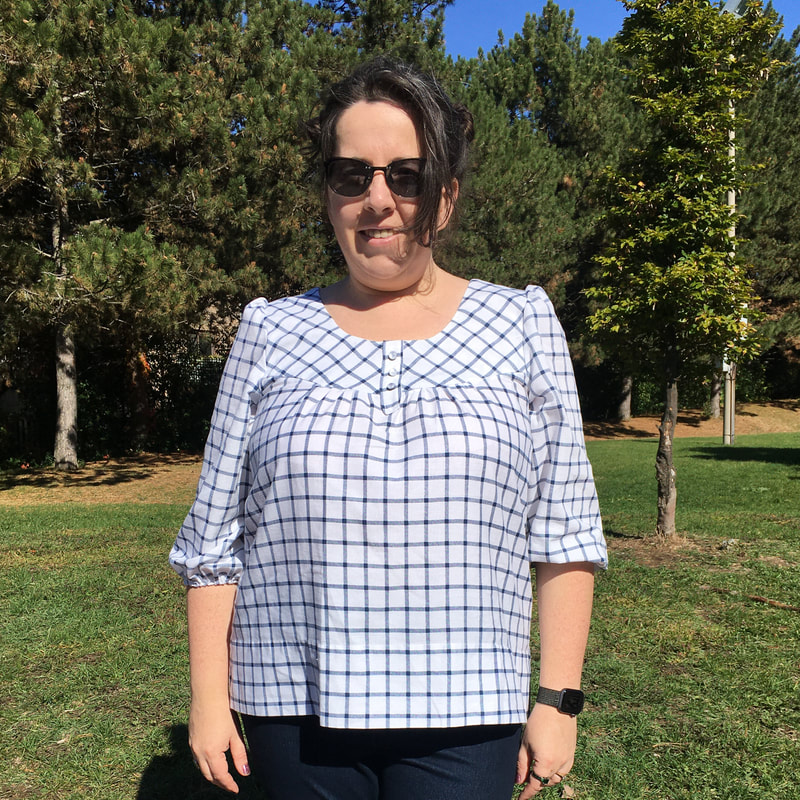
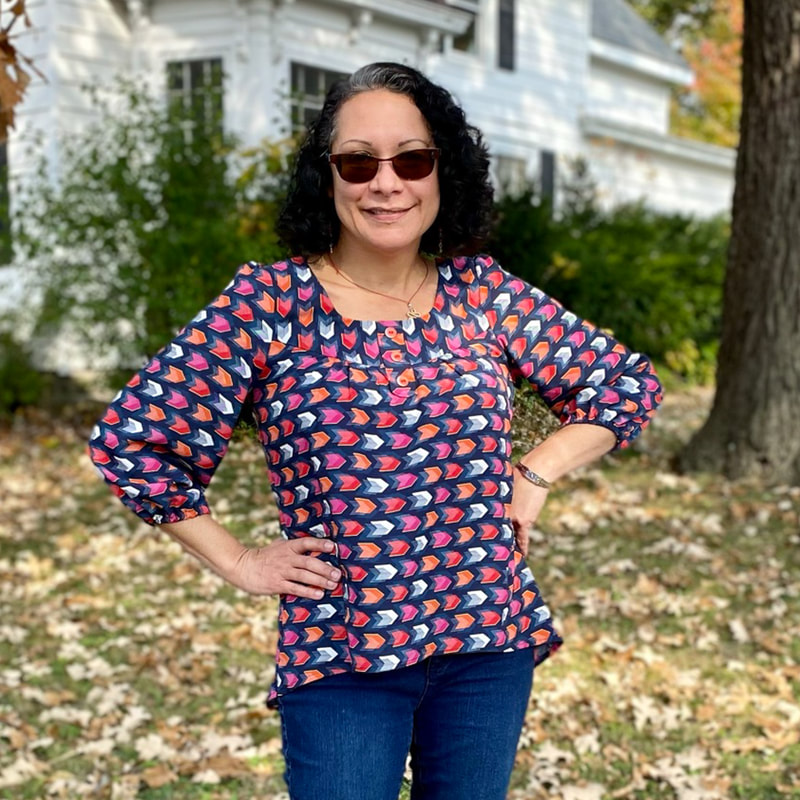
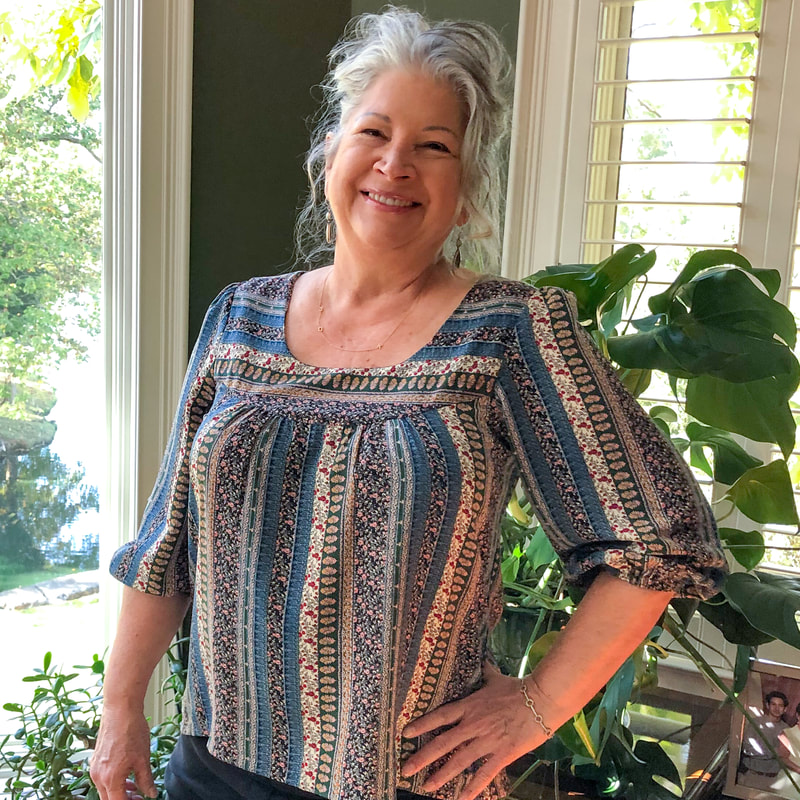
And may your Thanksgiving be a time of celebration, love and of course some sewing time! I'm thankful for your support of my business all these years! Thank you, Diane As a designer, the big moment in the pattern production process is testing. All the time and thought that goes into a pattern is finally brought out into the light and gets to be used by those that I've been creating for. I'll admit I get nervous but it's also exciting to see something that's been "my baby" brought to life. The Margo Blouse Pattern Update testers brought their A-game! They brought sewing expertise (which helps me fine tune the pattern), creativity and a generous spirit. I'm humbled by the time and attention these makers gave to me. Thank you to all of you! I have for you just a sample of the photos and projects the testers completed. Here they are (left to right): Angie of PocketfulofRainbows: She made View B in white eyelet showing how nice the pattern would be in lace. Margo of CreatingInTheGap: This color is amazing and the burnout fabric adds even more interest. It's a solid blouse with a twist! Danielle of sewciallibery: Danielle did something with her Margo I never even thought of! She used one fabric for the yoke and sleeve and another for the body. Brilliant and it would work as a scrap buster! Deepthi of MadeByDee: She made her Margo in a flowy rayon which is the first fabric I think of for the Margo blouse. At her suggestion I lengthened the short sleeve version 1 1/2" in the new update. Thank you for the suggestion Deepthi. Genya of WishIfYouCan: Genya made her blouse really special by taking the windowpane plaid and cutting it on the bias for the yoke which is a creative touch that makes it special. Jacqui of MadSewingScientist: She used a crepe de chine in her version and ran the directional print crosswise on the yoke. I love that print. Jenni of JenniSewsSomething: Jenni makes lots of projects that have a vintage feel to them and she brought that esthetic to her Margo here. Beautiful Jenni!
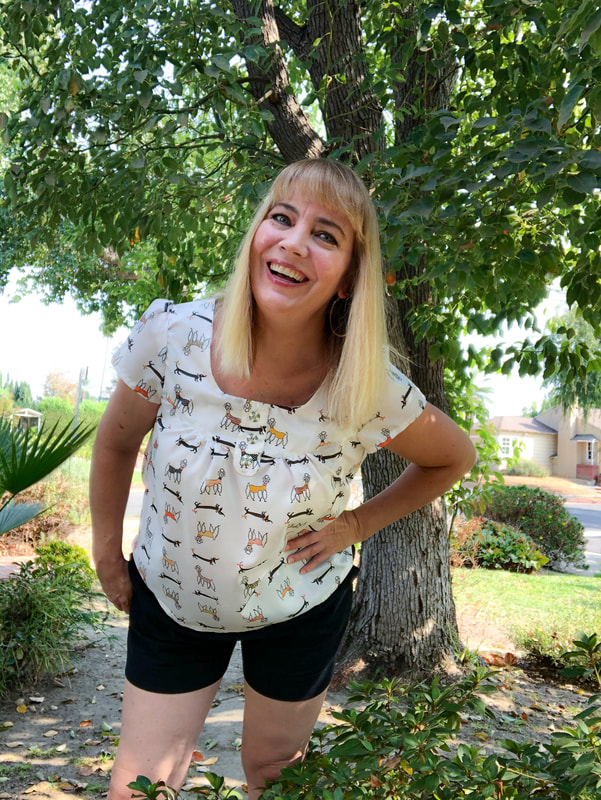
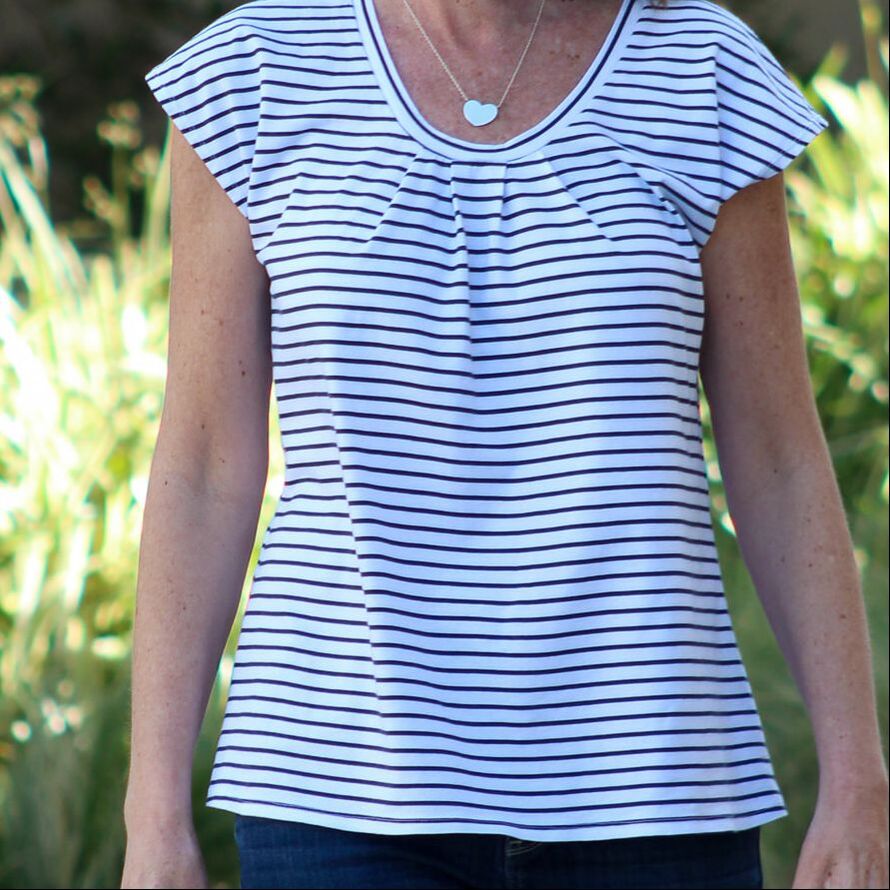
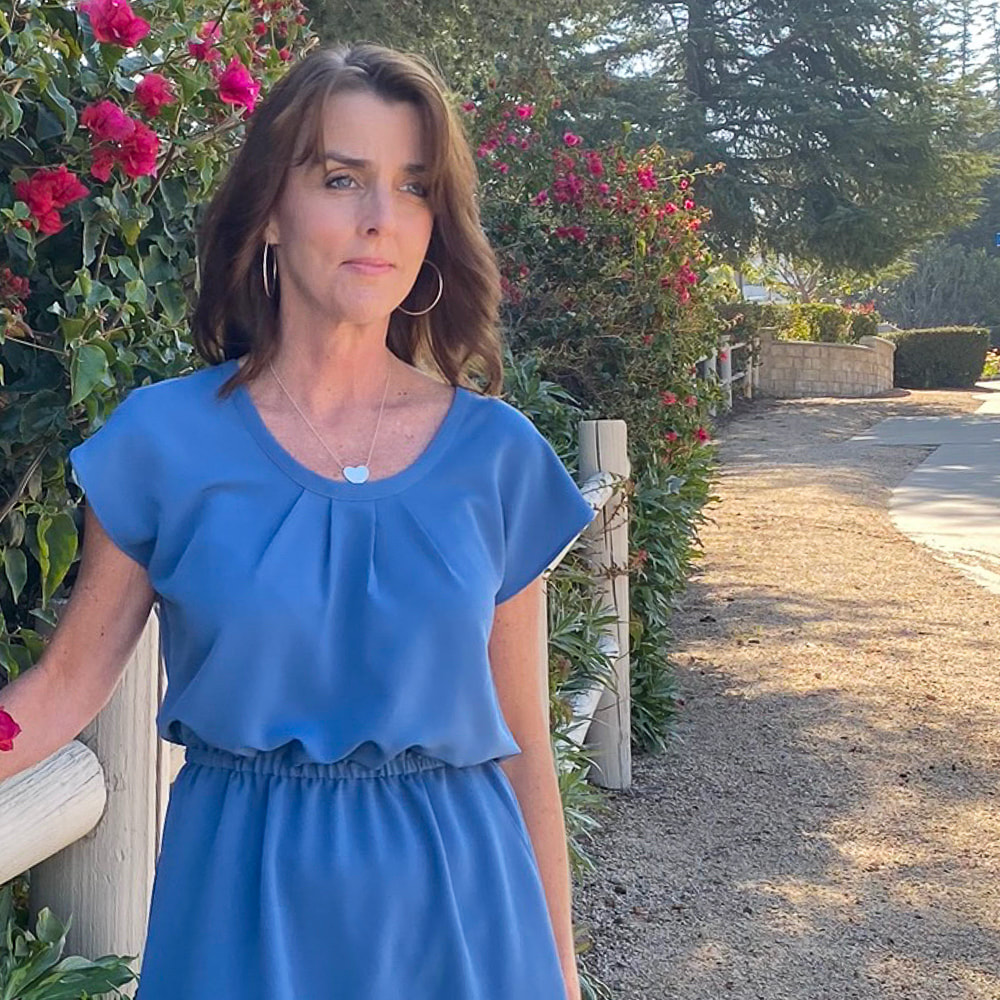
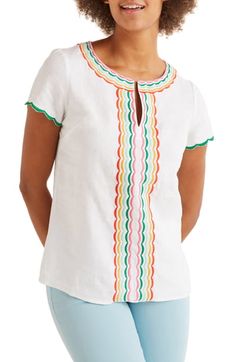
Kirsten of ReadRunSew: What can I say? Kirsten chose a fun dog print and made a whimsical Margo. This fun blouse goes right along with her fun personality. Vicki: Look at what Vicki did with this stripe! I didn't include it here, but she made another Margo during the test in a stripe. I love the 70's vibe! Thank you all for your help! I couldn't do it without you! The Updated Margo Blouse is in the store and if you join our new Facebook group, the BDP Sewing Collective, you get a coupon code for 30% off all patterns in the month of November. Enjoy!  Margo from Creating in the Gap One of our best-selling patterns just got a refresh! The Margo Blouse PDF pattern now comes with a few new features: Extended Sizing: Sizes 4-22 Layered Printing - print all sizes or just one! Improved Fit More Illustrations Over the next few days I'll be sharing photos from my lovely testers and ideas for your own Margo Blouse.
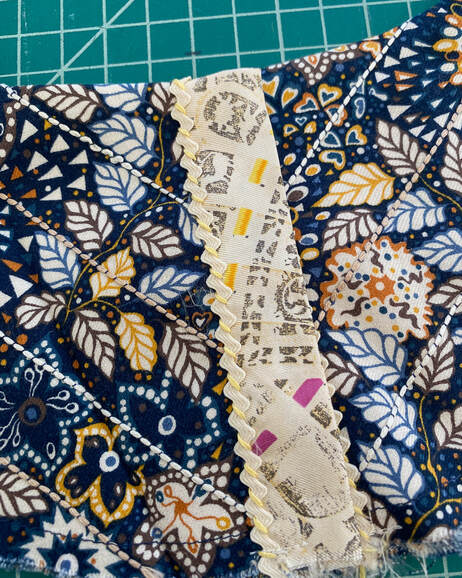
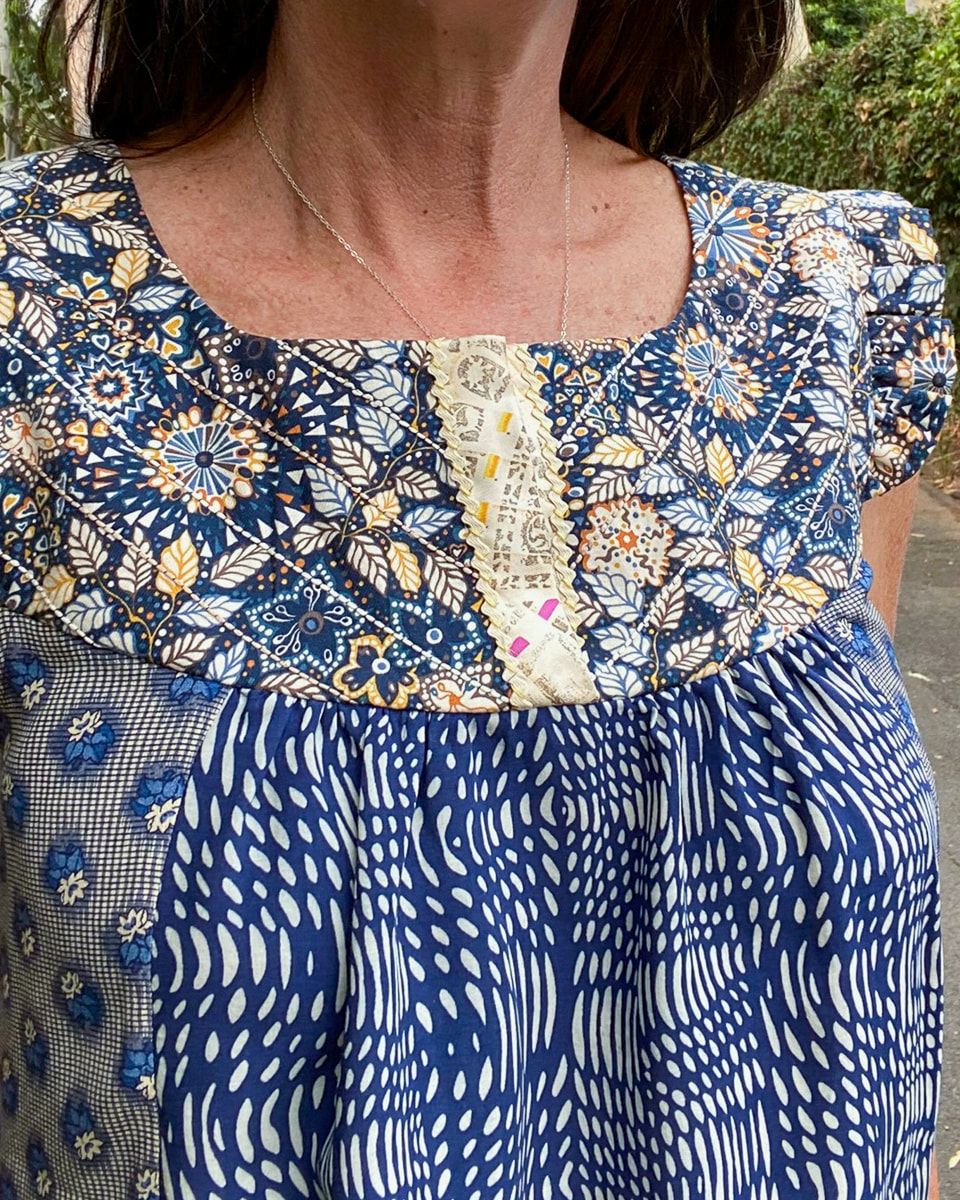
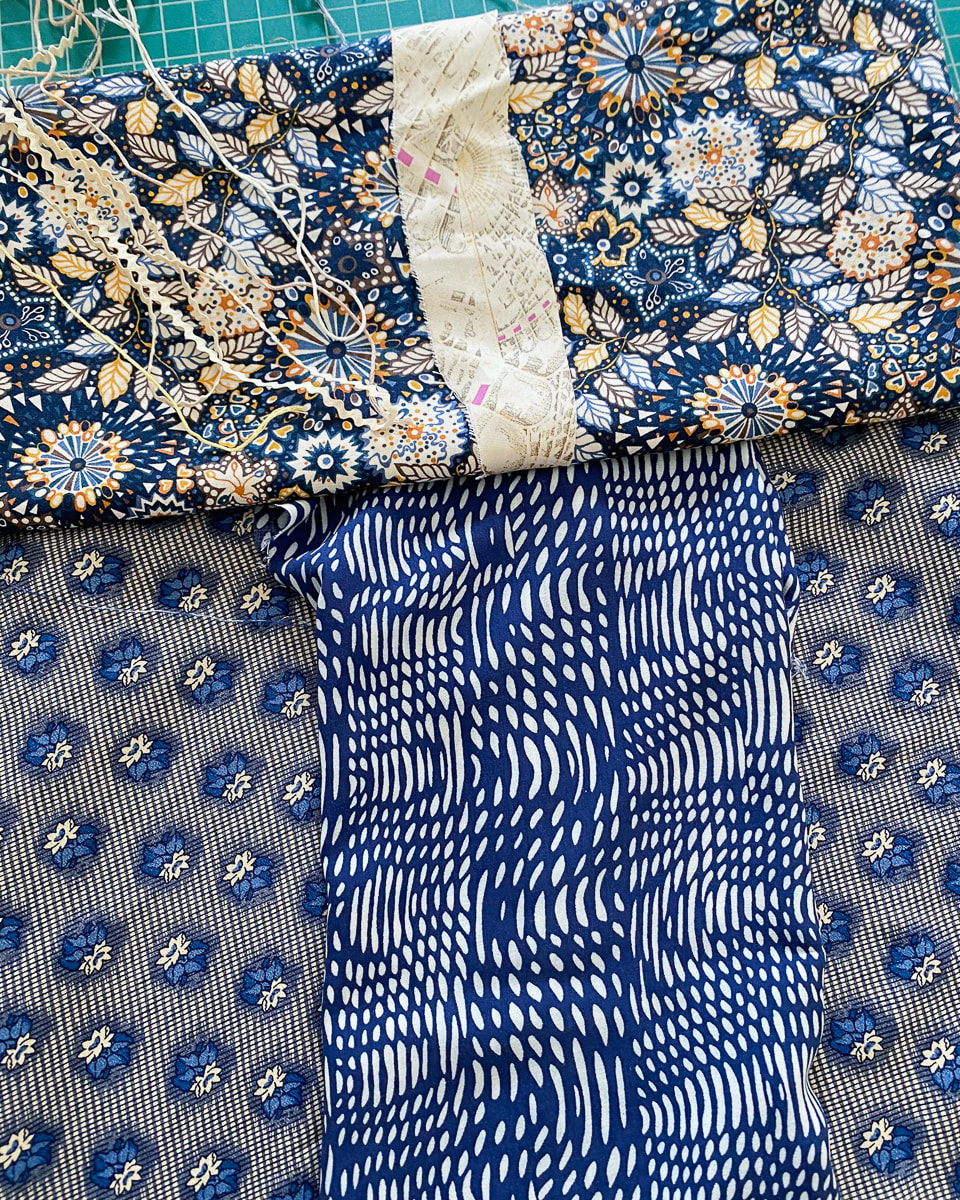
Get a coupon code for 30% off all patterns through November 30th if you join The BDP Sewing Collective Facebook Group. Use it on all patterns including the New Margo! Also, have you already purchased the Margo Blouse PDF pattern? We will send you the updated pattern FREE! Just email us with the name and email you purchased the pattern under and we will get your copy out to you. I hope you enjoy! Happy sewing! Diane 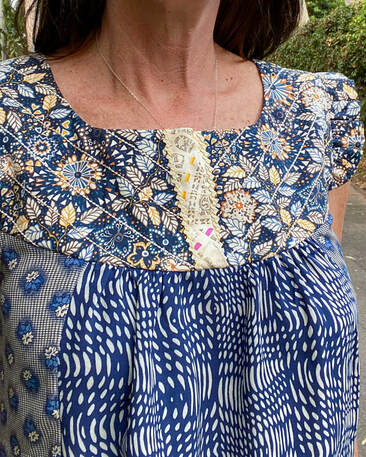 On my latest project, the Margo Blouse, I added some details to the yoke. The simple and fun to do details make this top special. The yoke on this blouse lends itself to embellishment, decorative stitching, embroidery, lace or contrasting fabric. To this blouse, I added reverse bobbin work to the front and back yoke and hand stitching to the placket.  Reverse bobbin work is done entirely on the machine. DMC embroidery floss is hand wrapped on the bobbin (all strands) and regular stitching thread is loaded in the top of the machine. I lengthened my stitch and stitched from the wrong side of the fabric. I have a detailed tutorial here for more details. Here's how to add it to the yoke:
I wanted to add a touch of gold to the yoke so I after I added the mini ricrac, I hand stitched DMC floss around the narrow parts of the ricrac. I've seen lots of pics of embellished ricrac and have been looking for a chance to try it myself. I love the little detail.
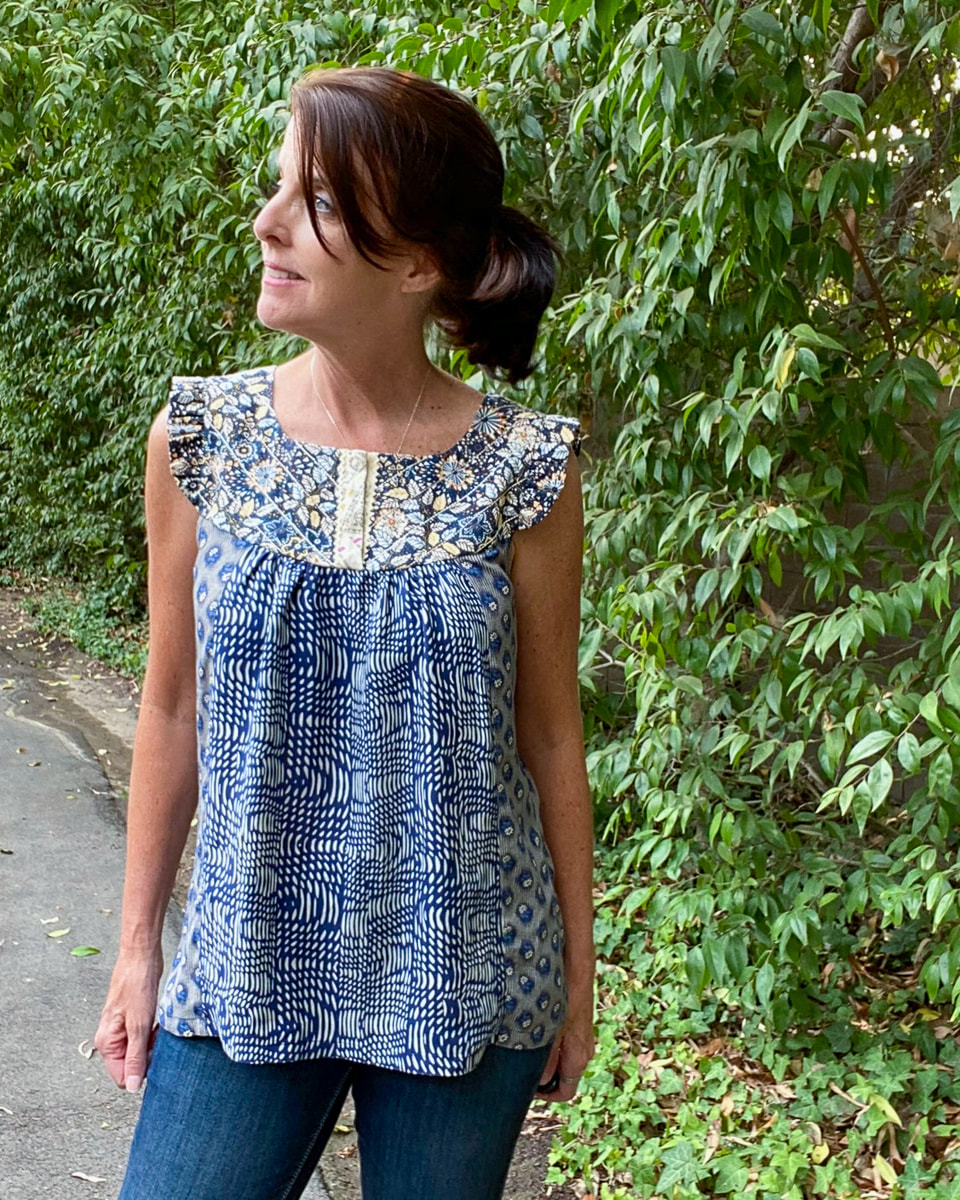
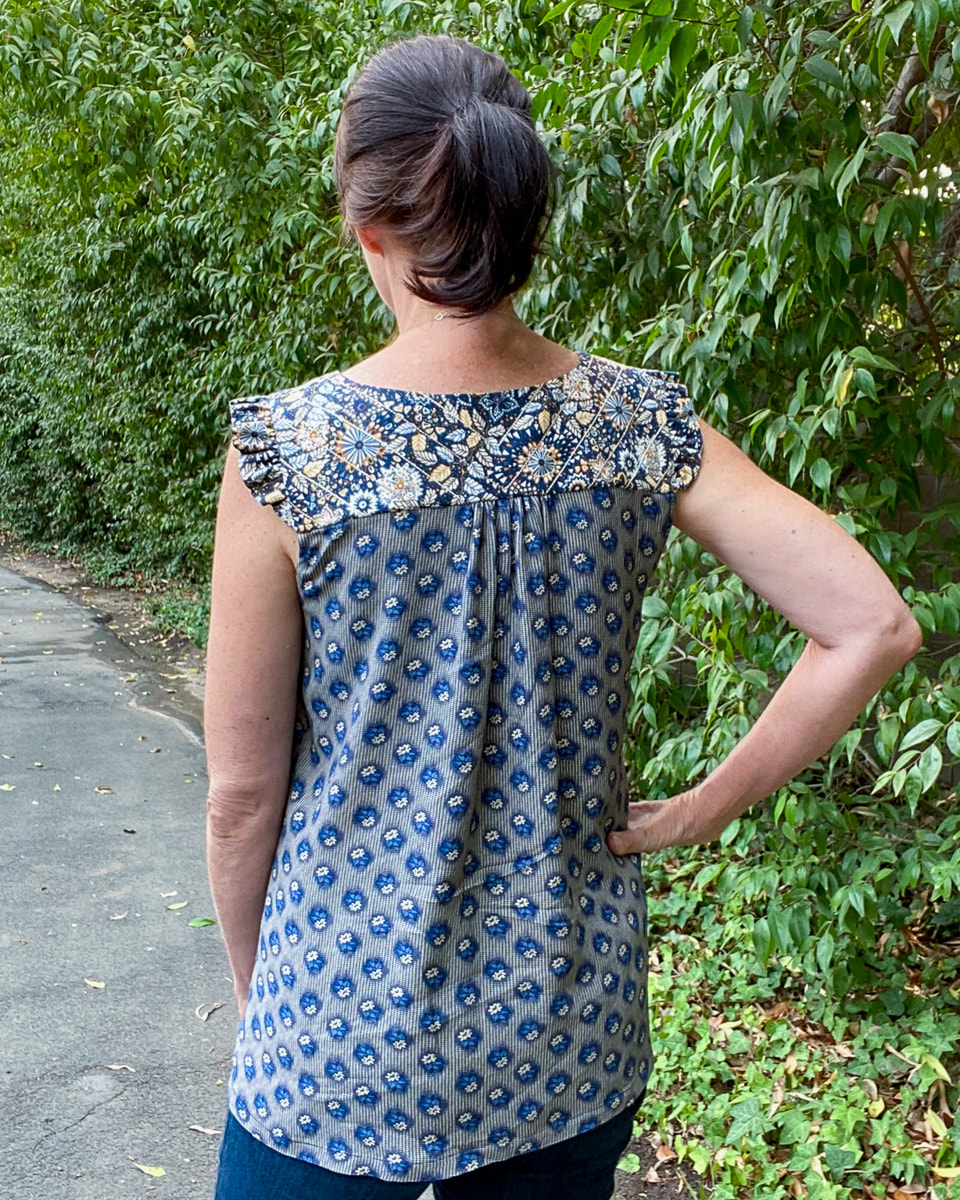
I have a Pinterest board with more ideas for the Margo yoke. I'd love to see your makes! Happy sewing, Diane 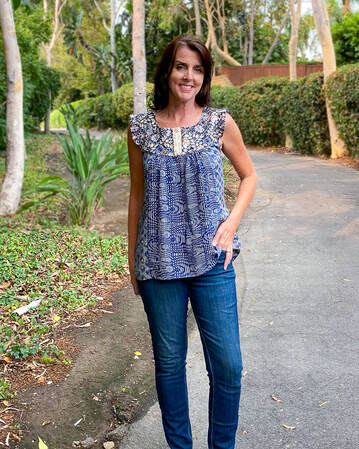 I haven't joined in on a sew a long or sewing challenge in a while (mostly because of time) but the Marfy Remnant Challenge 2020 hosted by Andrea at Sew To Fit, seemed like a fun one to do and came at the perfect time. The rules are simple, choose a pattern and make it up using remnant and scraps. Andrea suggests using a Marfy blouse pattern but I chose to use my Margo Blouse pattern instead. Right away I knew it would be the right pattern to adjust for using small scraps of fabric.
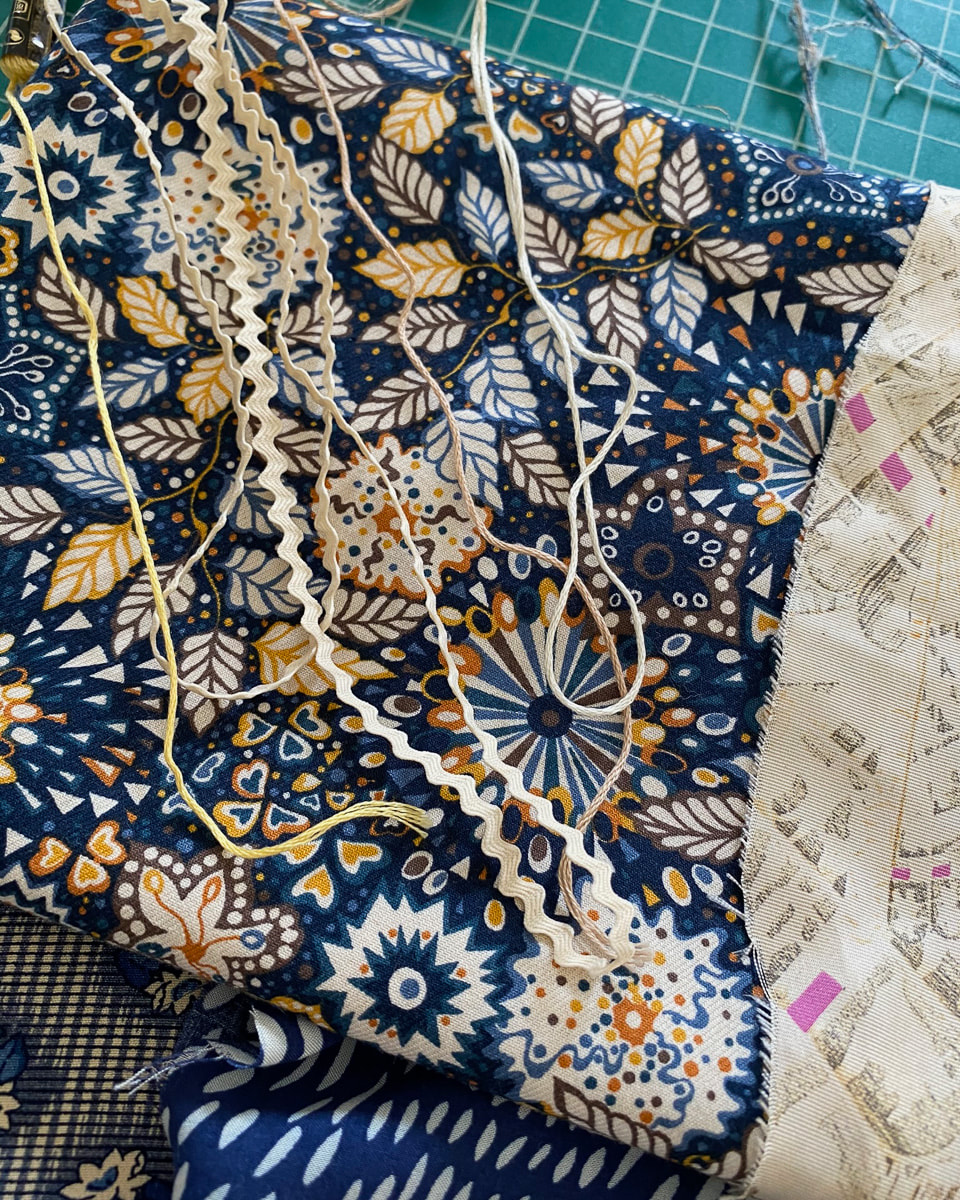
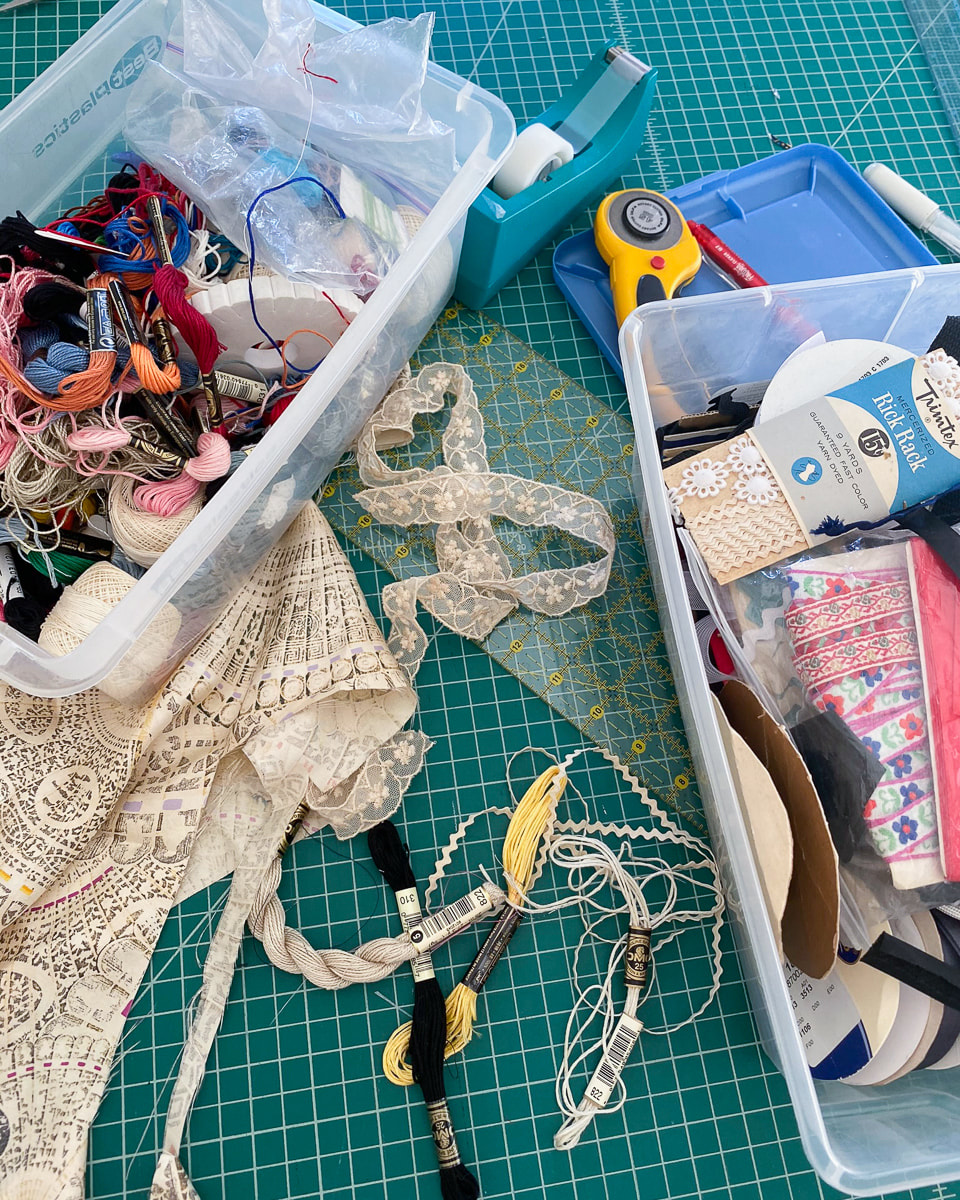
I made an epic mess in my sewing room when I pulled out my scraps, but early on I realized I had PLENTY of scraps to work with (oddly shaped but workable) and probably enough to make two projects. I didn't purchase anything to make this blouse and even used bits of vintage trim and left over DMC embroidery floss to finish it. All scraps were from previous garments:
The style of the Margo Blouse really lends itself to a project like this and here are the changes I made, mostly to accommodate the small scraps I had:
The yoke is my favorite part of the blouse. I added some reverse bobbin work to the front and back and added a simple stitch to the ric rac on the placket. I'll add a post about how I detailed the yoke next week.  I thoroughly enjoyed this project as it felt good to use up these well loved fabrics and create something from pieces that would otherwise go to waste. I encourage you to check out Andrea's other entries and maybe try to make one yourself!
More next week! Diane Today I have a video that I hope will make your life a whole lot easier. I'm working on a sleeveless version of the Margo Blouse for the MarfyRemnantChallenge sew along hosted by SewToFit. It's been a fun project that I've made entirely of scraps from my scrap box. I've made a few changes to the pattern to make if work for my scraps including splitting the front yoke and making it sleeveless. The video illustrates a technique that allows you to enclose the armhole seam without sewing. It's a fun and satisfying! I will share more about the project soon! 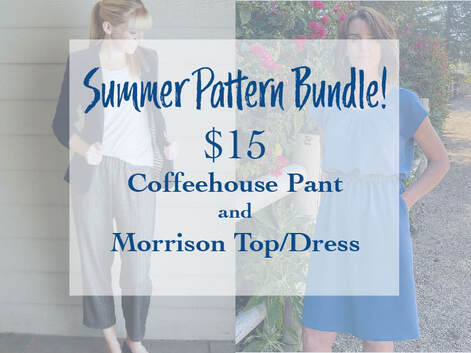 So really, how many times can you use a pattern? Time, money and space are all valuable to us and as sewists, using a pattern multiple times is a great way to use the resources we have. Today, I bring you a quick blog post packed with lots of photos to show how, with the "$15 Summer Pattern Bundle" that includes the Morrison Top and Dress and the Coffeehouse Pant PDF patterns, you can create loads of garments.
I start with the Morrison Top and Dress pattern which can be made up in both a knit and woven fabric. This simple pattern (the top is only 3 pieces) can be made up as a maxi-dress, an elegant silk shell, paired with the Coffeehouse Pants a faux jumpsuit, flouncy dress and a casual t-shirt. There's more inspiration out there in ready to wear and Pinterest (check out the Morrison Board). I even have a sewing friend that made 5 beautiful pair of summer PJ's using the Morrison Top and Coffeehouse Pant patterns. I'm inspired!
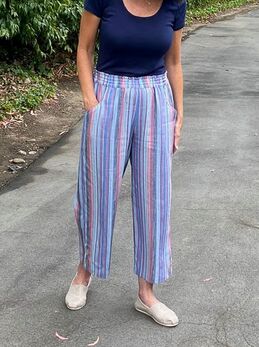
The Coffeehouse Pants are also a quick sew and fun made up as a beachy pant but also nice in a plaid or striped suiting. You can add a button placket to the hem (there's a post here) or a drawstring or even a paperbag waist. 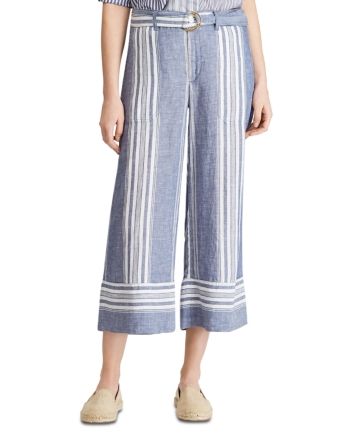  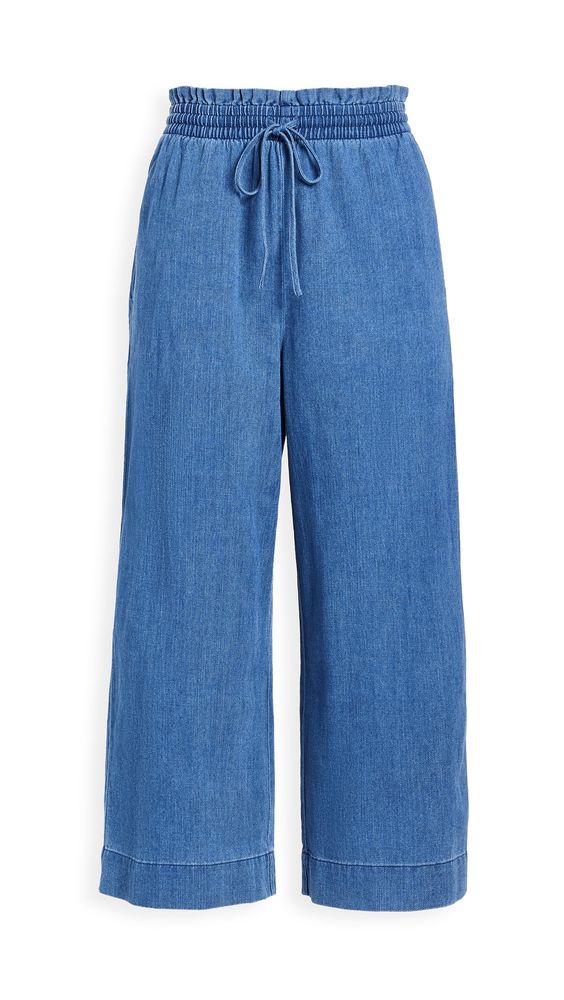 The Coffeehouse Pinterest board has more ideas including playing with stripes and adding embroidery.
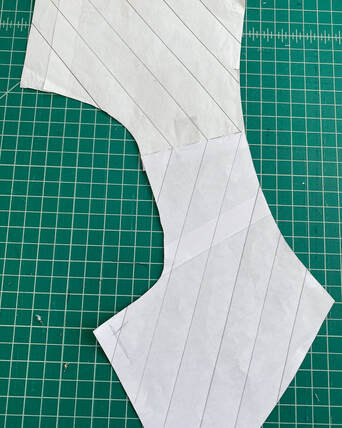
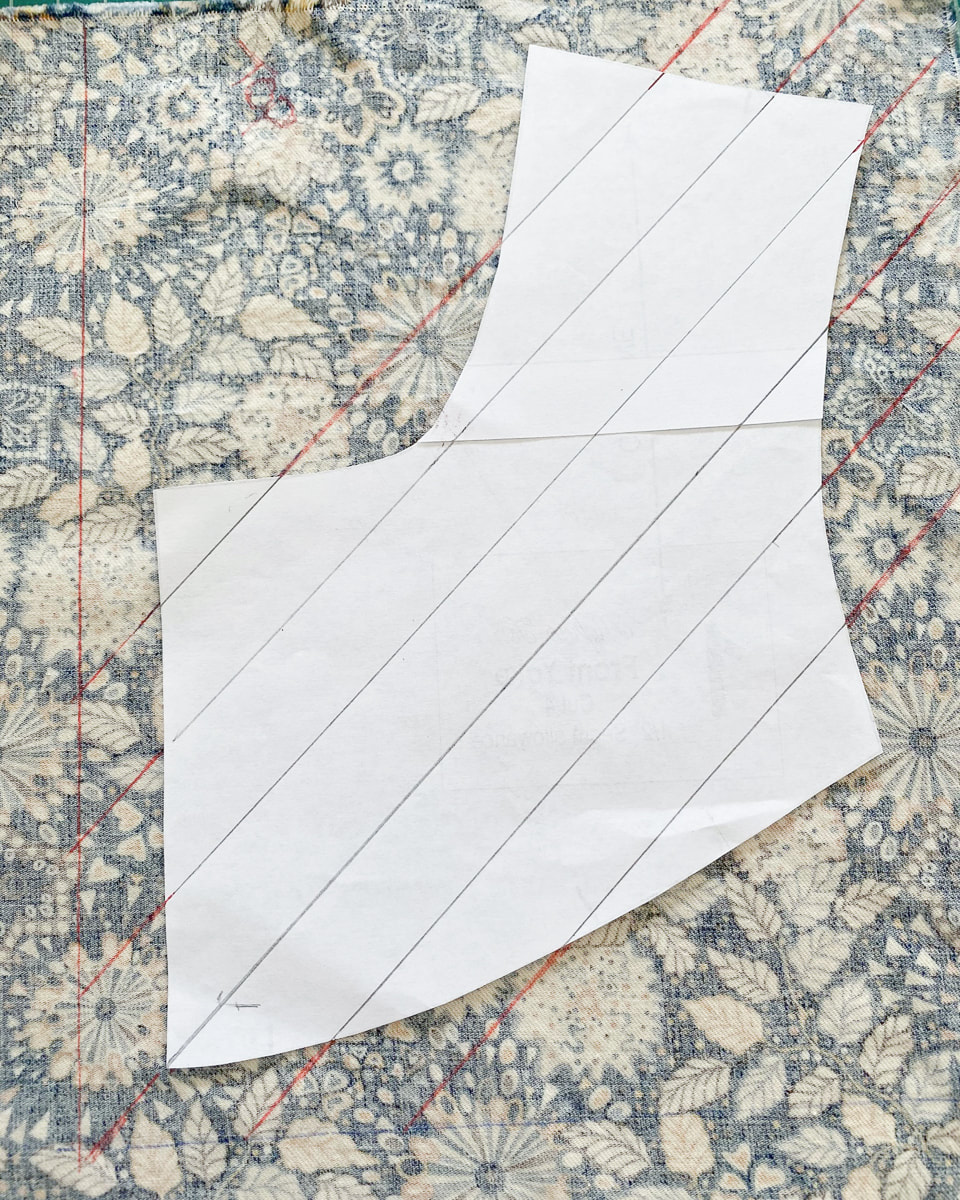
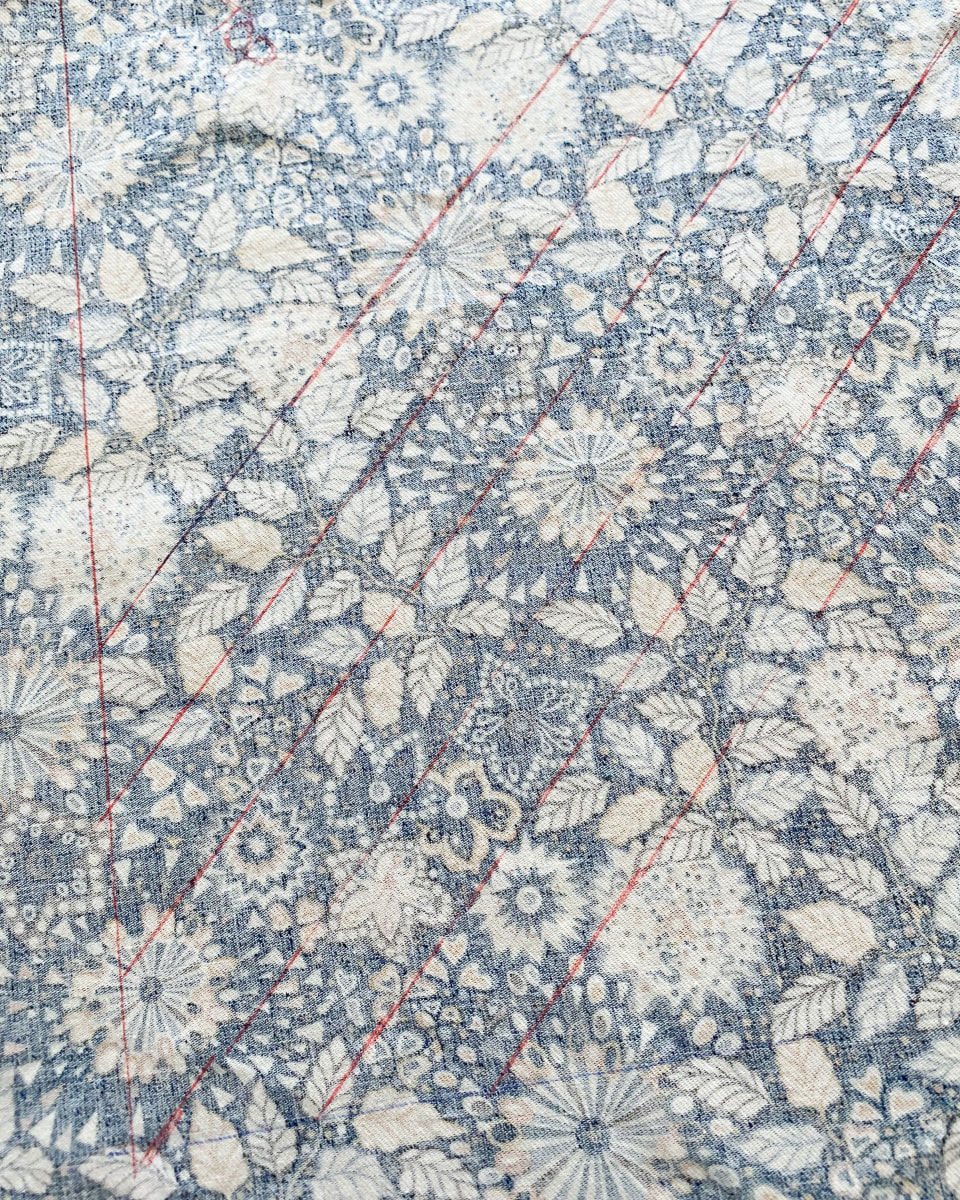
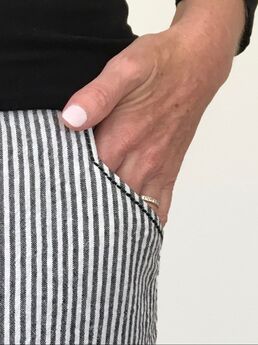
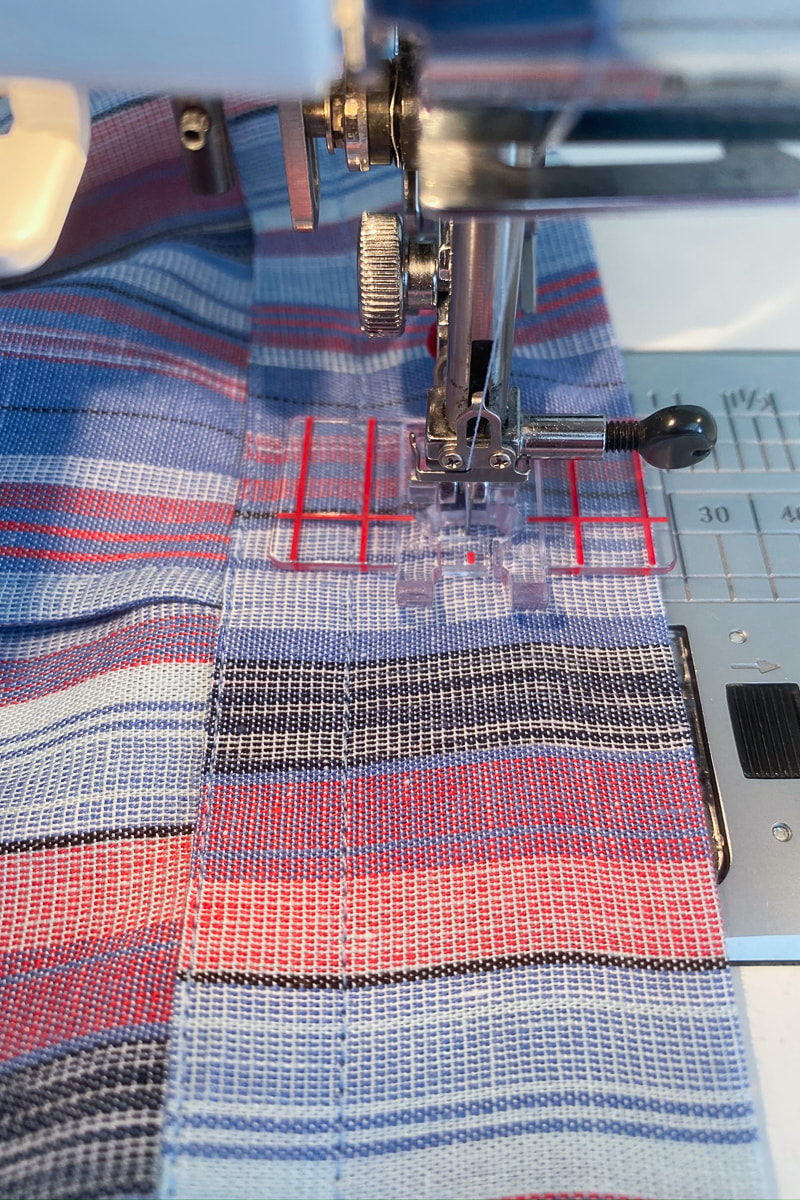
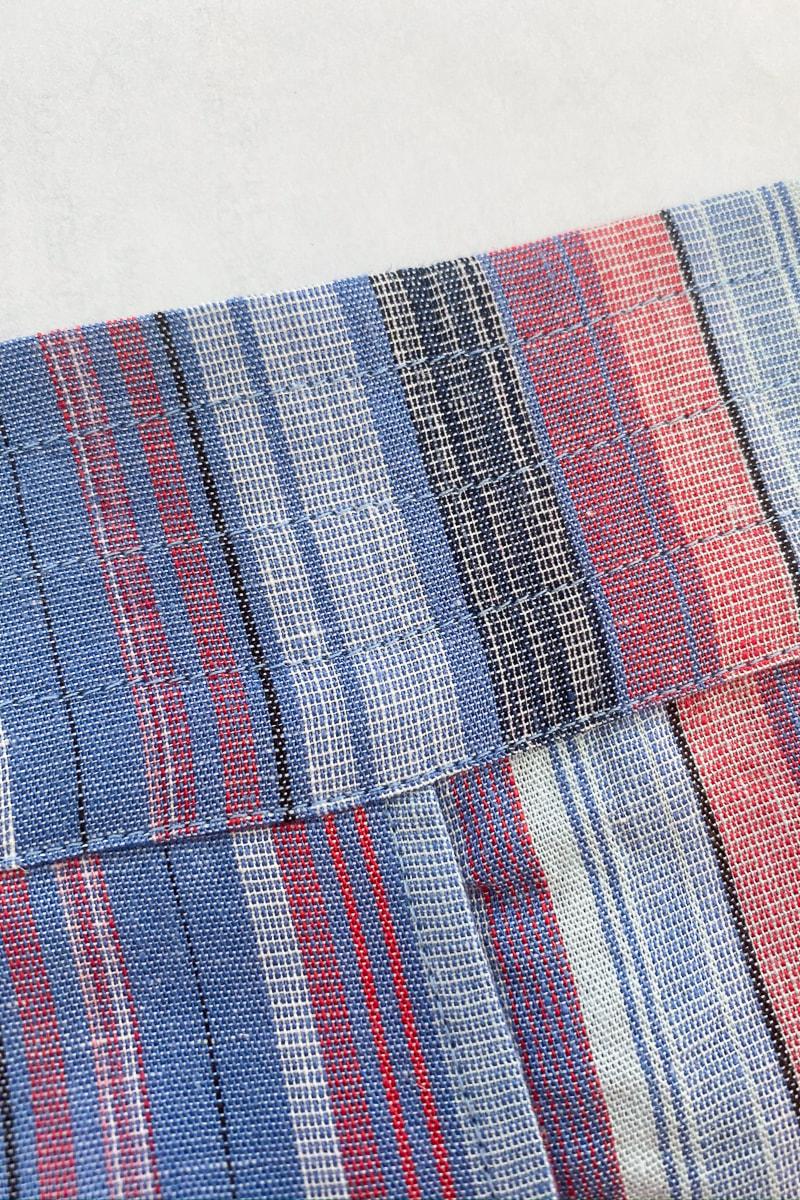
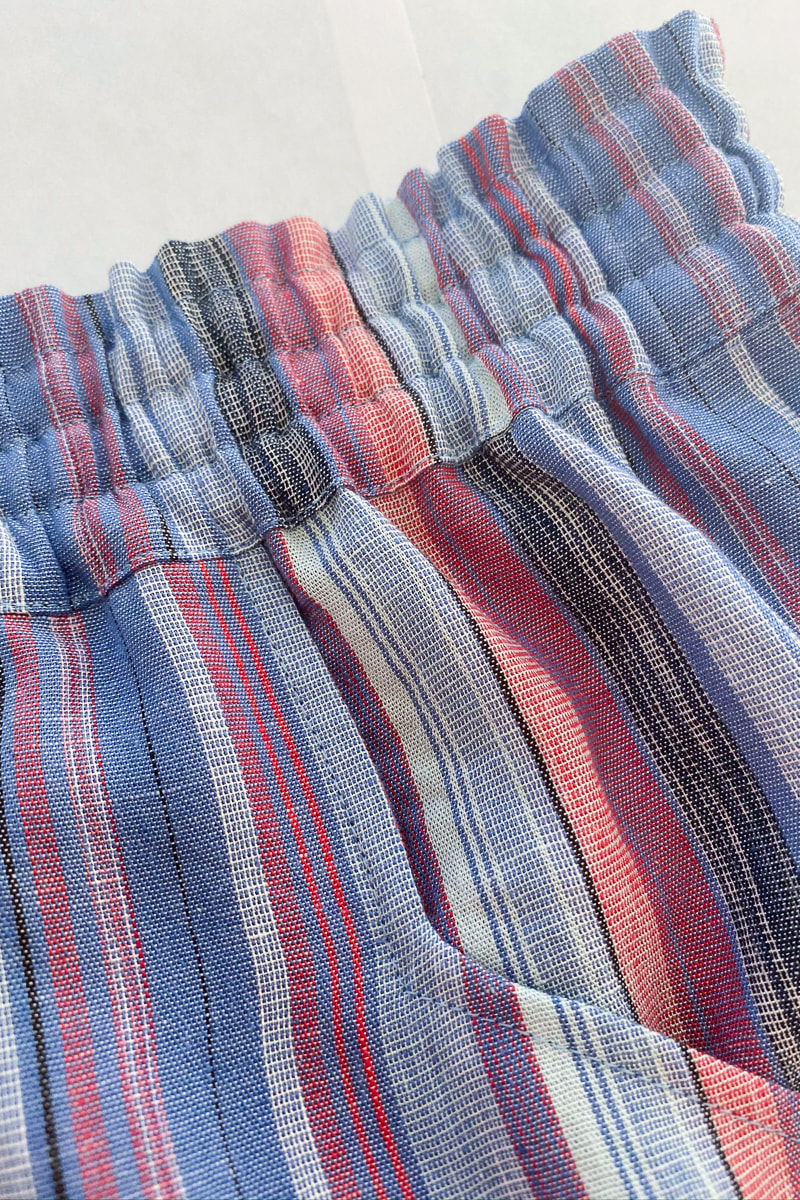
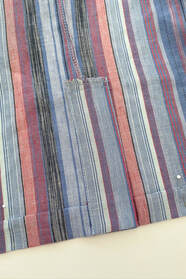
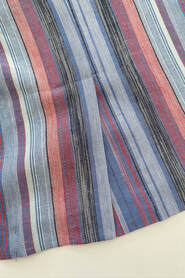
These are just 2 patterns that I love but there are so many more we can use to build our wardrobes. The options for reusing a pattern are really endless! I'm working on a project using up some remnants that I will share soon! Have fun sewing! Diane  I recently made a pair of super soft Coffeehouse Pants in a rayon/linen blend. Now those of you with any experience with stripes, know it can take some finesse to make them look good. In the case of an uneven stripe, the school of thought has been that they can't be matched. But I'm here to say that they can! We should start by defining an uneven stripe. An uneven stripe has different stripe colors and widths that don't form a symmetrical pattern. Here is an example of pants in uneven stripes that haven't been matched: 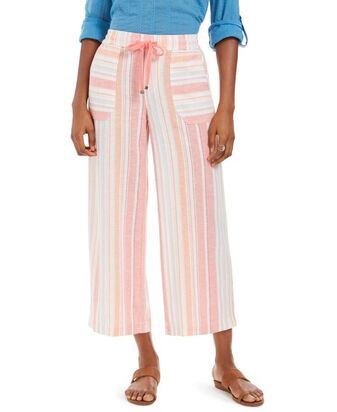 Usually when we make pants we attempt to match the stripes in the center front and center back so they form a "V" shape. But here, there's no match at center front. Here's how to fix it. Normally when we lay out fabric, we fold the fabric in half lengthwise. With an uneven stripe, you get stripes that don't line up. If you look at the red stripes in the pic below, you can see they're almost opposite in the lengthwise fold. 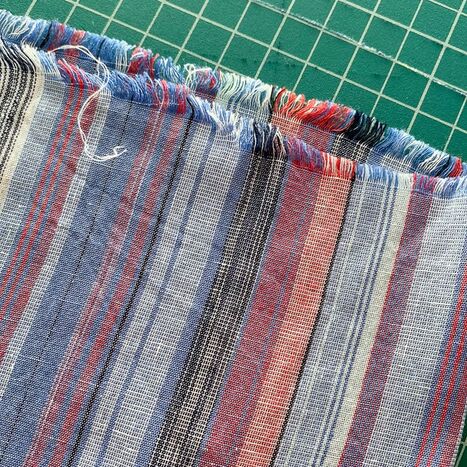 The solution comes in the way you fold the fabric before layout. If you fold your fabric on the CROSSGRAIN, you can avoid this entirely. In the photo below, I folded the fabric crosswise and now all the stripes line up: 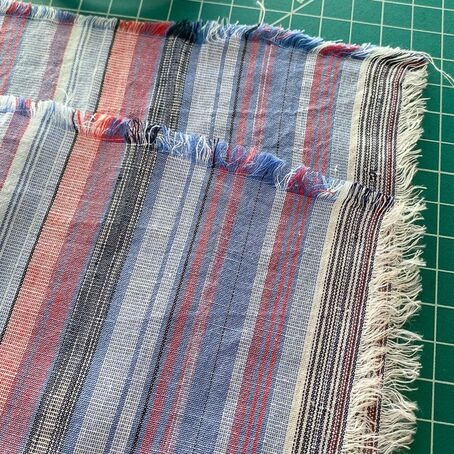 Since the fabric was folded on the crossgrain, my pant pattern pieces were laid out side by side: 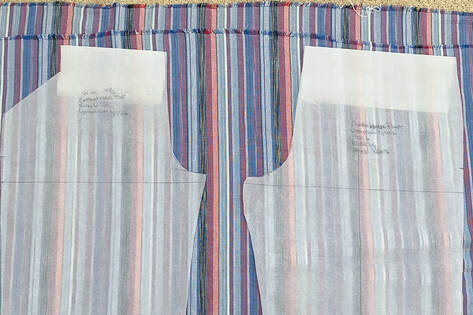 Here's the match I got on the center back seam: 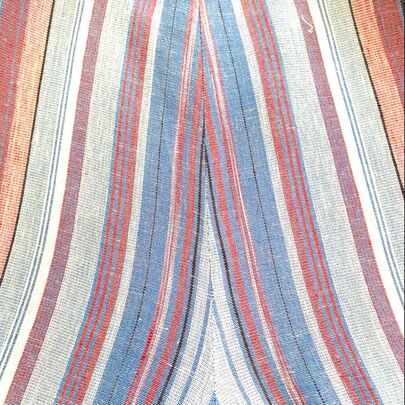 It's so simple but a complete game changer! Keep the crosswise fold in mind before purchasing your fabric for an uneven stripe project so you're certain to buy enough fabric.
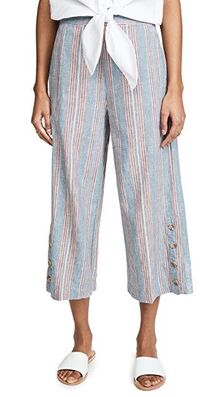
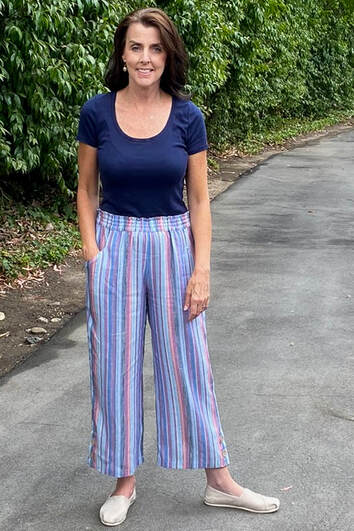
I hope this helps all of you! Stay well and keep sewing, Diane  A sewing project can start forming from different inspirations. Sometimes it's a fabric, or a need I have in my closet but in this case it came from ready to wear. I've seen some adorable striped pants around and couldn't wait to make my own.
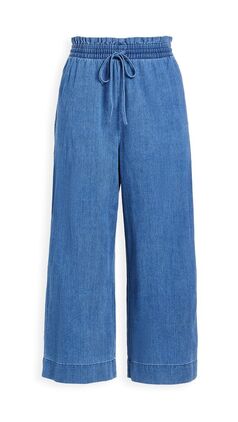
These pants are from Madewell and since I love elements of both I combined them into one pant. I added a button placket at the hem and made a channel elastic waistband. These are easy additions to an already simple pant, but the details really make it special. 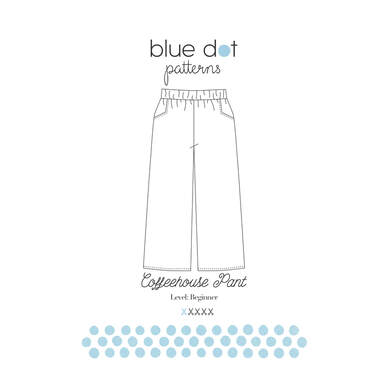 I chose a linen/rayon blend uneven stripe as the fabric and paired it with the Coffeehouse Pant pattern. Here are the changes I made to get the look I wanted:
I was able to use the waistband pattern as is and just added 3 rows of stitching each 1/2" apart. I used this nifty seam guide foot I have for my Janome machine to keep all the channels even. I'm really happy with how it came out and the band is really comfortable.
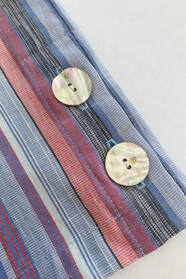
To make the placket, I added an extension at the outside hem on both the front and back pieces.
I'll be adding a blog post soon on how I worked with the uneven stripe. It can be done, so those of you who shy from these fabrics, don't dismay because they can be tamed. Stay tuned!
The Coffeehouse Pant PDF pattern is combined with the Morrison Top/Dress PDF pattern in a "Summer Bundle" for just $15! Happy sewing, friends! I hope you're all well. Diane |

About MeHi! I'm Diane, a wife, mom, sewing teacher and pattern designer from sunny Southern California. I share my sewing adventures here on the Blue Dot Blog formerly Gatorbunnysews. For more info click here. 
Categories
All
Archives
October 2022
|


 RSS Feed
Proudly powered by Weebly